Hey,
Still fairly new to this hobby and have lots of ideas but I’ve got a snag with a few prints now and was hoping someone could help me work out what I’m doing wrong.
The project is small trays for a custom advent calendar but as you can see the corner on the second picture has lifted massively.
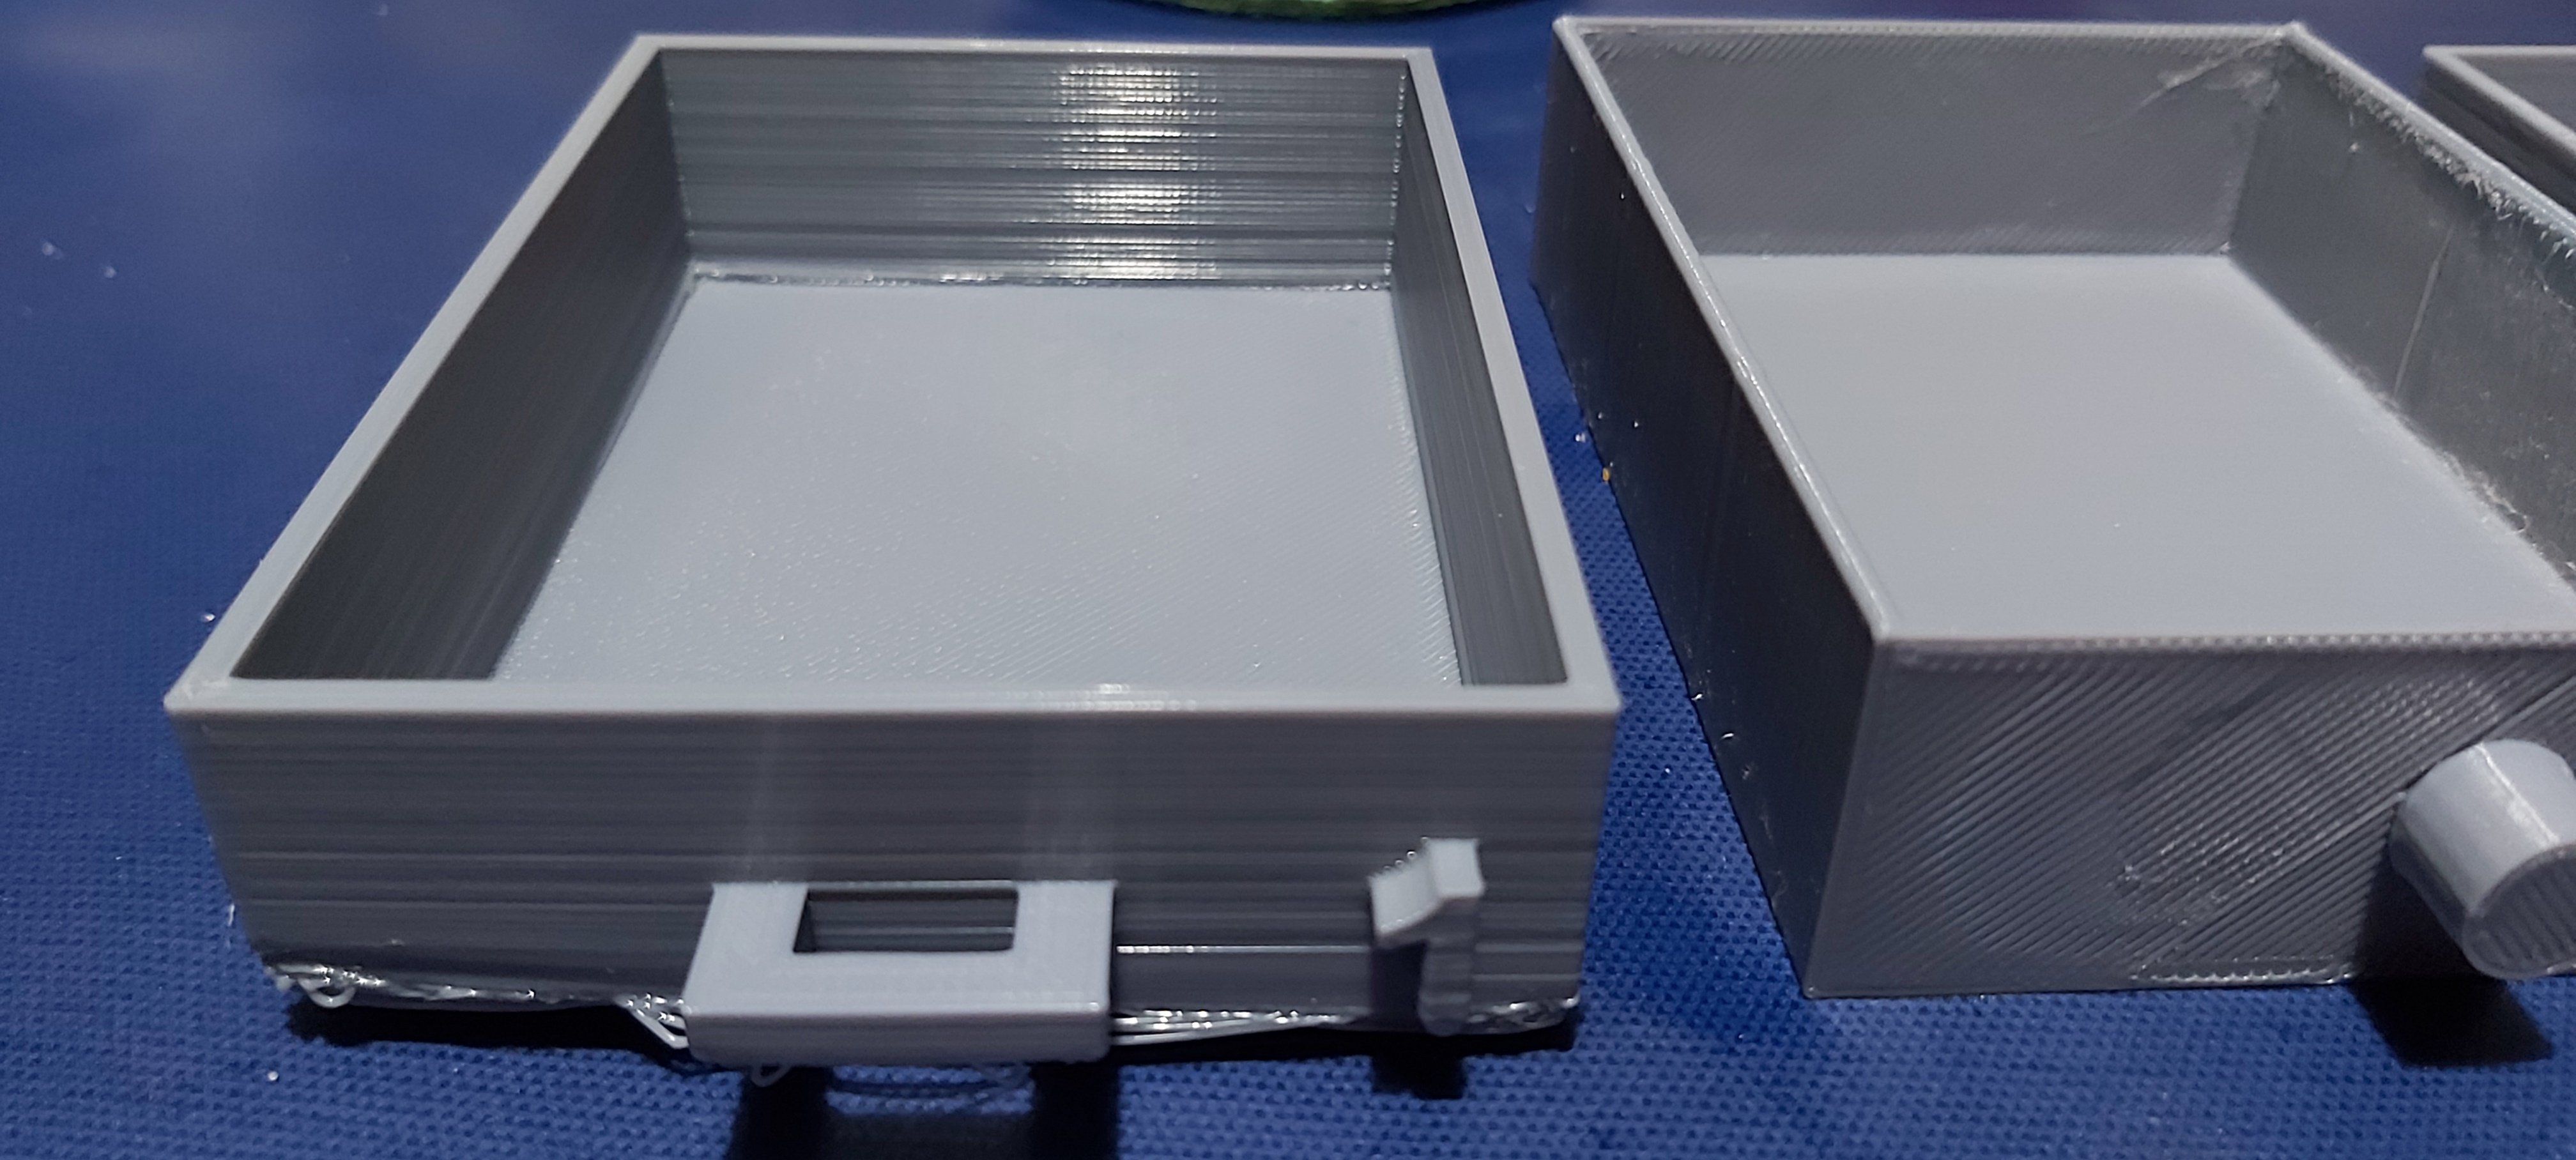
This has happened before with a different print too and I never solved that issue either.
Using an Ender 3 Pro with some generic filament from amazon, hot end at 200C (goes stringy any higher), bed was 50C for this print I think.
Any help would be wonderful :)
You must log in or # to comment.
Pointy corners like to lift. Try designing with a small radius if possible. A brim helps a lot. Also print so that the long edge of the part is on the X axis for bed slingers.
This is an example I am currently printing with a 10mm brim:

Why on x? I haven’t heard this before
The shorter side on the X makes less air movement across the bed thus retaining more heat in a localized area. Think of all printer motions like little fans themselves. Moving a palm frond or paper fan moved in a large motion moves more air.
The moving bed and undesired cooling it causes is one of the largest weak spots in Cartesian printers.
So on a bed slinger you can orient a print any way you want.
But, a bed slinger has a lot more mass to move when moving the Y axis (the bed, your print attached to the bed) then it does on the X (the gantry and tool head)
So orienting your print where longer moves are on the X axis has a couple benefits
- accelerations on X are less likely to introduce ringing The
- Heavier prints are less likely to come loose from the shifting (although if this is the case you probably should slow down or work on adhesion issues overall)
You’ll see something similar with Voron prints where some orient the infill to be at 45 degrees since that overall works best with how CoreXY AB motors work. E.g. only one motor is pulling vs both working in tandem at other angles.
That depends on the type of print. The design the OP showed will not have such a ringing issue with something large and low. The problem is a lifting corner. The long Y orientation is wrong for this problem.
I’ll try to work that into my next iteration, not sure if rounded corners will help with the plan in mind but that’s all part of the challenge and fun I suppose! Thanks for the response.
The biggest issue is that your corners are lifting from the bed during the print. Fixing this is usually a combination of making sure the bed is clean and adding a brim to increase adhesion. Maybe messing with temperature and cooling fan settings for the first few layers.
Second is things look a bit over extruded. This could just be due to the corner issue though so fix that before any other changes.
So my son and I figured out that a few °C higher bed temp combined with cheap hairspray completely fixed out adhesion issues with PLA corners. Good bed leveling while the bed is at temp is crucial. DO NOT DO IT COLD.
I’ve given the bed a good clean now that I’ve found my supplies. Had to hide everything when the niblings visted and forgot where they went. Gonna see how things work out now it’s been cleaned properly and look into over extrusion.
An easy trick is to spray the bed down with hairspray. This is what I did with my old warped glass bed and it worked great to promote adhesion.
Great comments, but Id like to add bit more.
Start with calibration if you havent already:
- e-steps calibration - do it once after any hardware change
- Temperature tower - every filament is different
- Flow tower - do it every time you notice extrusion issues after changing filament
- First layer calibration (bed leveling and nozzle distance) - you obviously did that, but look if there is any room for improvement
- Retraction calibration - not relevant for this model, but thats the last part of basic calibration
On top of that, you want to improve 1st layer adhesion to avoid lifting:
- Use brim
- Add more squish (reduce nozzle to bed distance)
- Print first layer slowly
- Clean your bed and dont touch it with fingers
- Use round corners when possible
- Dont use part cooling fan on first layer
- Leave bed heater on for some time before you start printing (to give enough time for build plate to heat up evenly)
- Lower bed temp after first layer (example: I print PLA on clean glass at 60C, but after first layer I drop it to 55C)
- Use mouse ears (basically a fat brim that you place manually on sharp corners)
Use glue or hairspray if nothing else helps, or consider better build plate like PEI or even better quality filament
I recommend using mineral spirits. It’s the only thing that has improved bed adhesion. WITH THE HEAT OFF! I don’t know that mineral spirit vapors are bad, but they’re definitely not good…
I’ve got some odd spots in the middle of the bed where it’s not always printing a neat line in the first layer which is odd. Unsure if it’s due to not being clean or a levelling issue but I’ll investigate. Thanks for the thorough checklist of things to do though - really helpful!
Unsure if it’s due to not being clean or a levelling issue
It can be both. To exclude bent X axis or bed, I think its best to get nozzle close to the bed, then observe the gap while moving head in XY. Light can help with good angle as well as getting your eye close to the nozzle 👁️
Other recommendations are great but you could also try some type of adhesive AFTER you’ve eliminated any other potential problem sources.
It does look a over extruded. Have you calibrated your esteps? I always need to do that when changing filament types and sometimes even between rolls of the same filament type (especially bargain bin PLA from amzn)
My ender 3 with a textured glass bed sticks perfect with PLA and nothing else. For some reason PLA+ tends to lift. Glue stick helped with PLA+ but I hated dealing with because it REALLY stuck so I switched to masking tape. That does the job and is easier to remove. On my CR-10 with plain glass bed (no texture) I use hairspray… Mostly because that’s what the guy I bought it from recommended and, to be honest, it does work amazingly. Nothing sticks to that glass plate bed without an adhesive but it pops right off once the bed cools down.
That said, I don’t recommend “extra” adhesives unless you’re fully sure you’ve solved any other potential problems. They can be a help/bandaid but if the root cause is something else then you’re just masking it.
Some materials and beds need some help, some don’t. I primarily use PLA and PLA+ with the occasional PETG and TPU.
Useful insight, I’ll try the other suggestions before an extra adhesive though! I still need to get my head around printer settings again as I’ve not used this for a couple of years and my brain has decided to forget that info for other useless things instead.