

It was a long running project, but I finally did it. I built what I’m calling a smart mailbox that communicates locally with Home Assistant via ESPHome.
Parts:
- Pine plank roughly the width of my mailbox
- Treated pine plank for mounting
- Thin sheet of perspex or similar transparent plastic
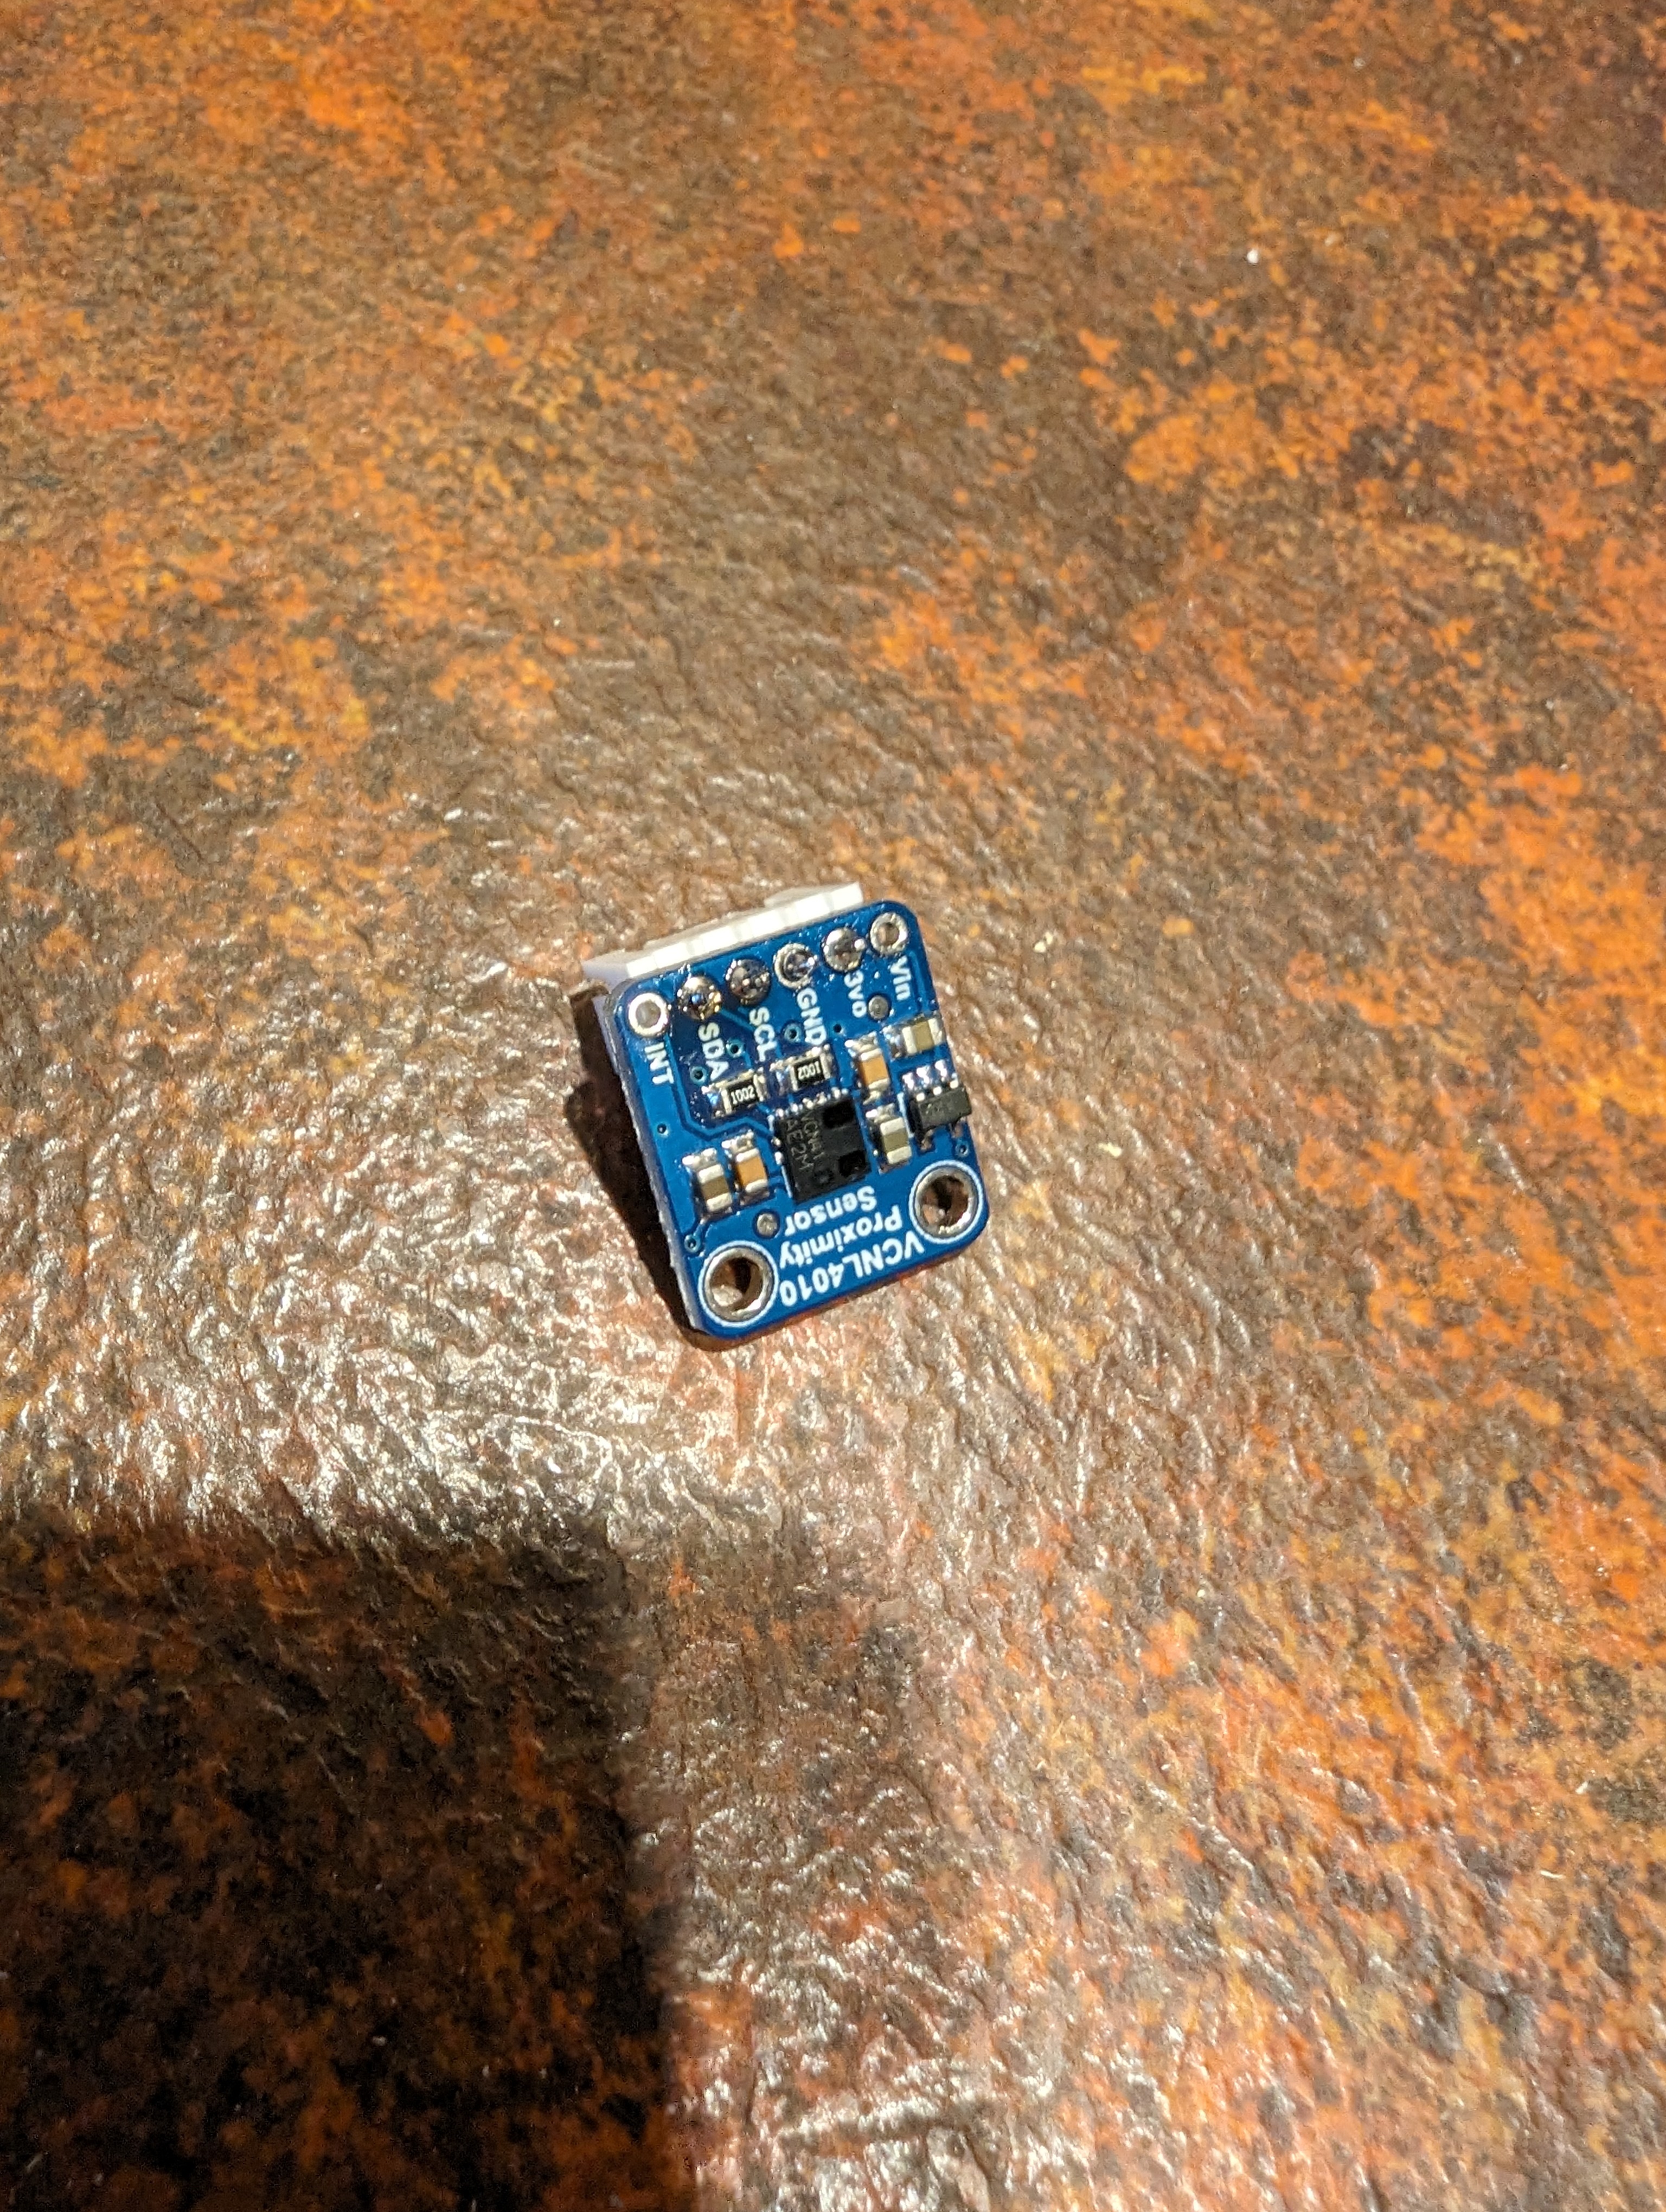
- 2x VCNL4010 proximity sensor
- ESP32 dev board with antenna
- Bigger antenna
- Prototype board
- 2.54mm pitch JST connectors
- 2.54mm pitch pin header sockets
- 18650 battery
- 18650 Type-C charging module
- Battery holder
- 2x 5V 1.5W solar panels
- MCP1700-3302E LDO regulator
- 100uF electrolytic capacitor
- 100nF ceramic capacitor
- Resistors… I think I ended up using a 1 MOhm and a 330 kOhm
- Weatherproof junction box
- Nylon screw spacers
- Cable glands
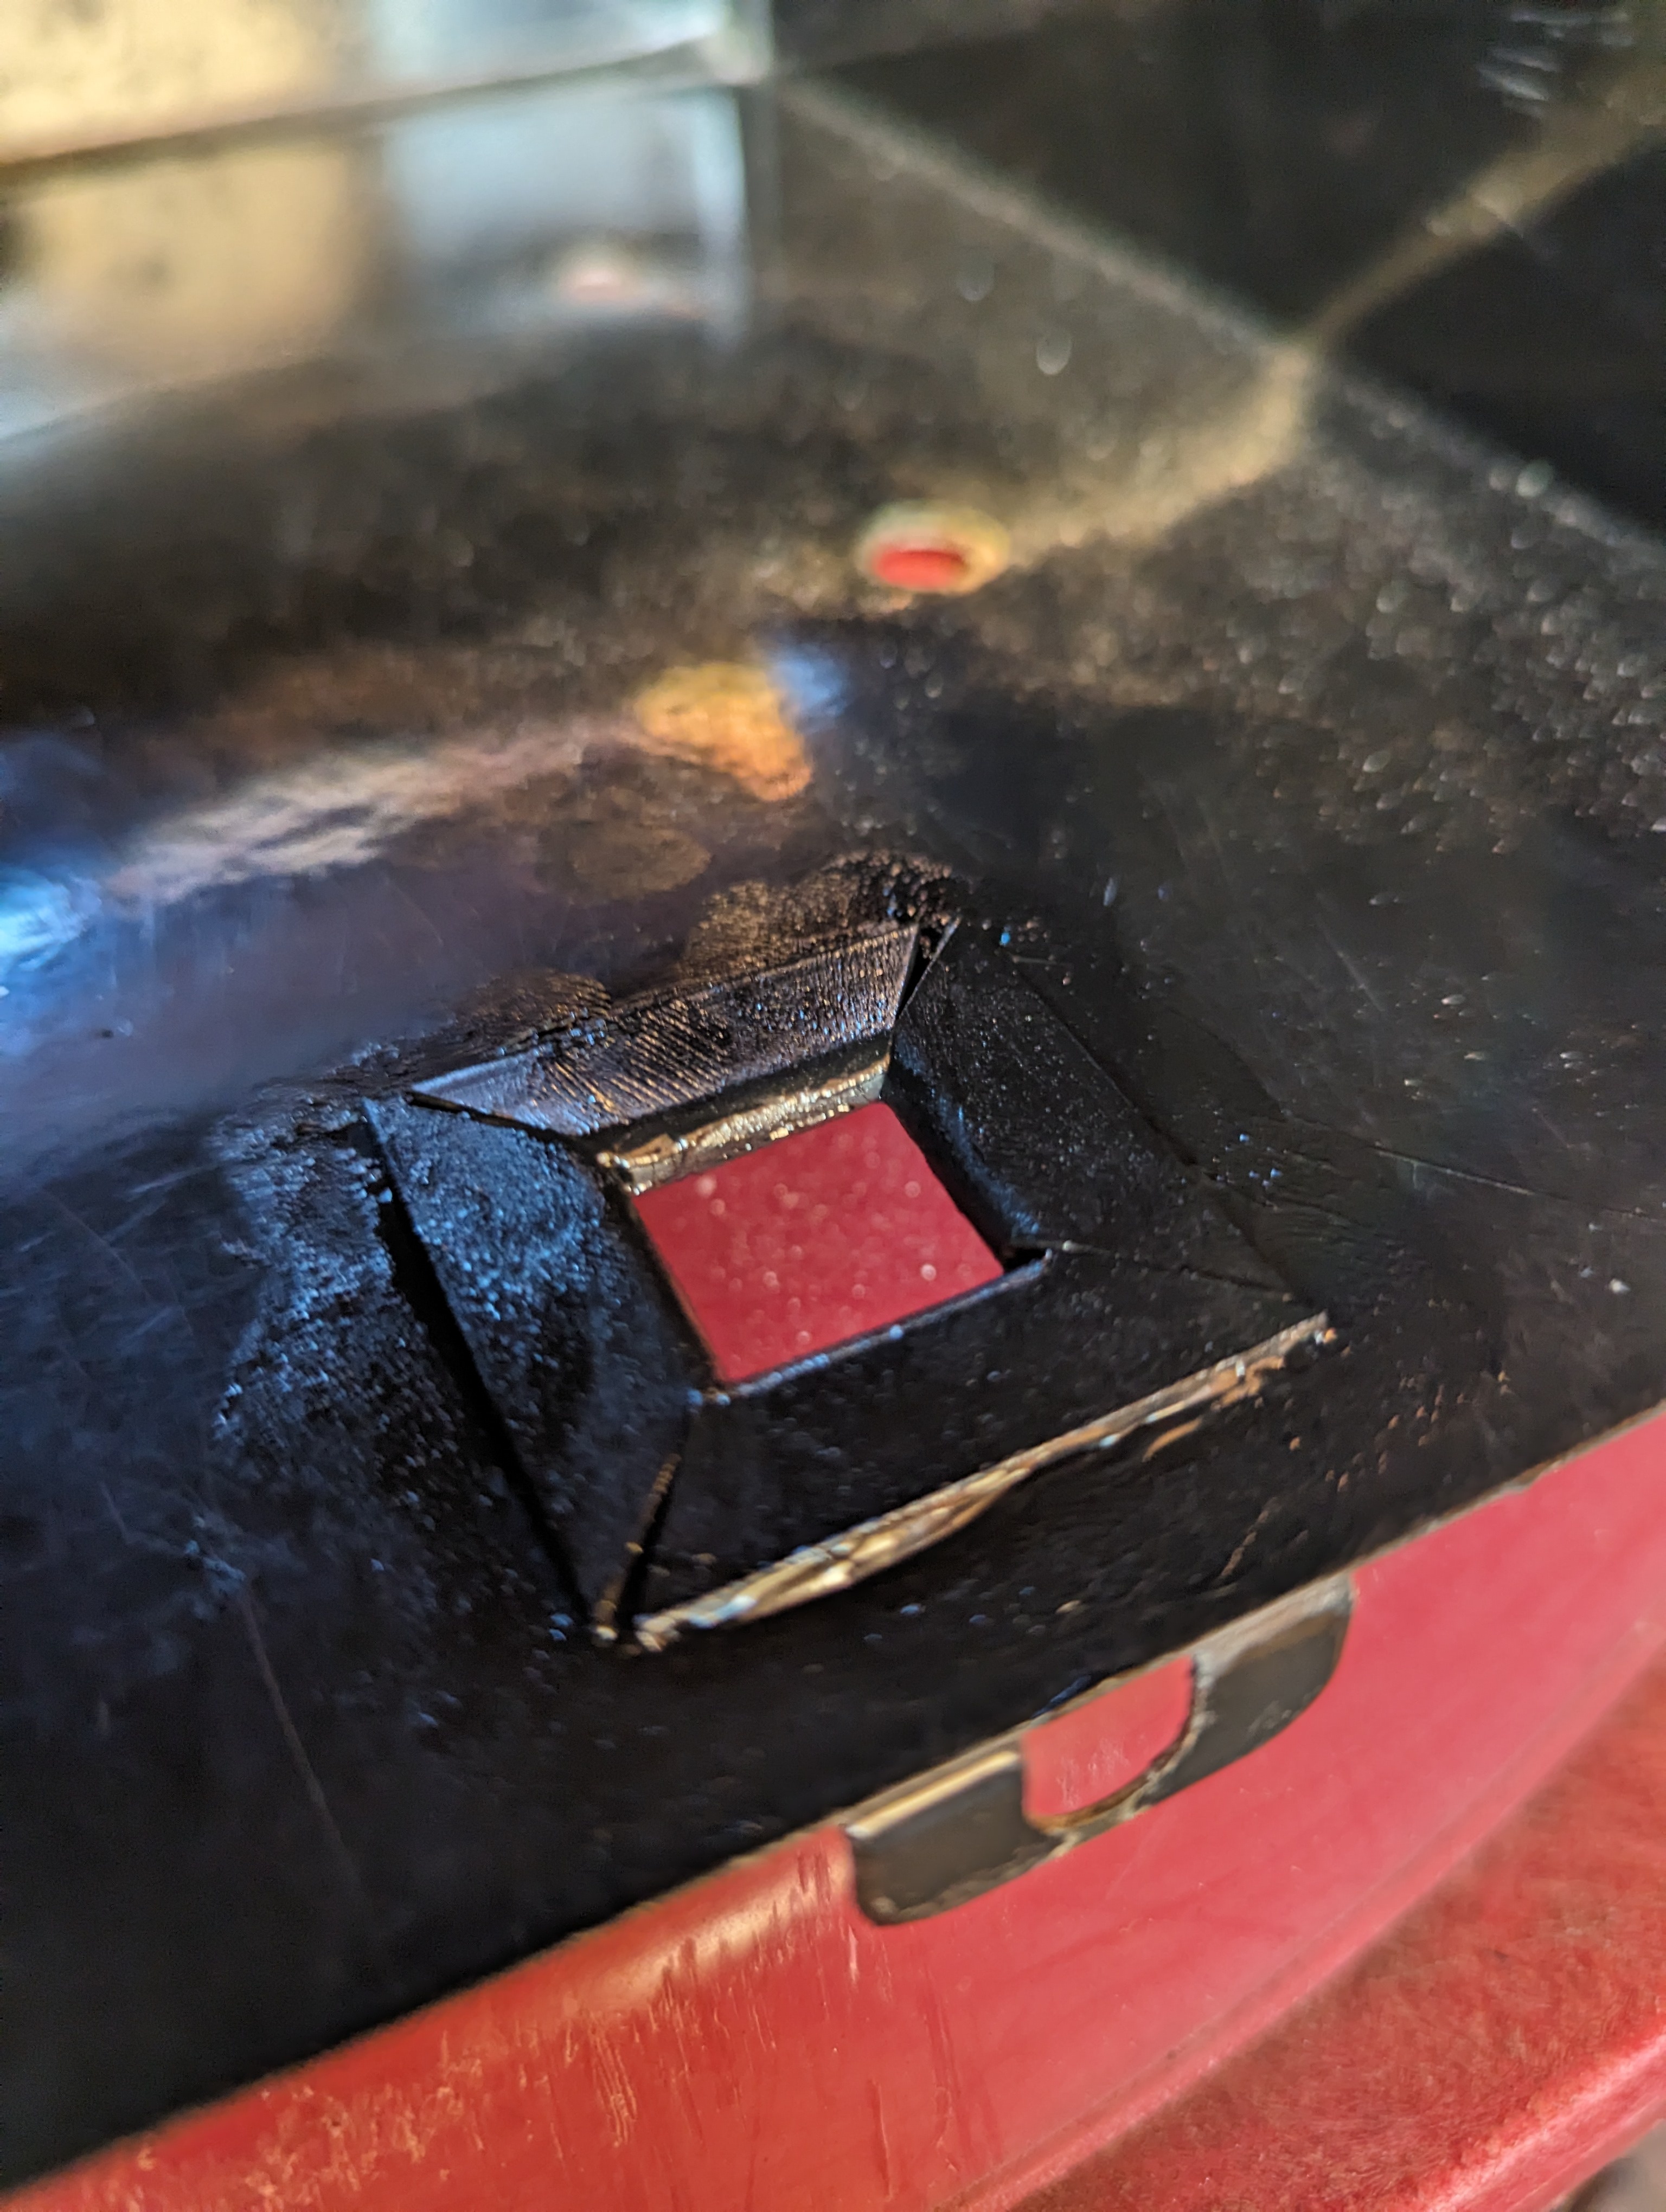
- 12mm waterproof button
- Various cables and wires
- Paint and polyurethane spray to weatherproof the wood
Tools:
- Soldering iron
- Router for cutting grooves in wood
- Drill and hole saw bits
- Various files and sandpaper
For a start, I followed this guide to get me started on the power delivery portion, but I ended up using much higher valued resistors since I found that I was losing more battery charge through the voltage divider than I was from the ESP32 or proximity sensors.
Once I’d tested the concept with the parts just laying in a jumble on the table, it was time to get to work.
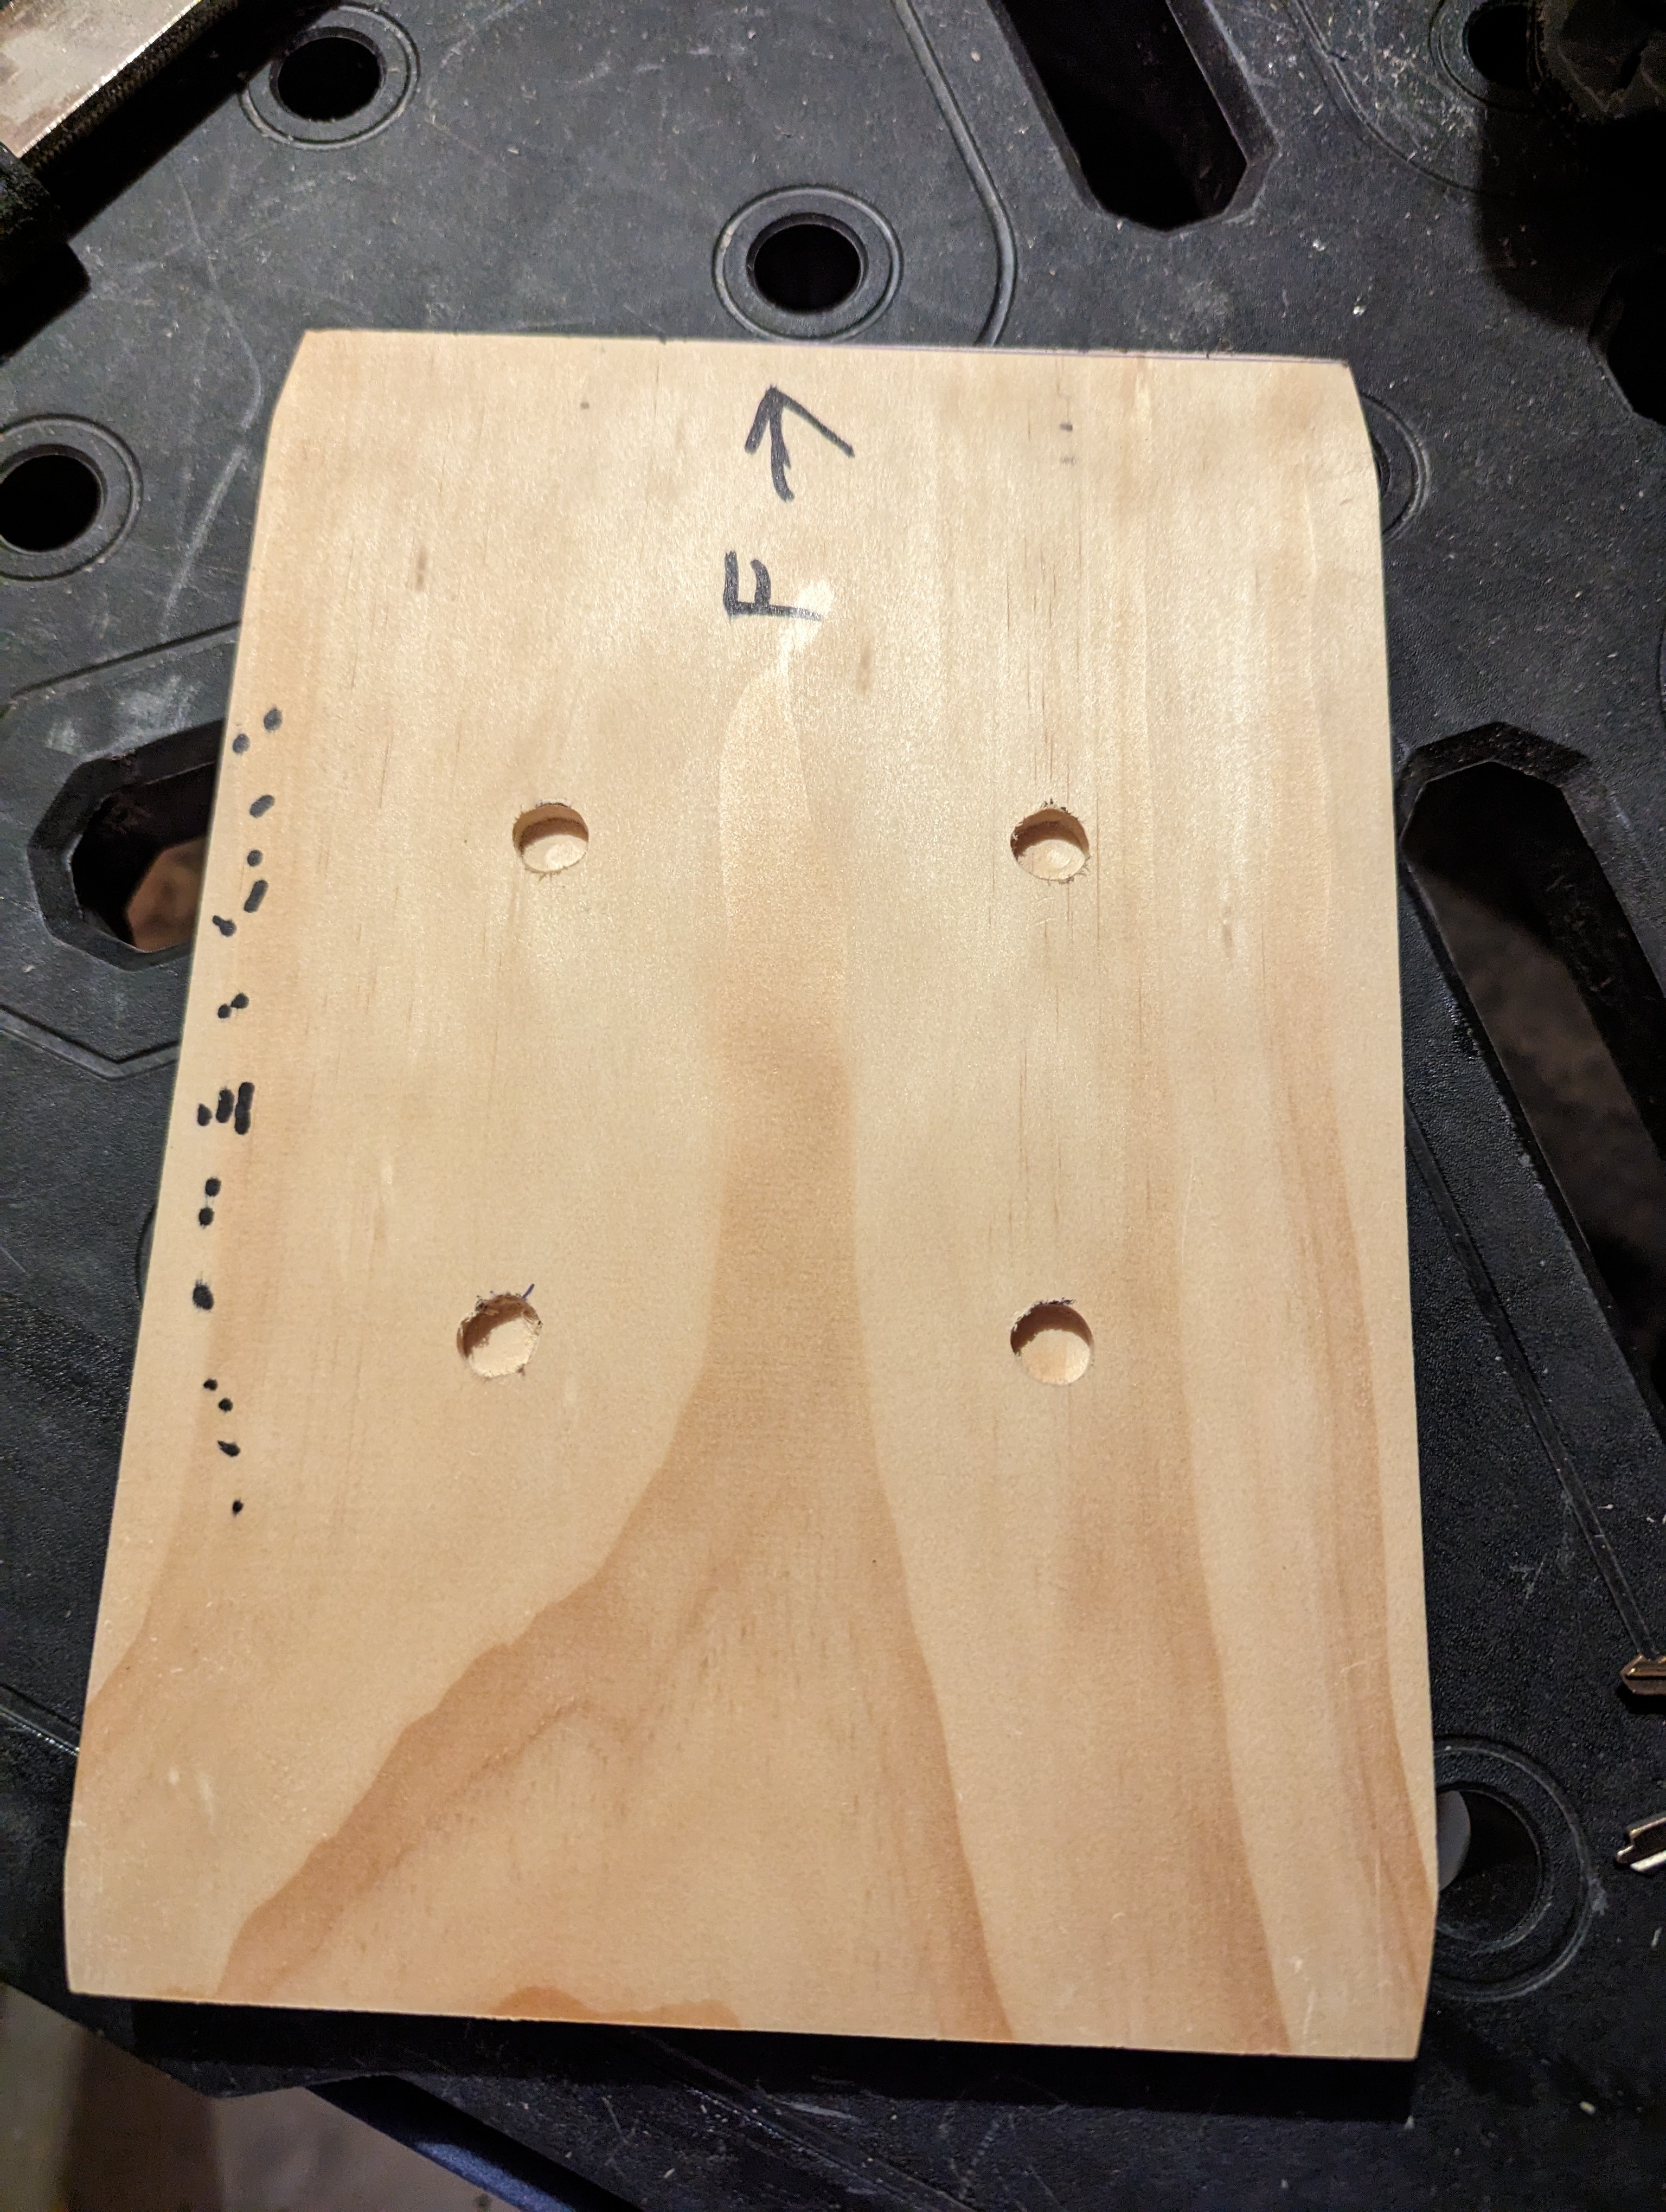
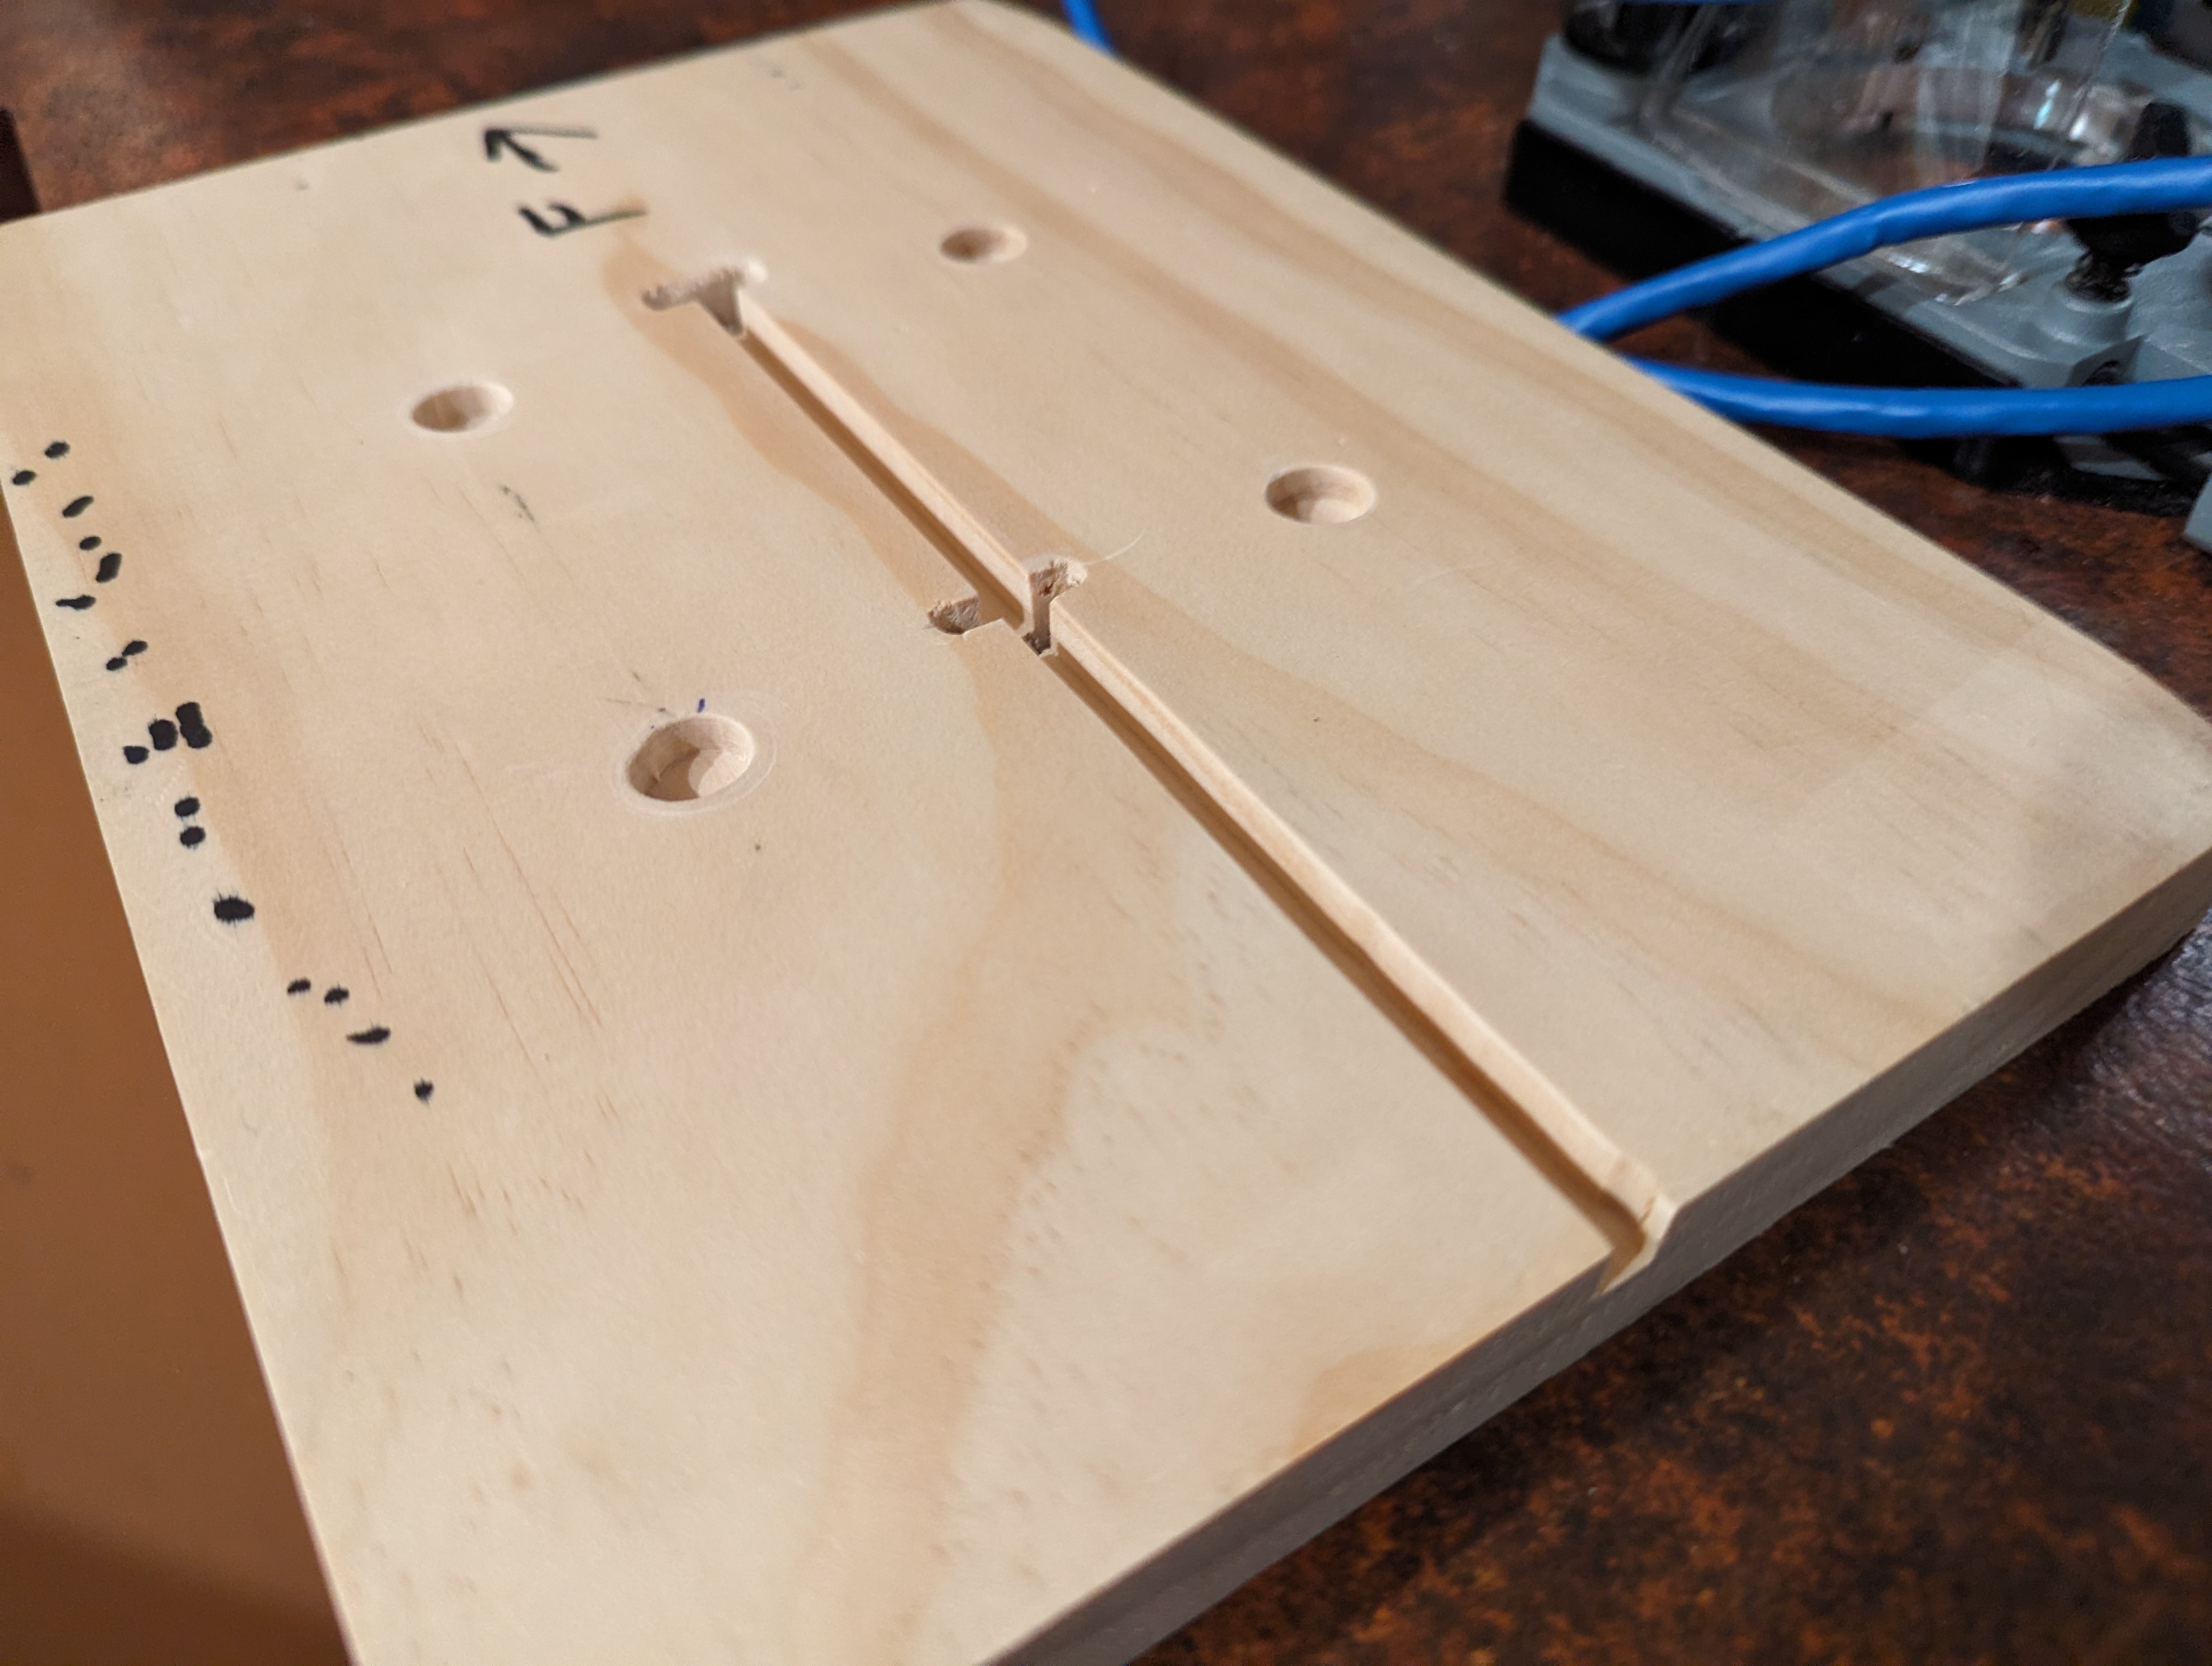
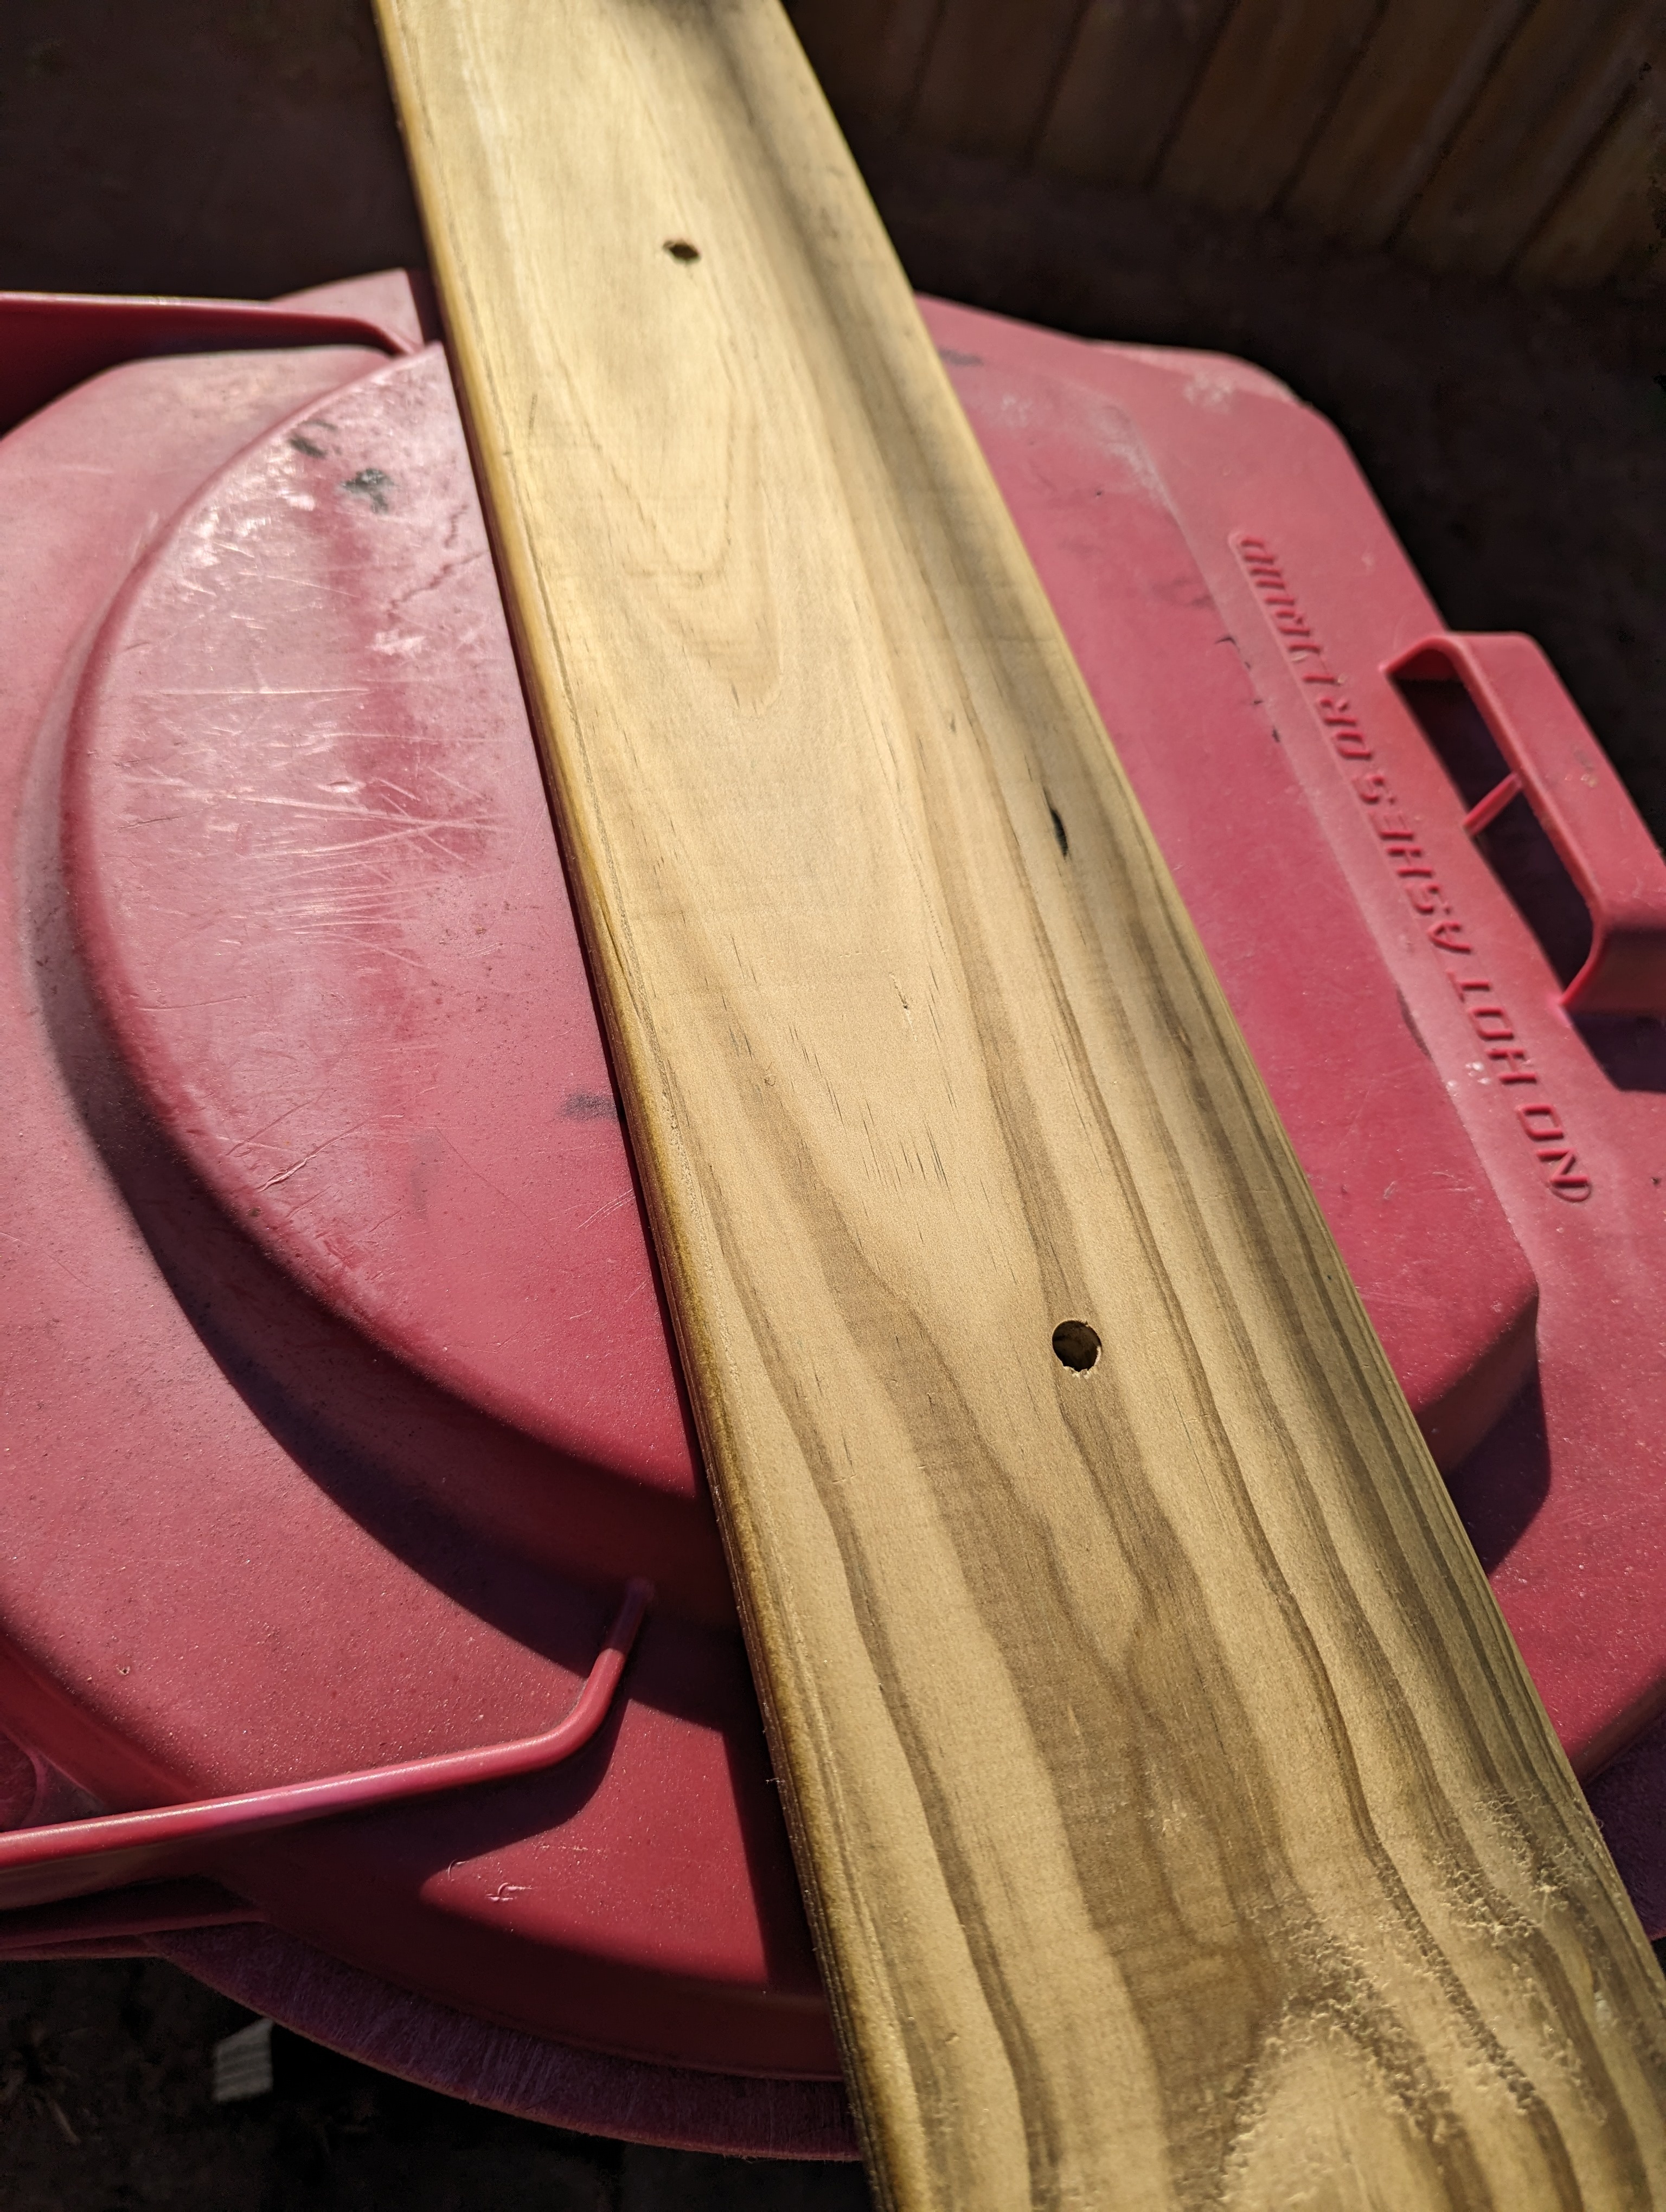
I started by cutting a plank of pine to fit my mailbox, chamfering the ends to make space for the metal joins. I routed out some spaces for the tops of the bolts that hold the mailbox down.
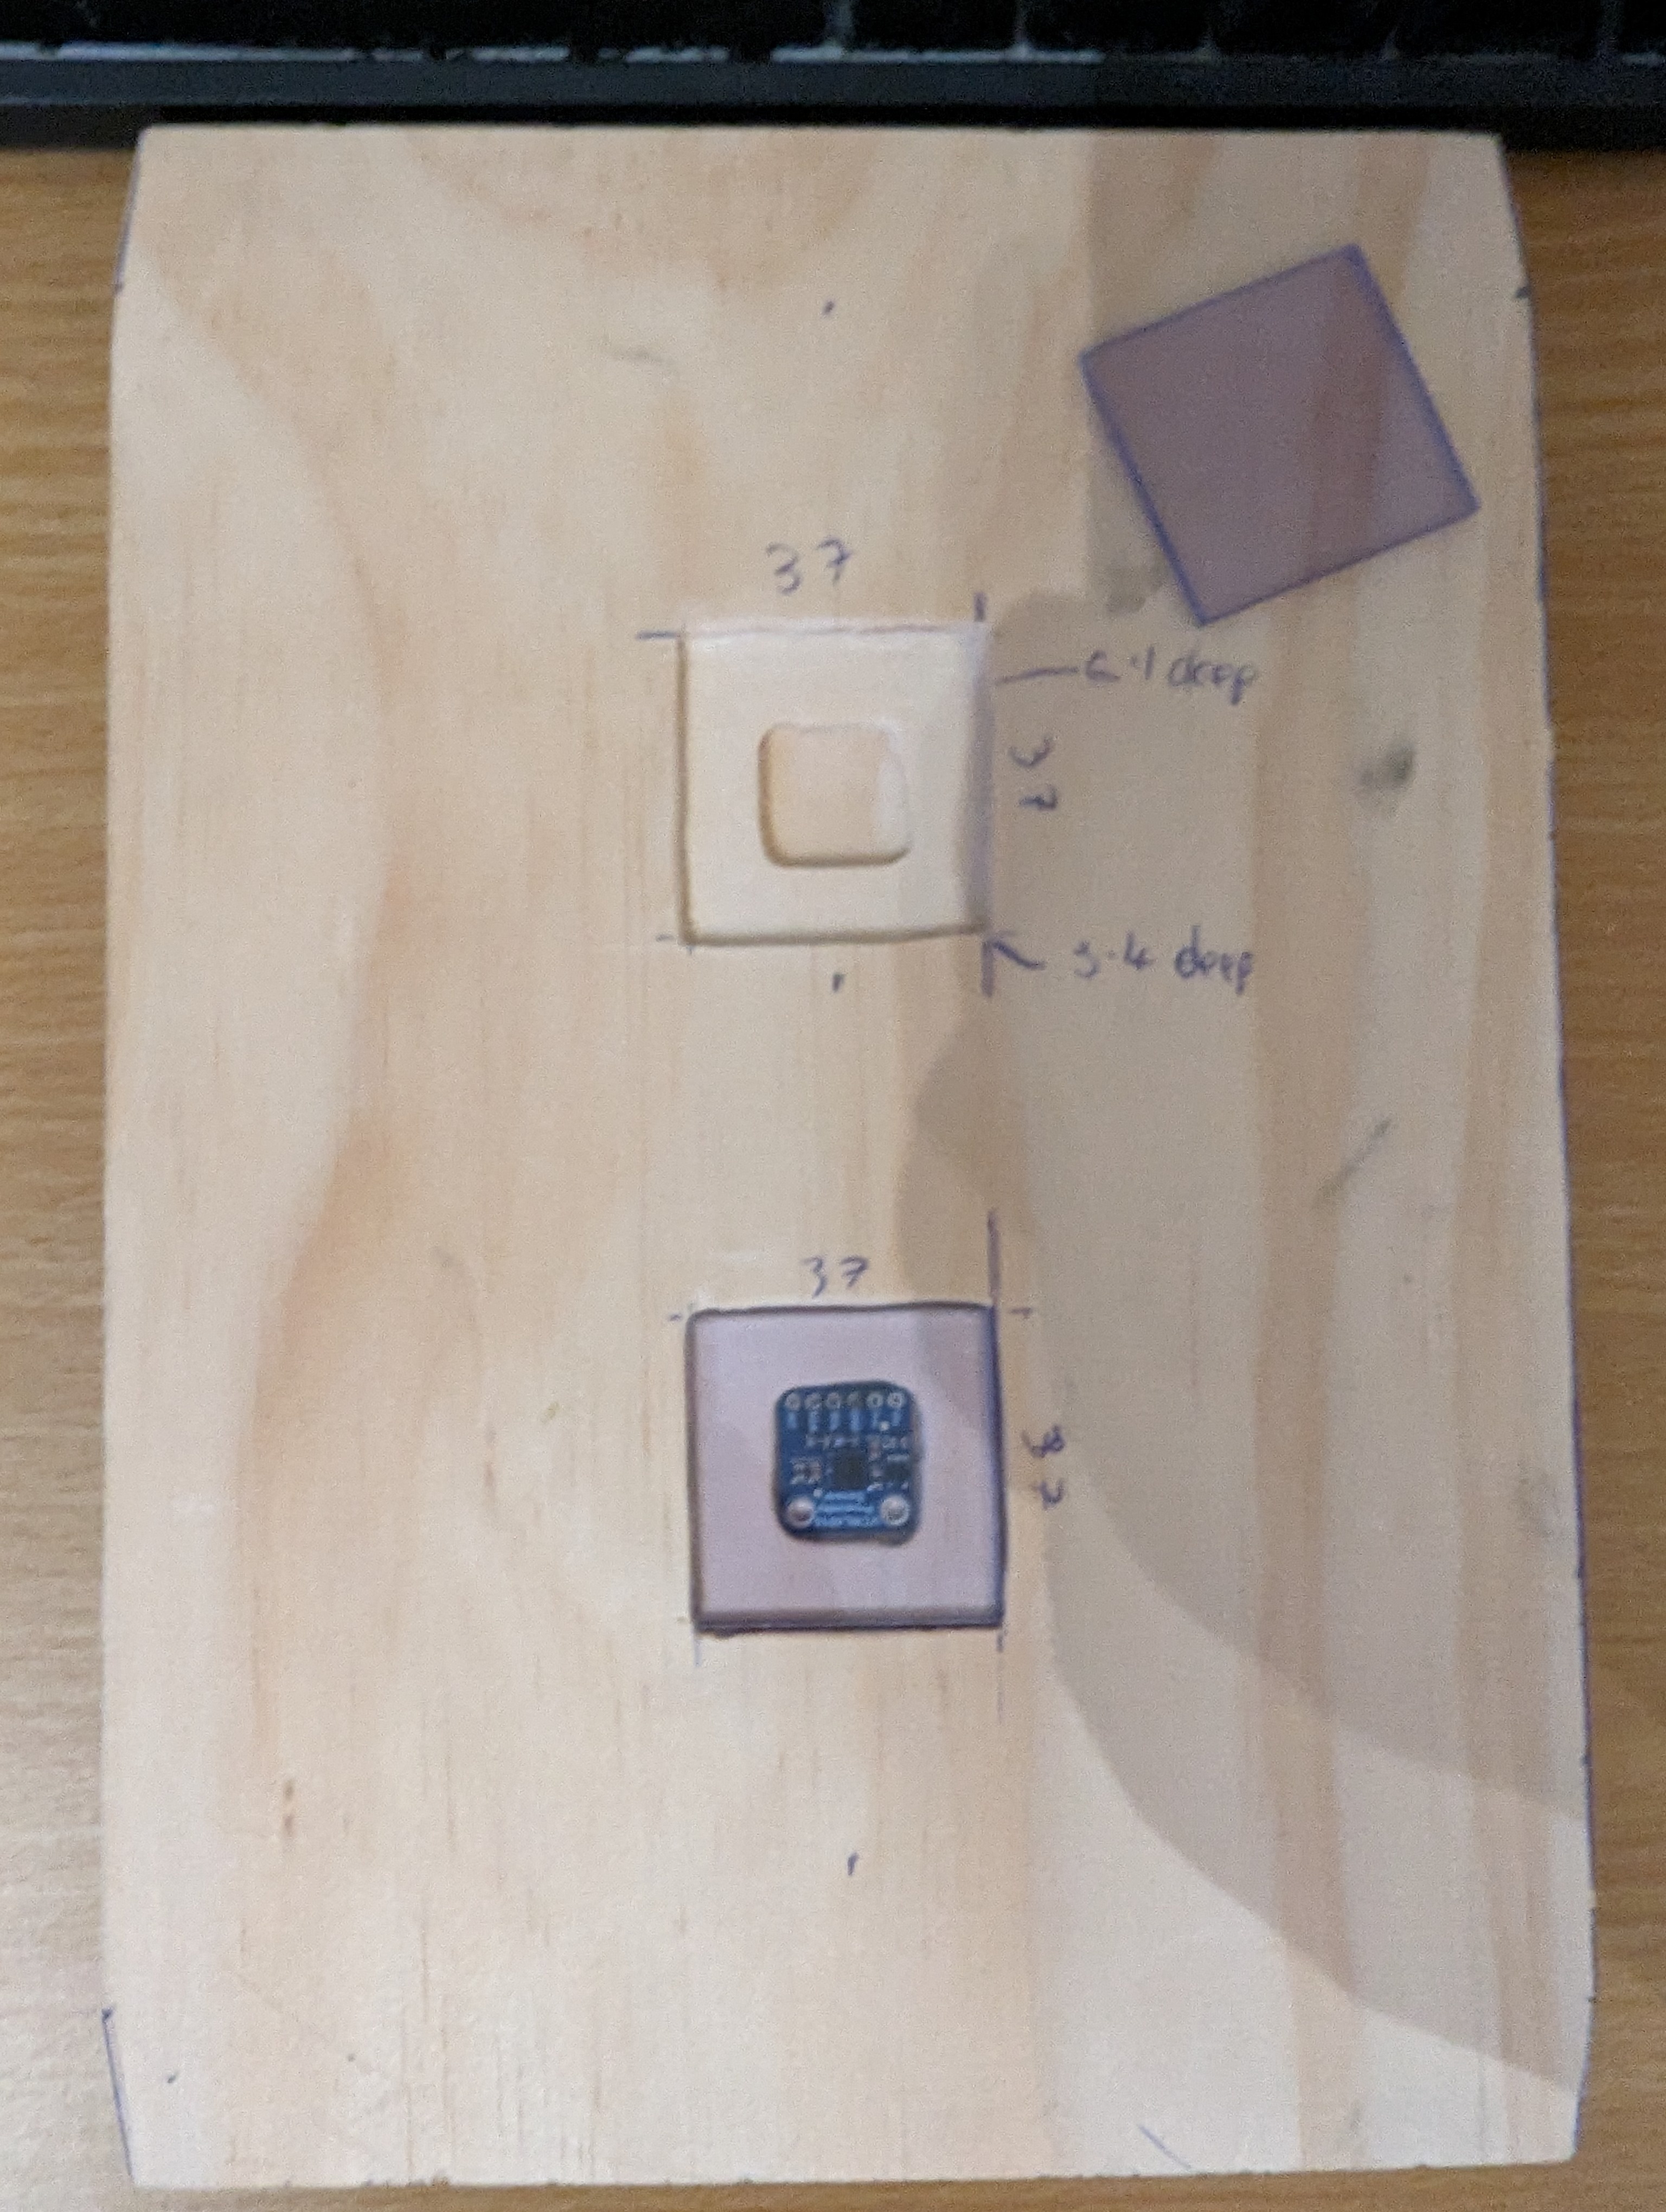
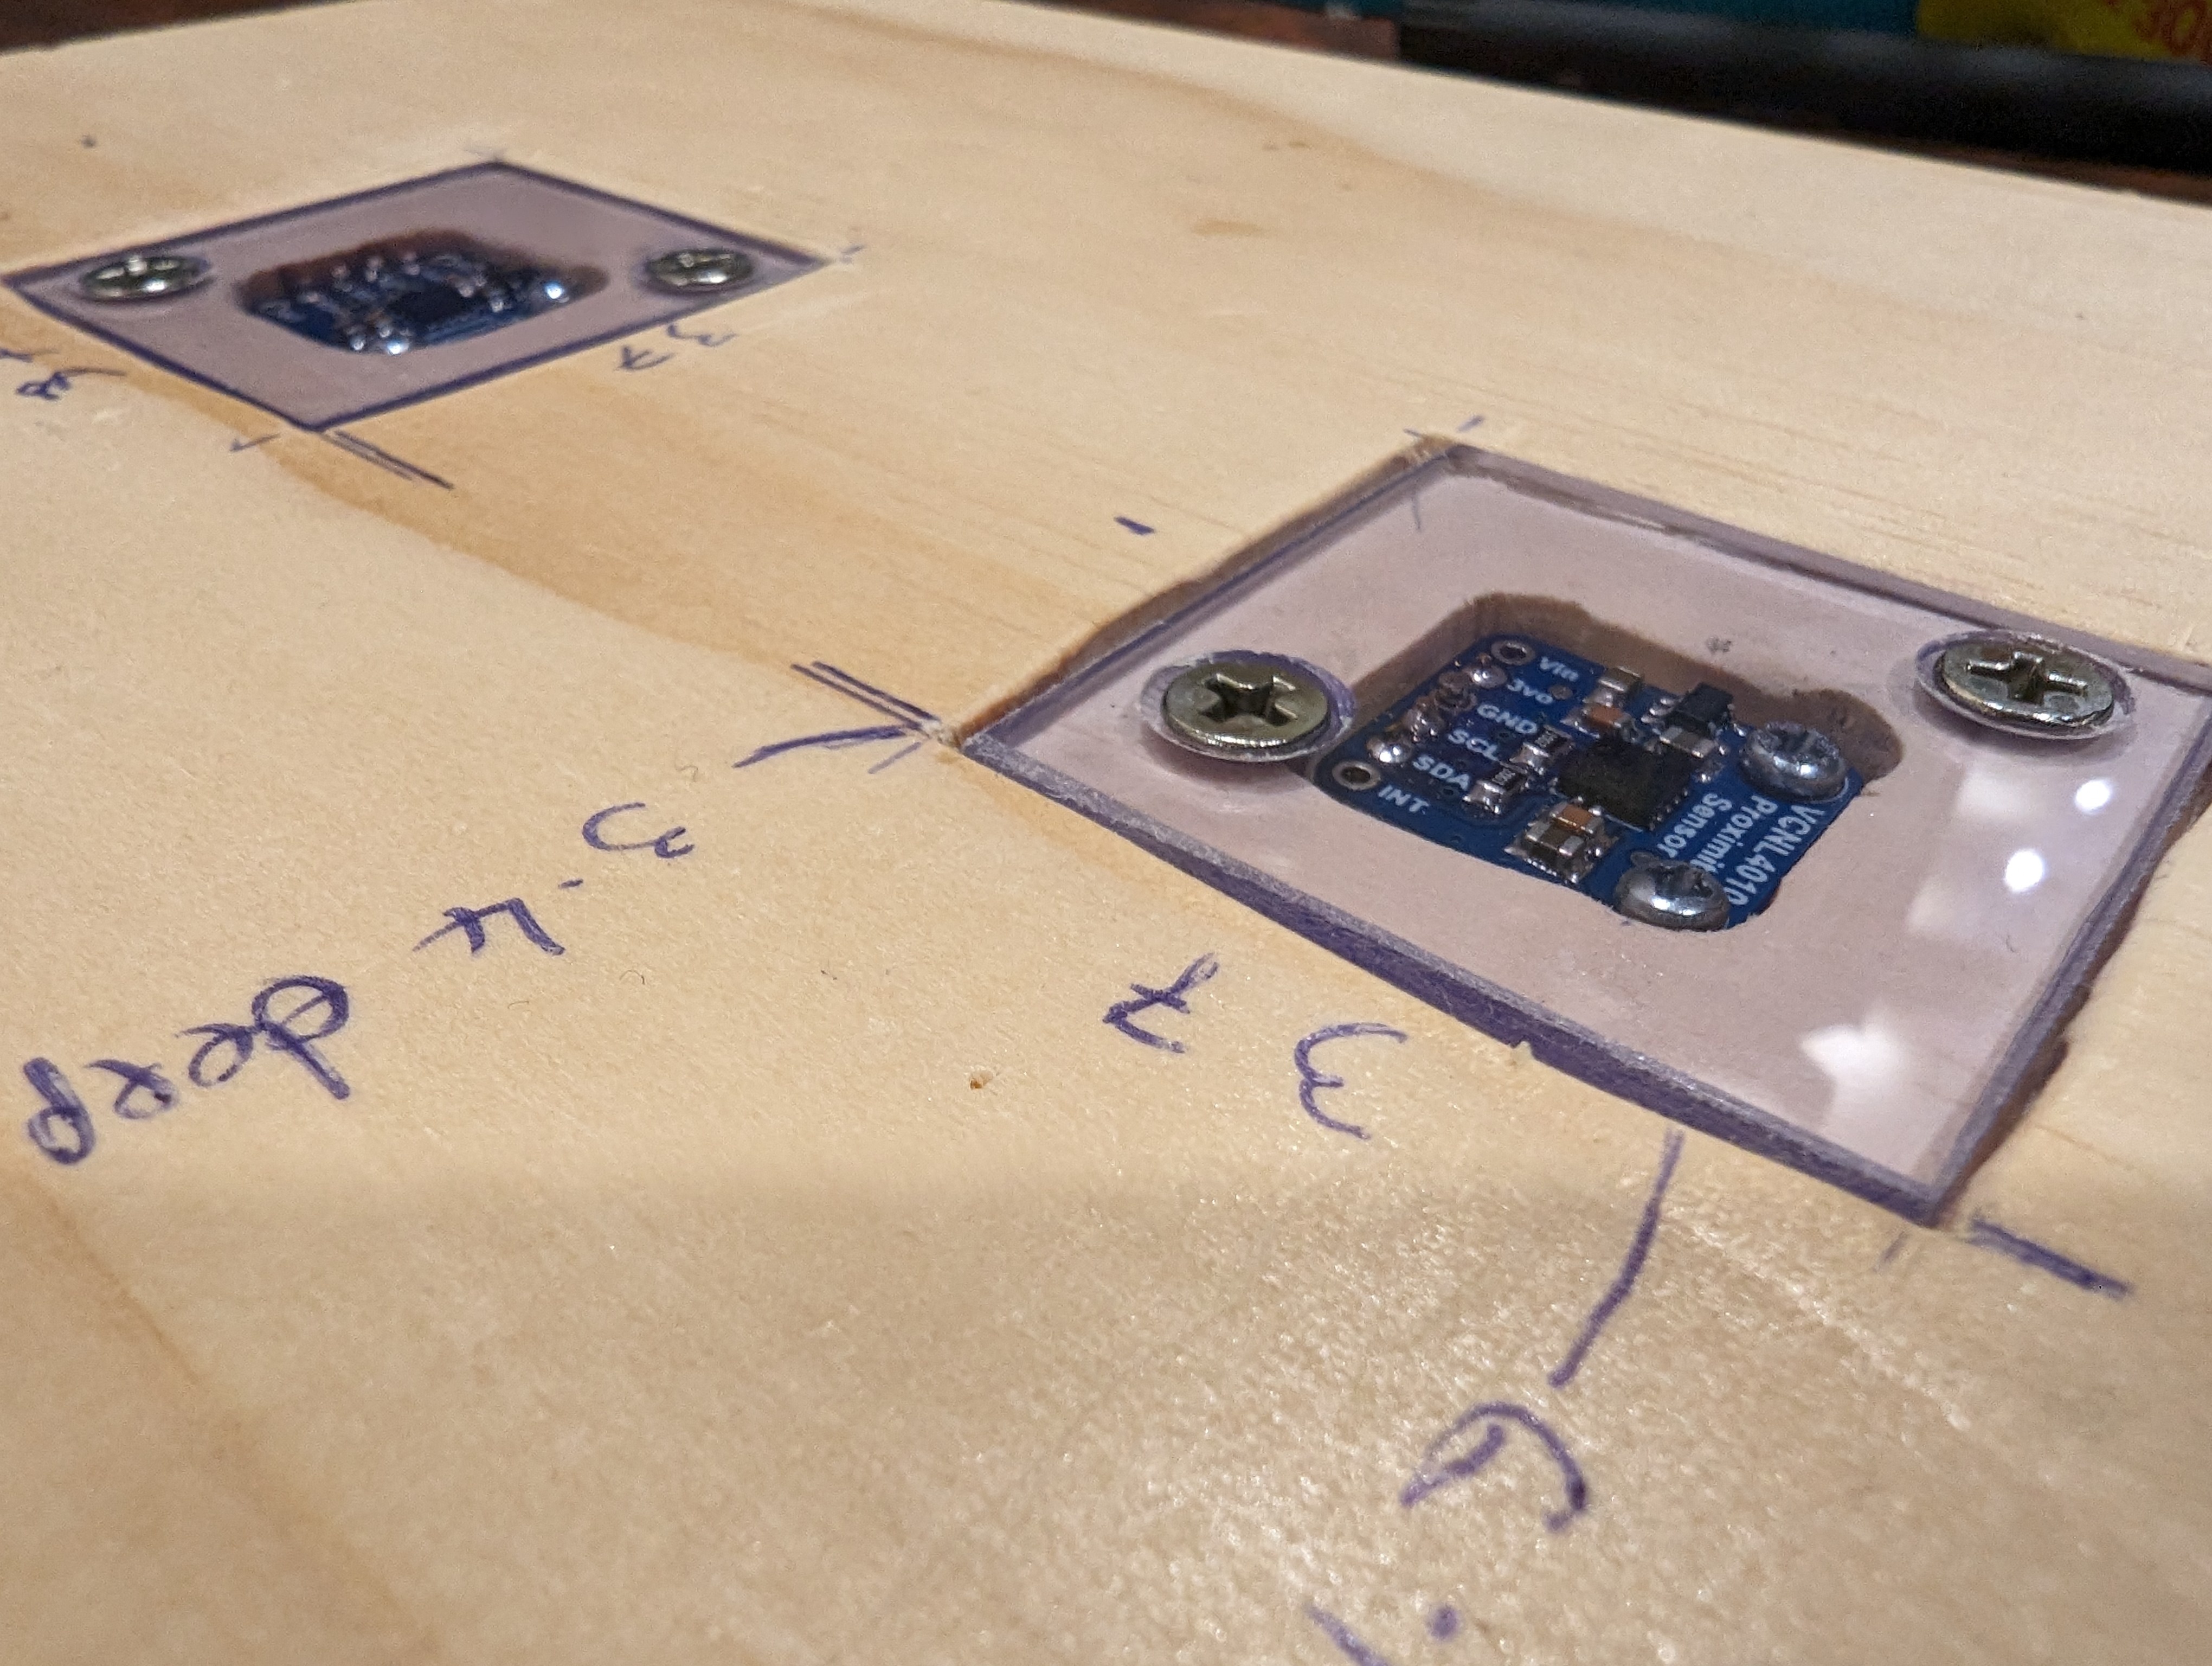
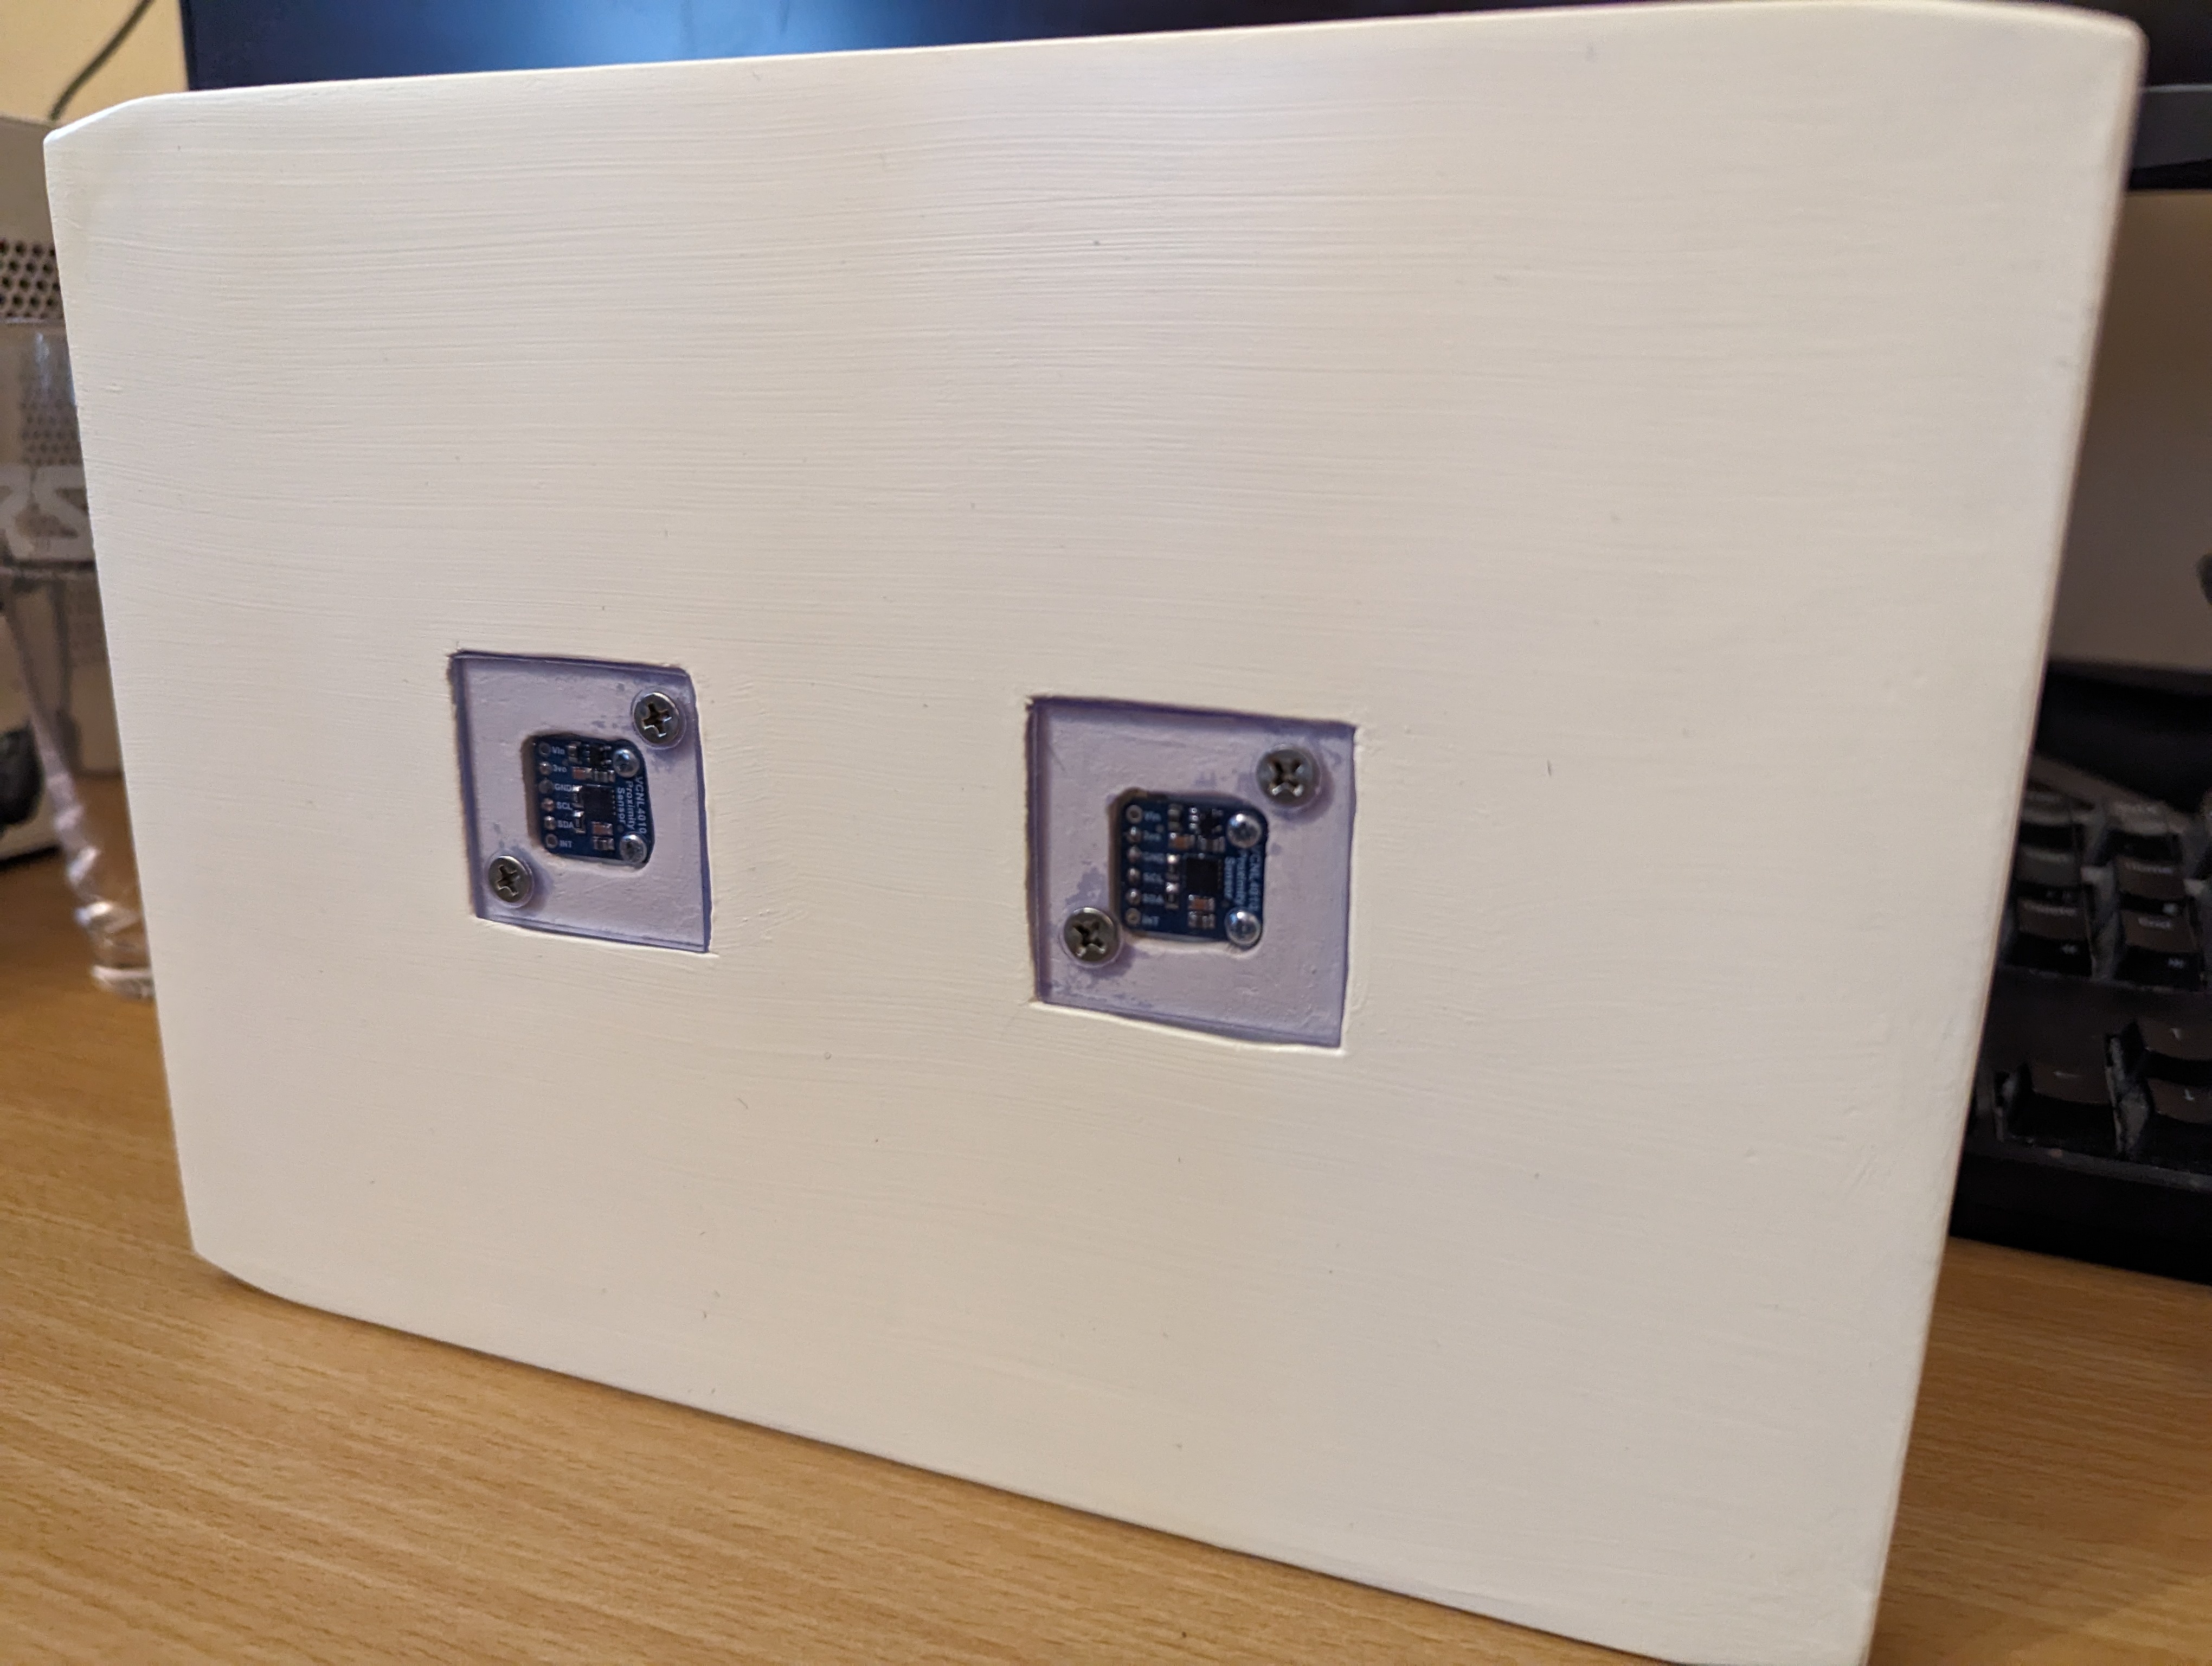
Measured out where the sensors should go, along with a surrounding space to screw down some little perspex windows to cover them. The idea I wanted was for the mail to be able to slide over the sensors without getting caught on them, as well as to protect them from dust.
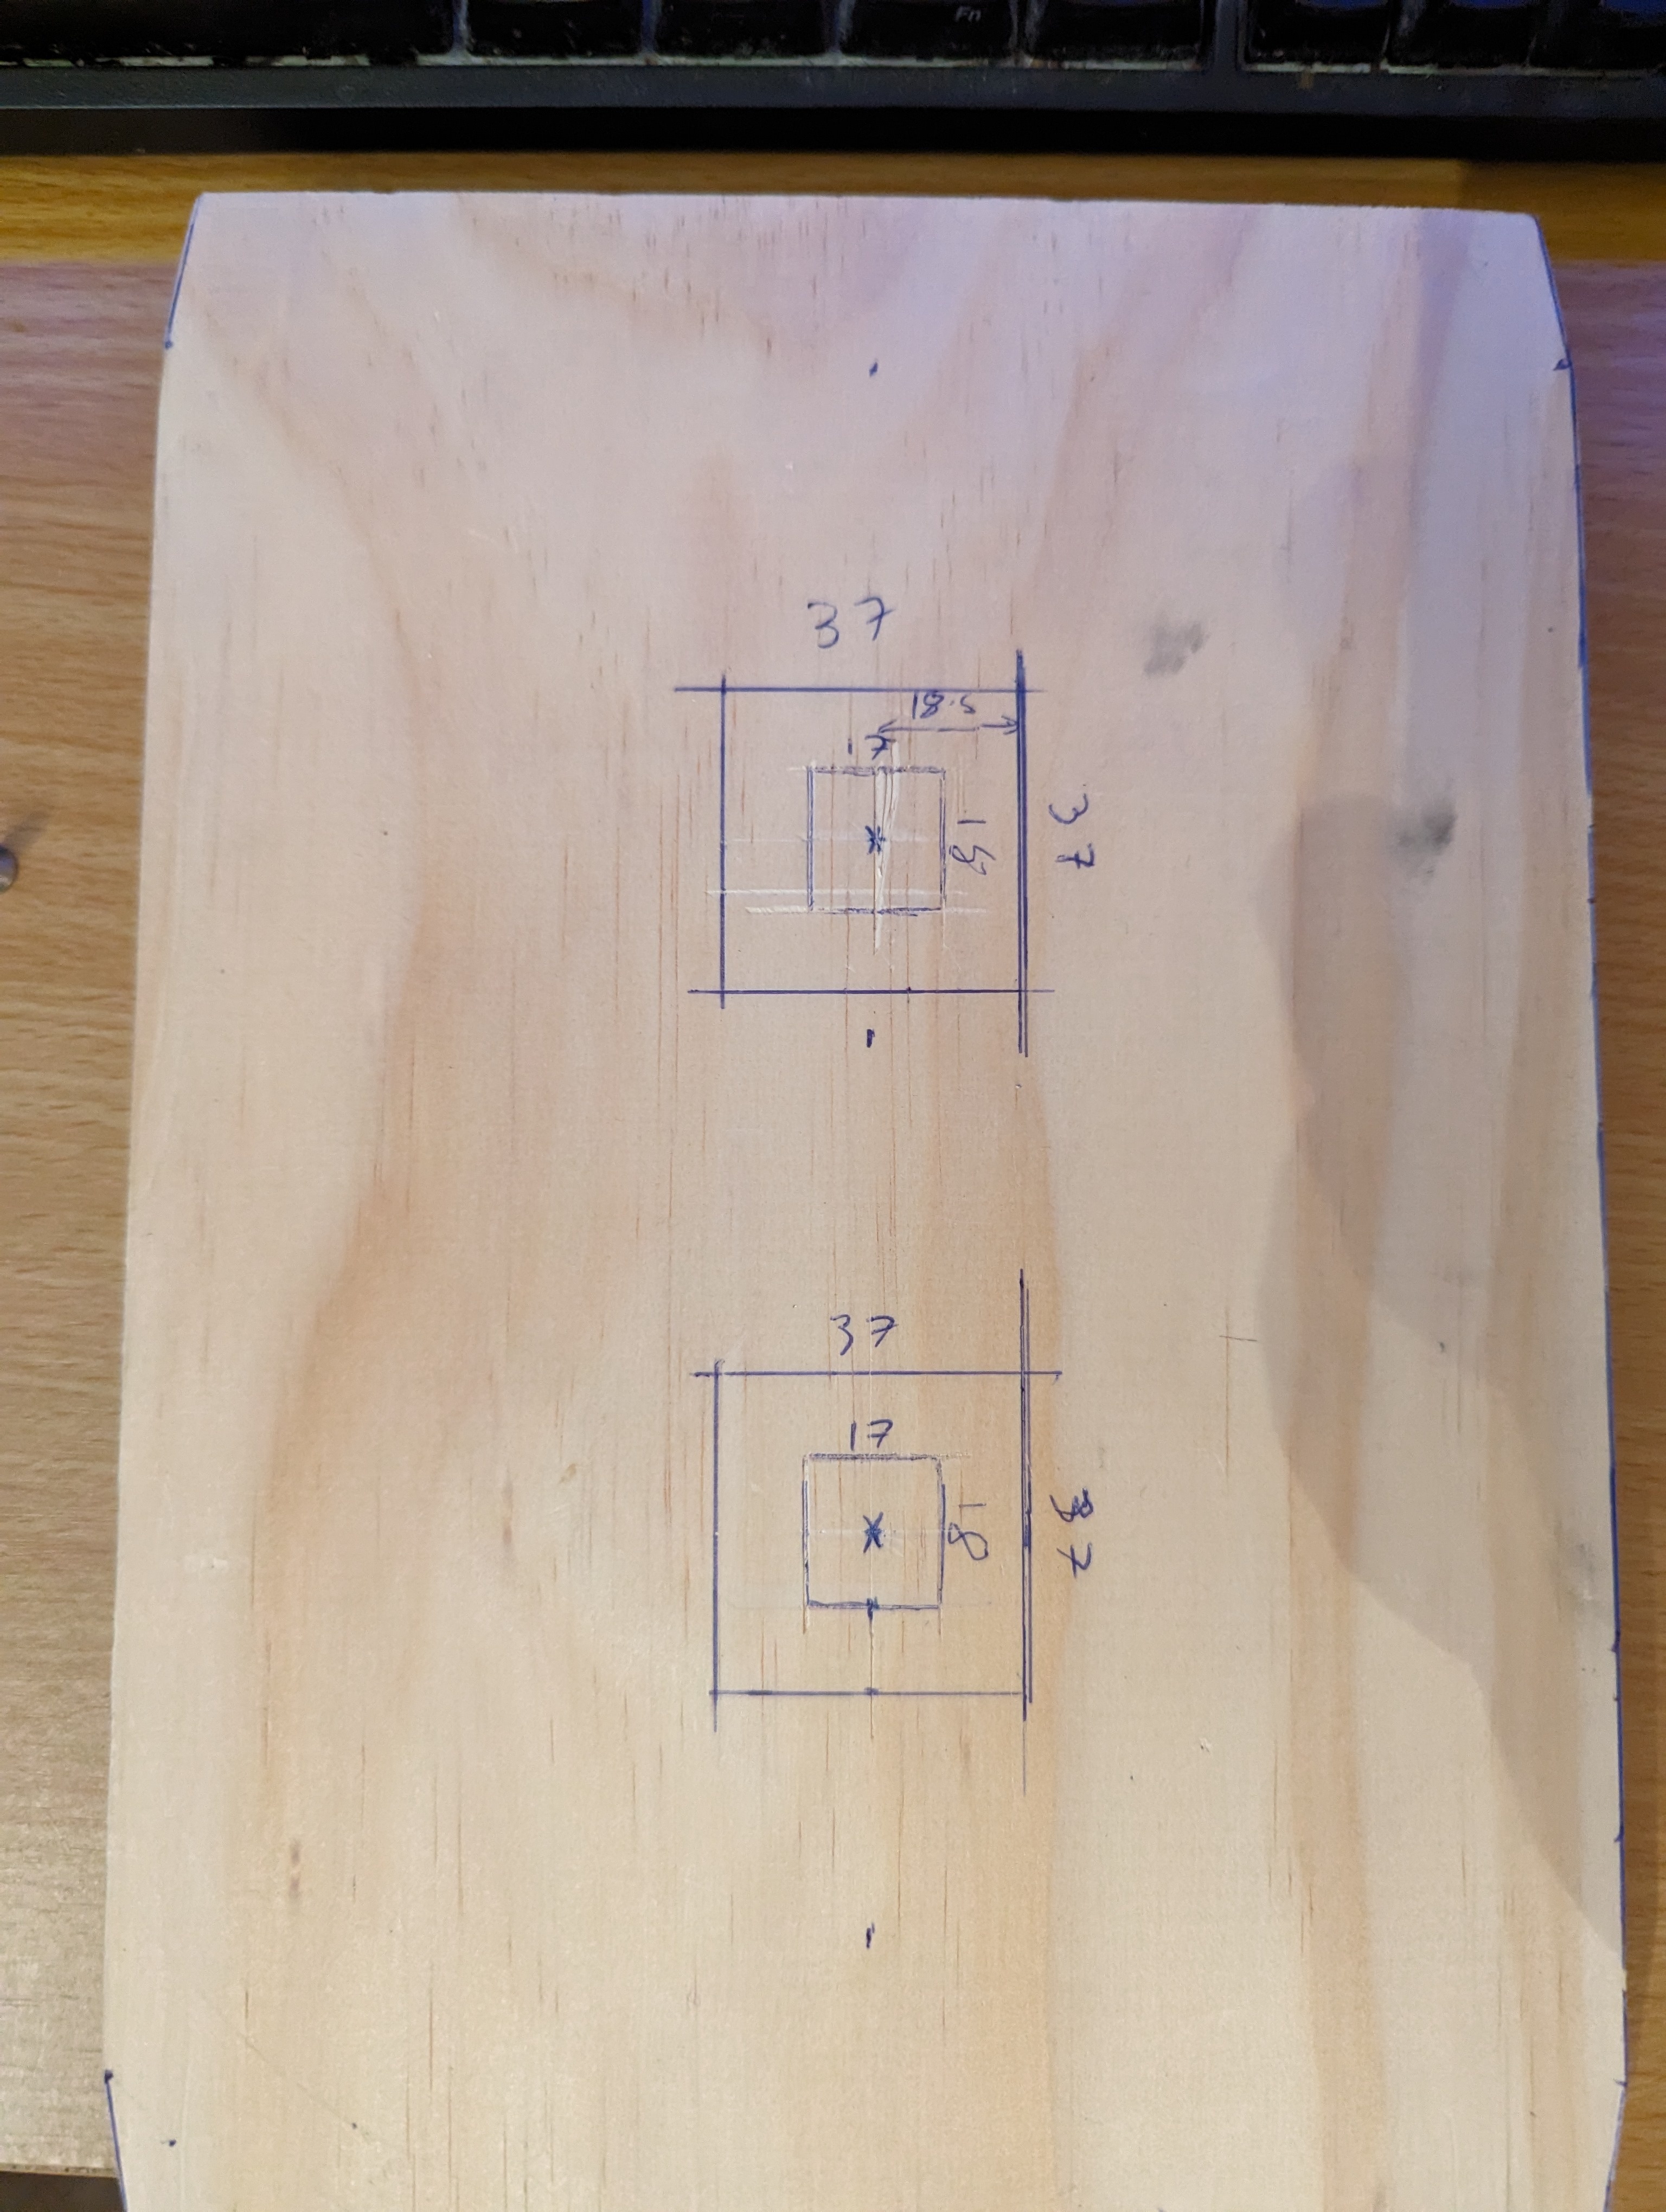
Routed out the dents and cleaned them up with a chisel and sandpaper. Cut the perspex to shape for a test fit.
On the other side, I routed out a notch for the cable to access the sensors.
I had originally planned to just solder wires into the sensors, but then I realised JST connectors would fit perfectly into the sensors. This meant I had to widen the holes somewhat, which I did with a small chisel and file.
I got a bit lazy with making screw holes to hold down the perspex, so they’re not in as neat a place as I’d like. If I did this again I’d measure properly for their placement. Still, with countersinking they hold down the perspex well and nothing sticks up for mail to get caught on.
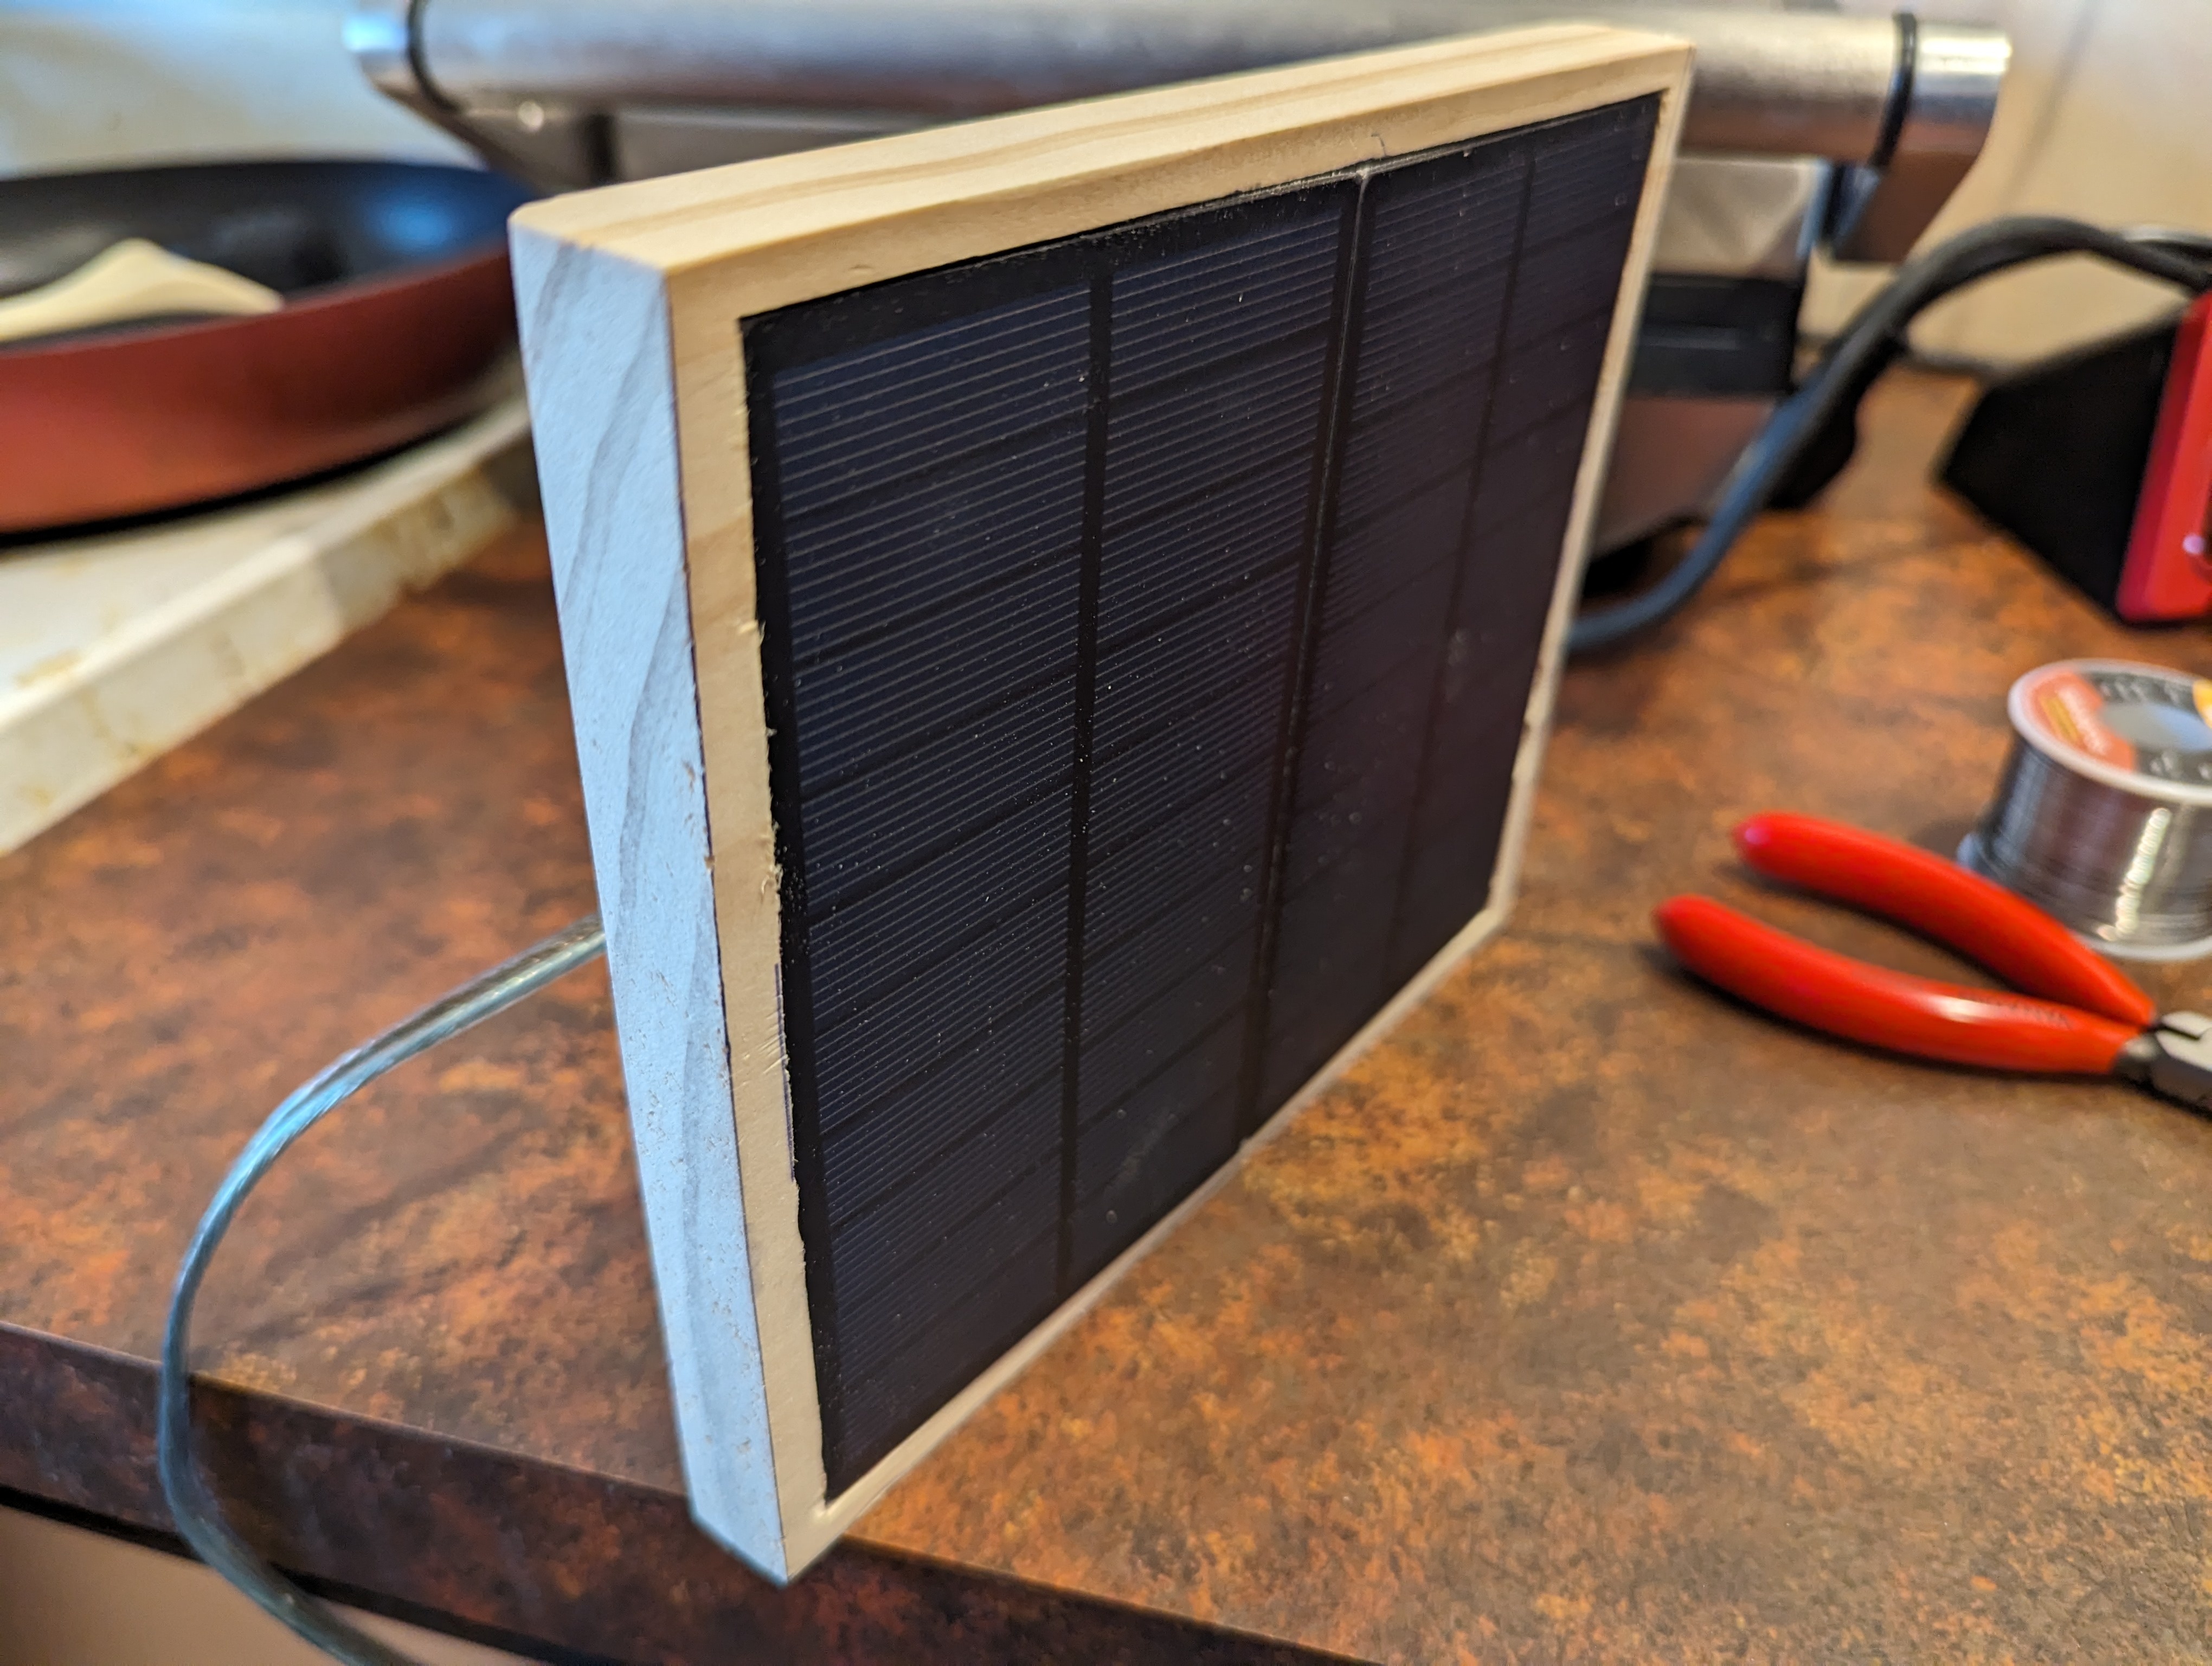
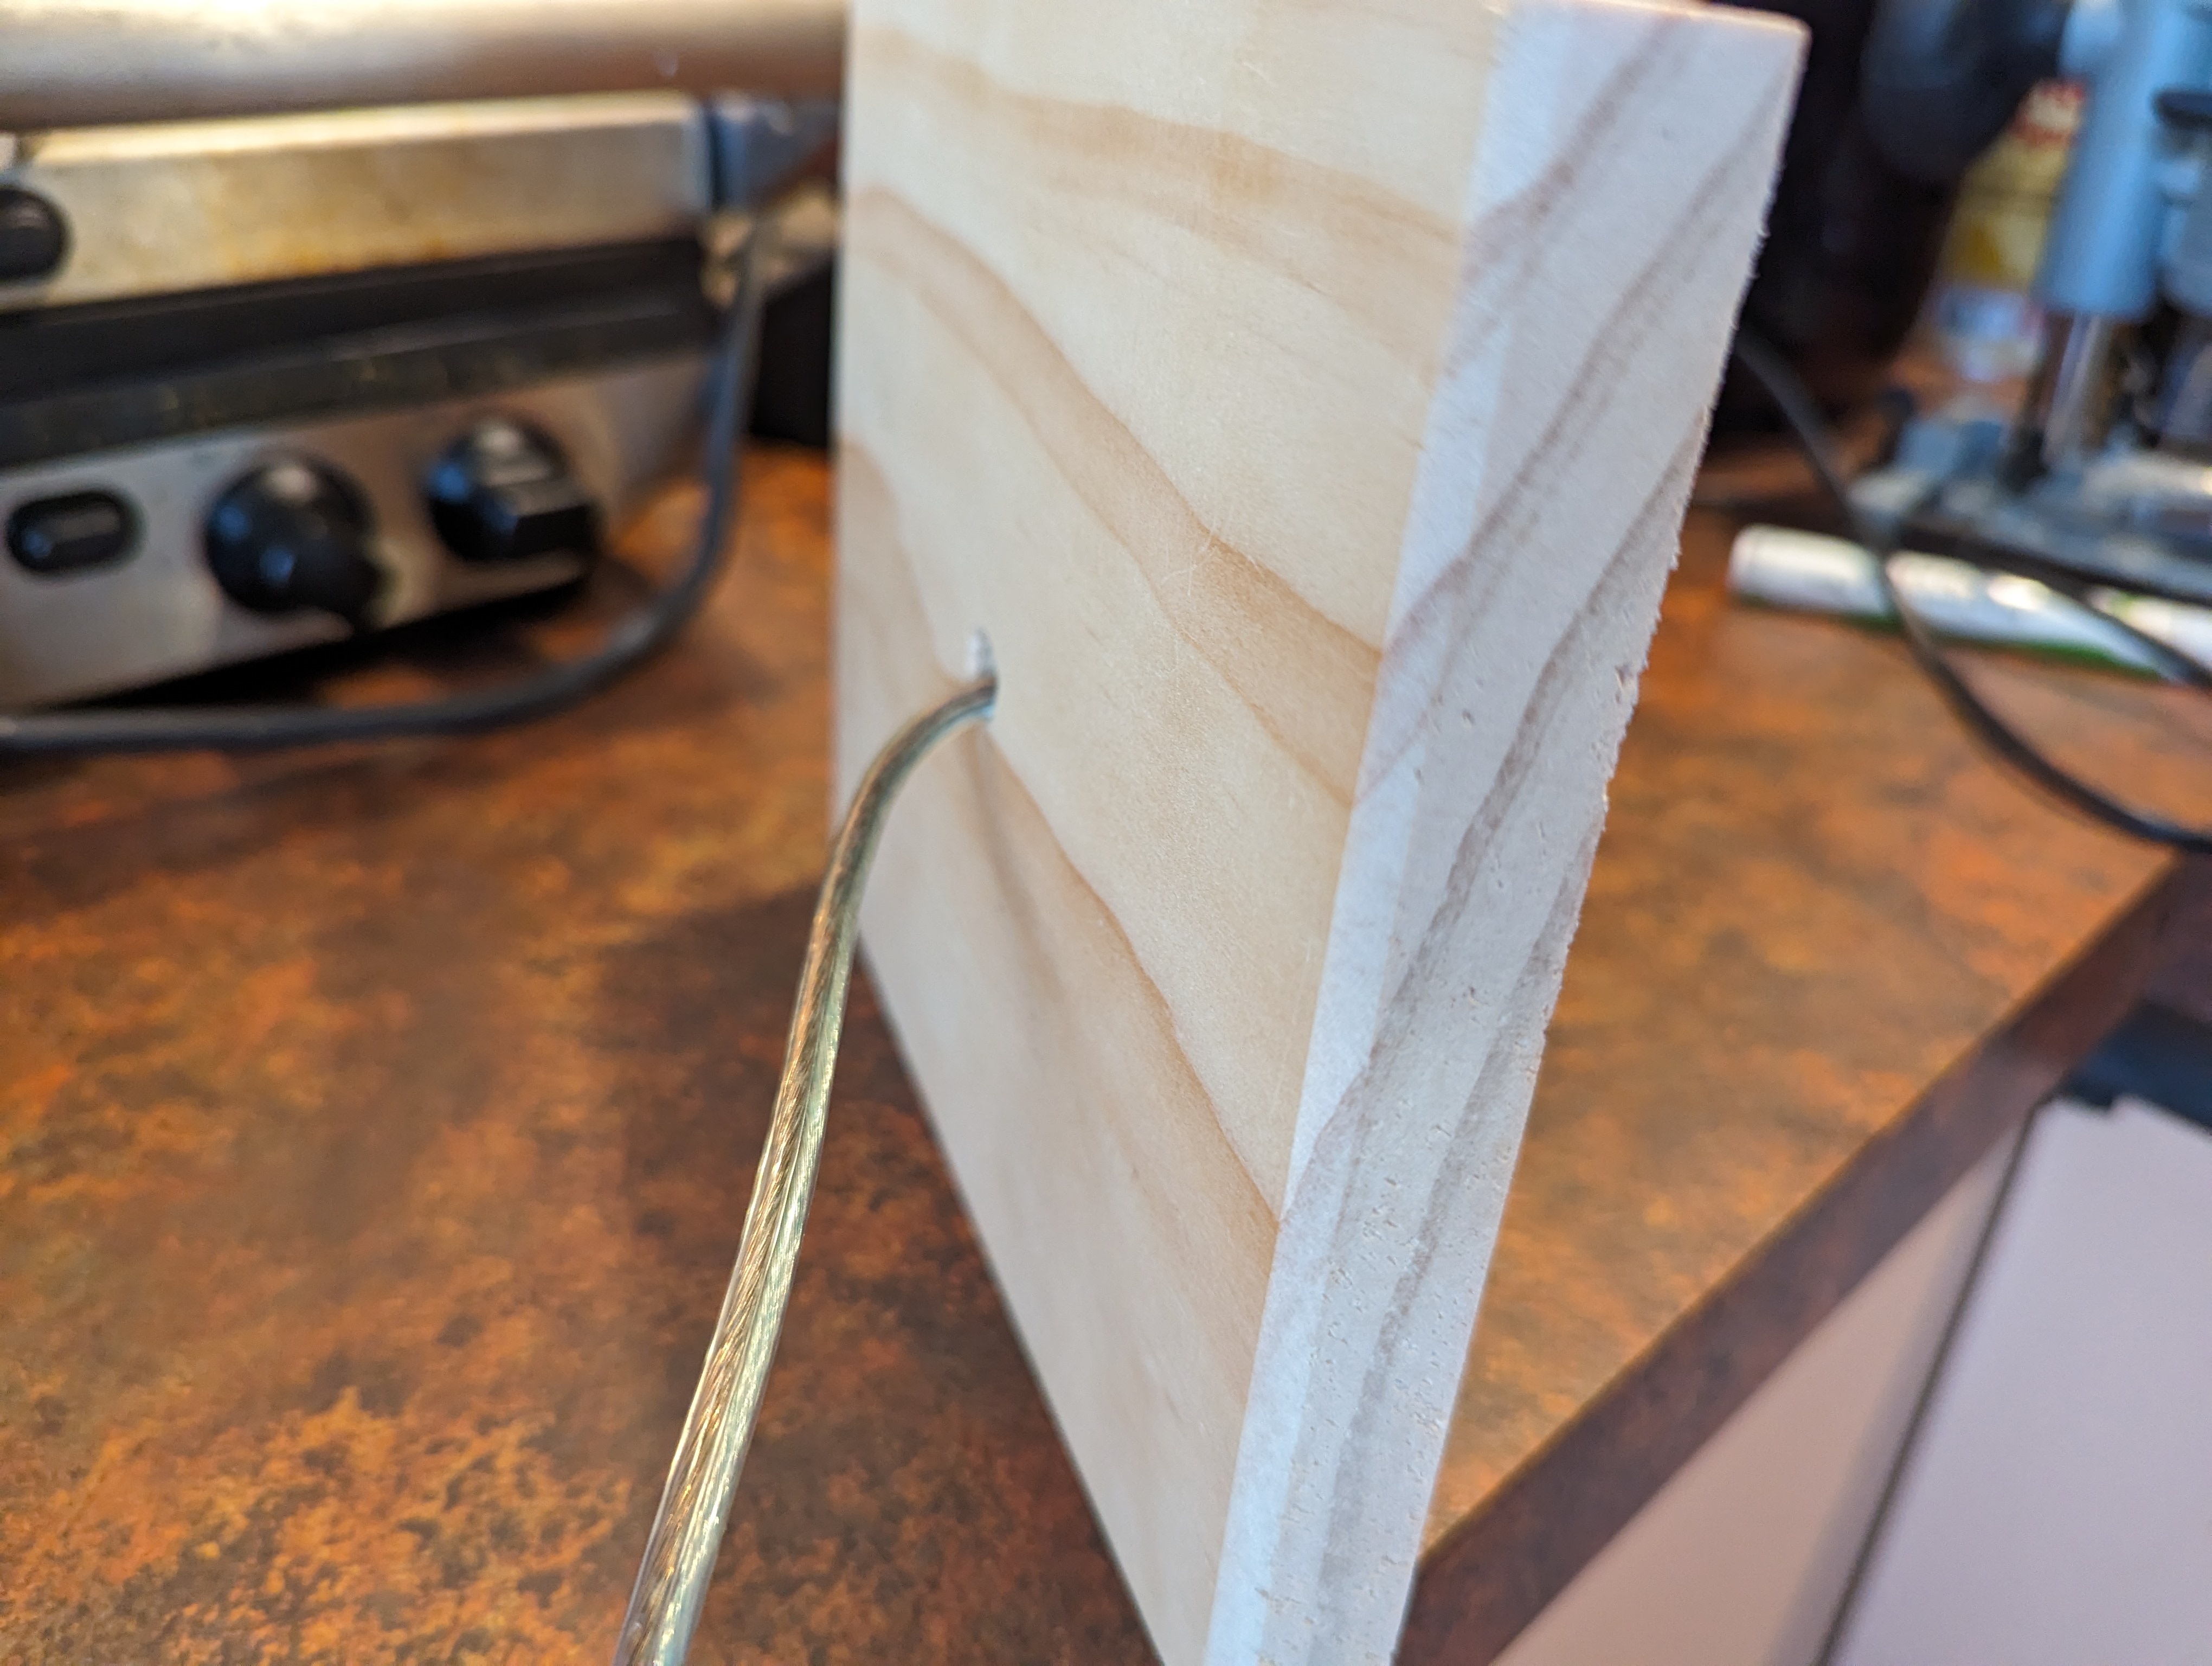
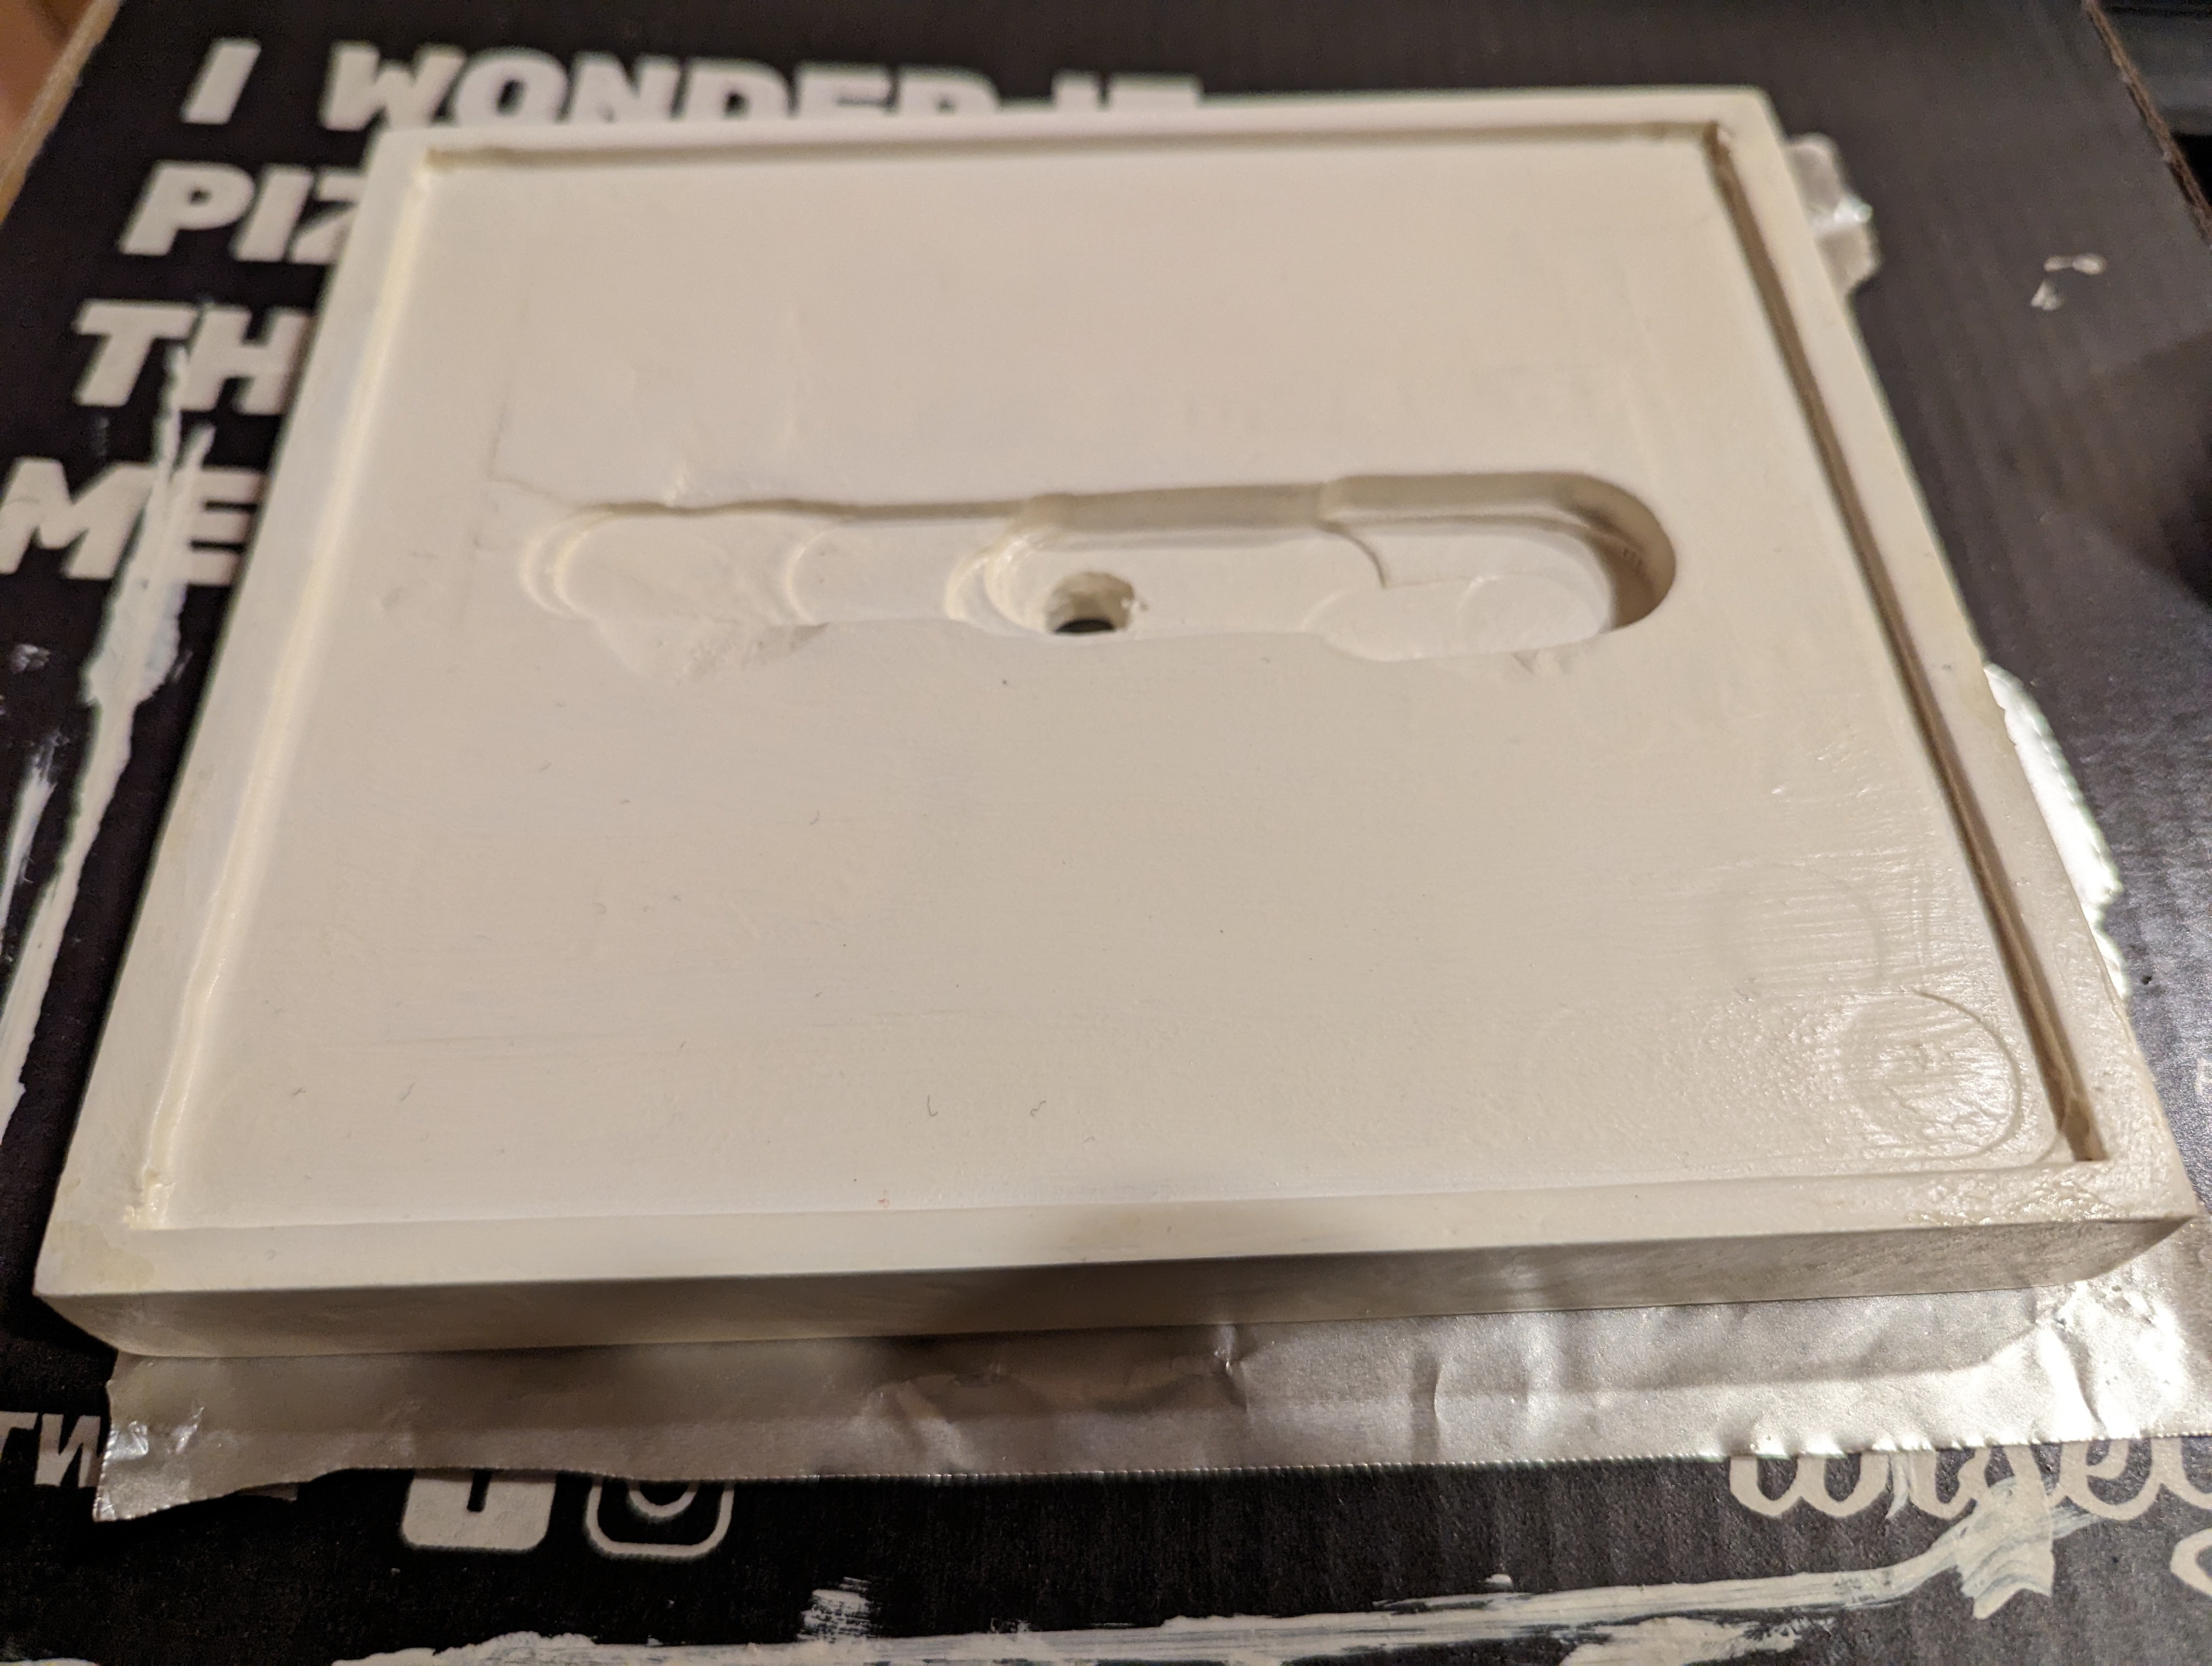
I also got started on making a housing for the solar panels. I used the router to carve out a 1-2mm area for them to sit in, and a much deeper ditch linking the two terminals, which you’ll see in a later picture. For now, here’s how they look sitting in it.
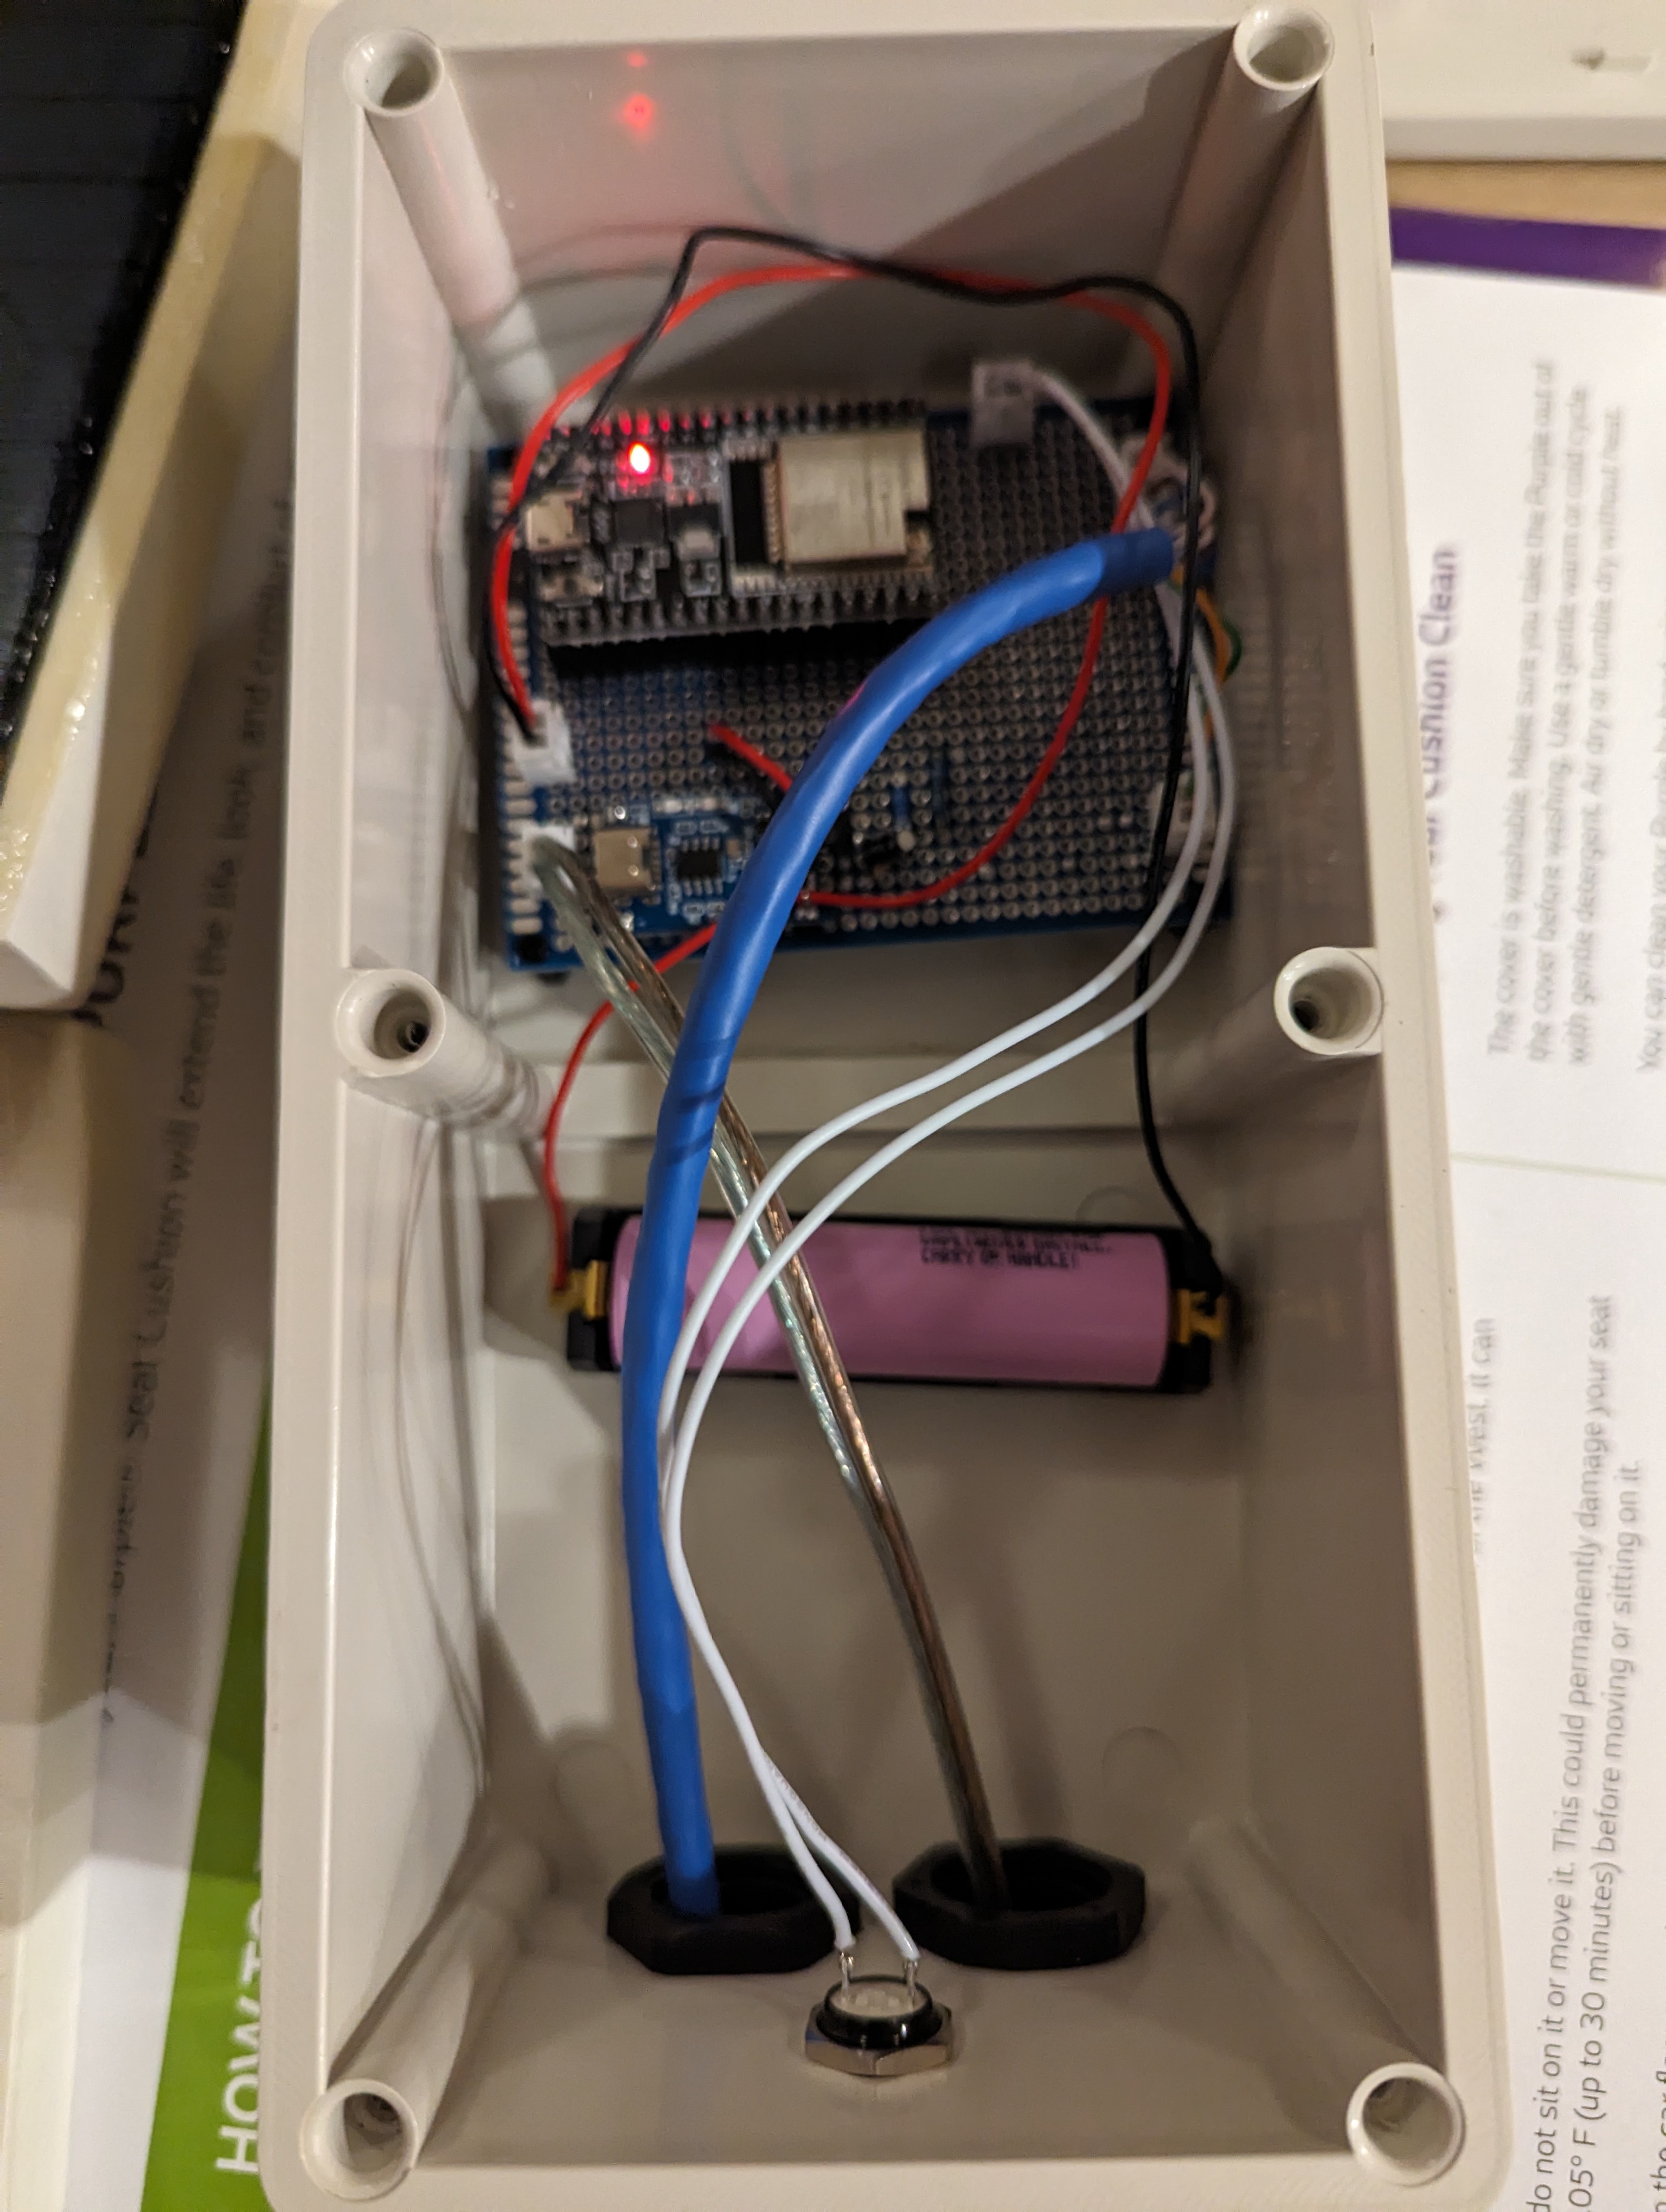
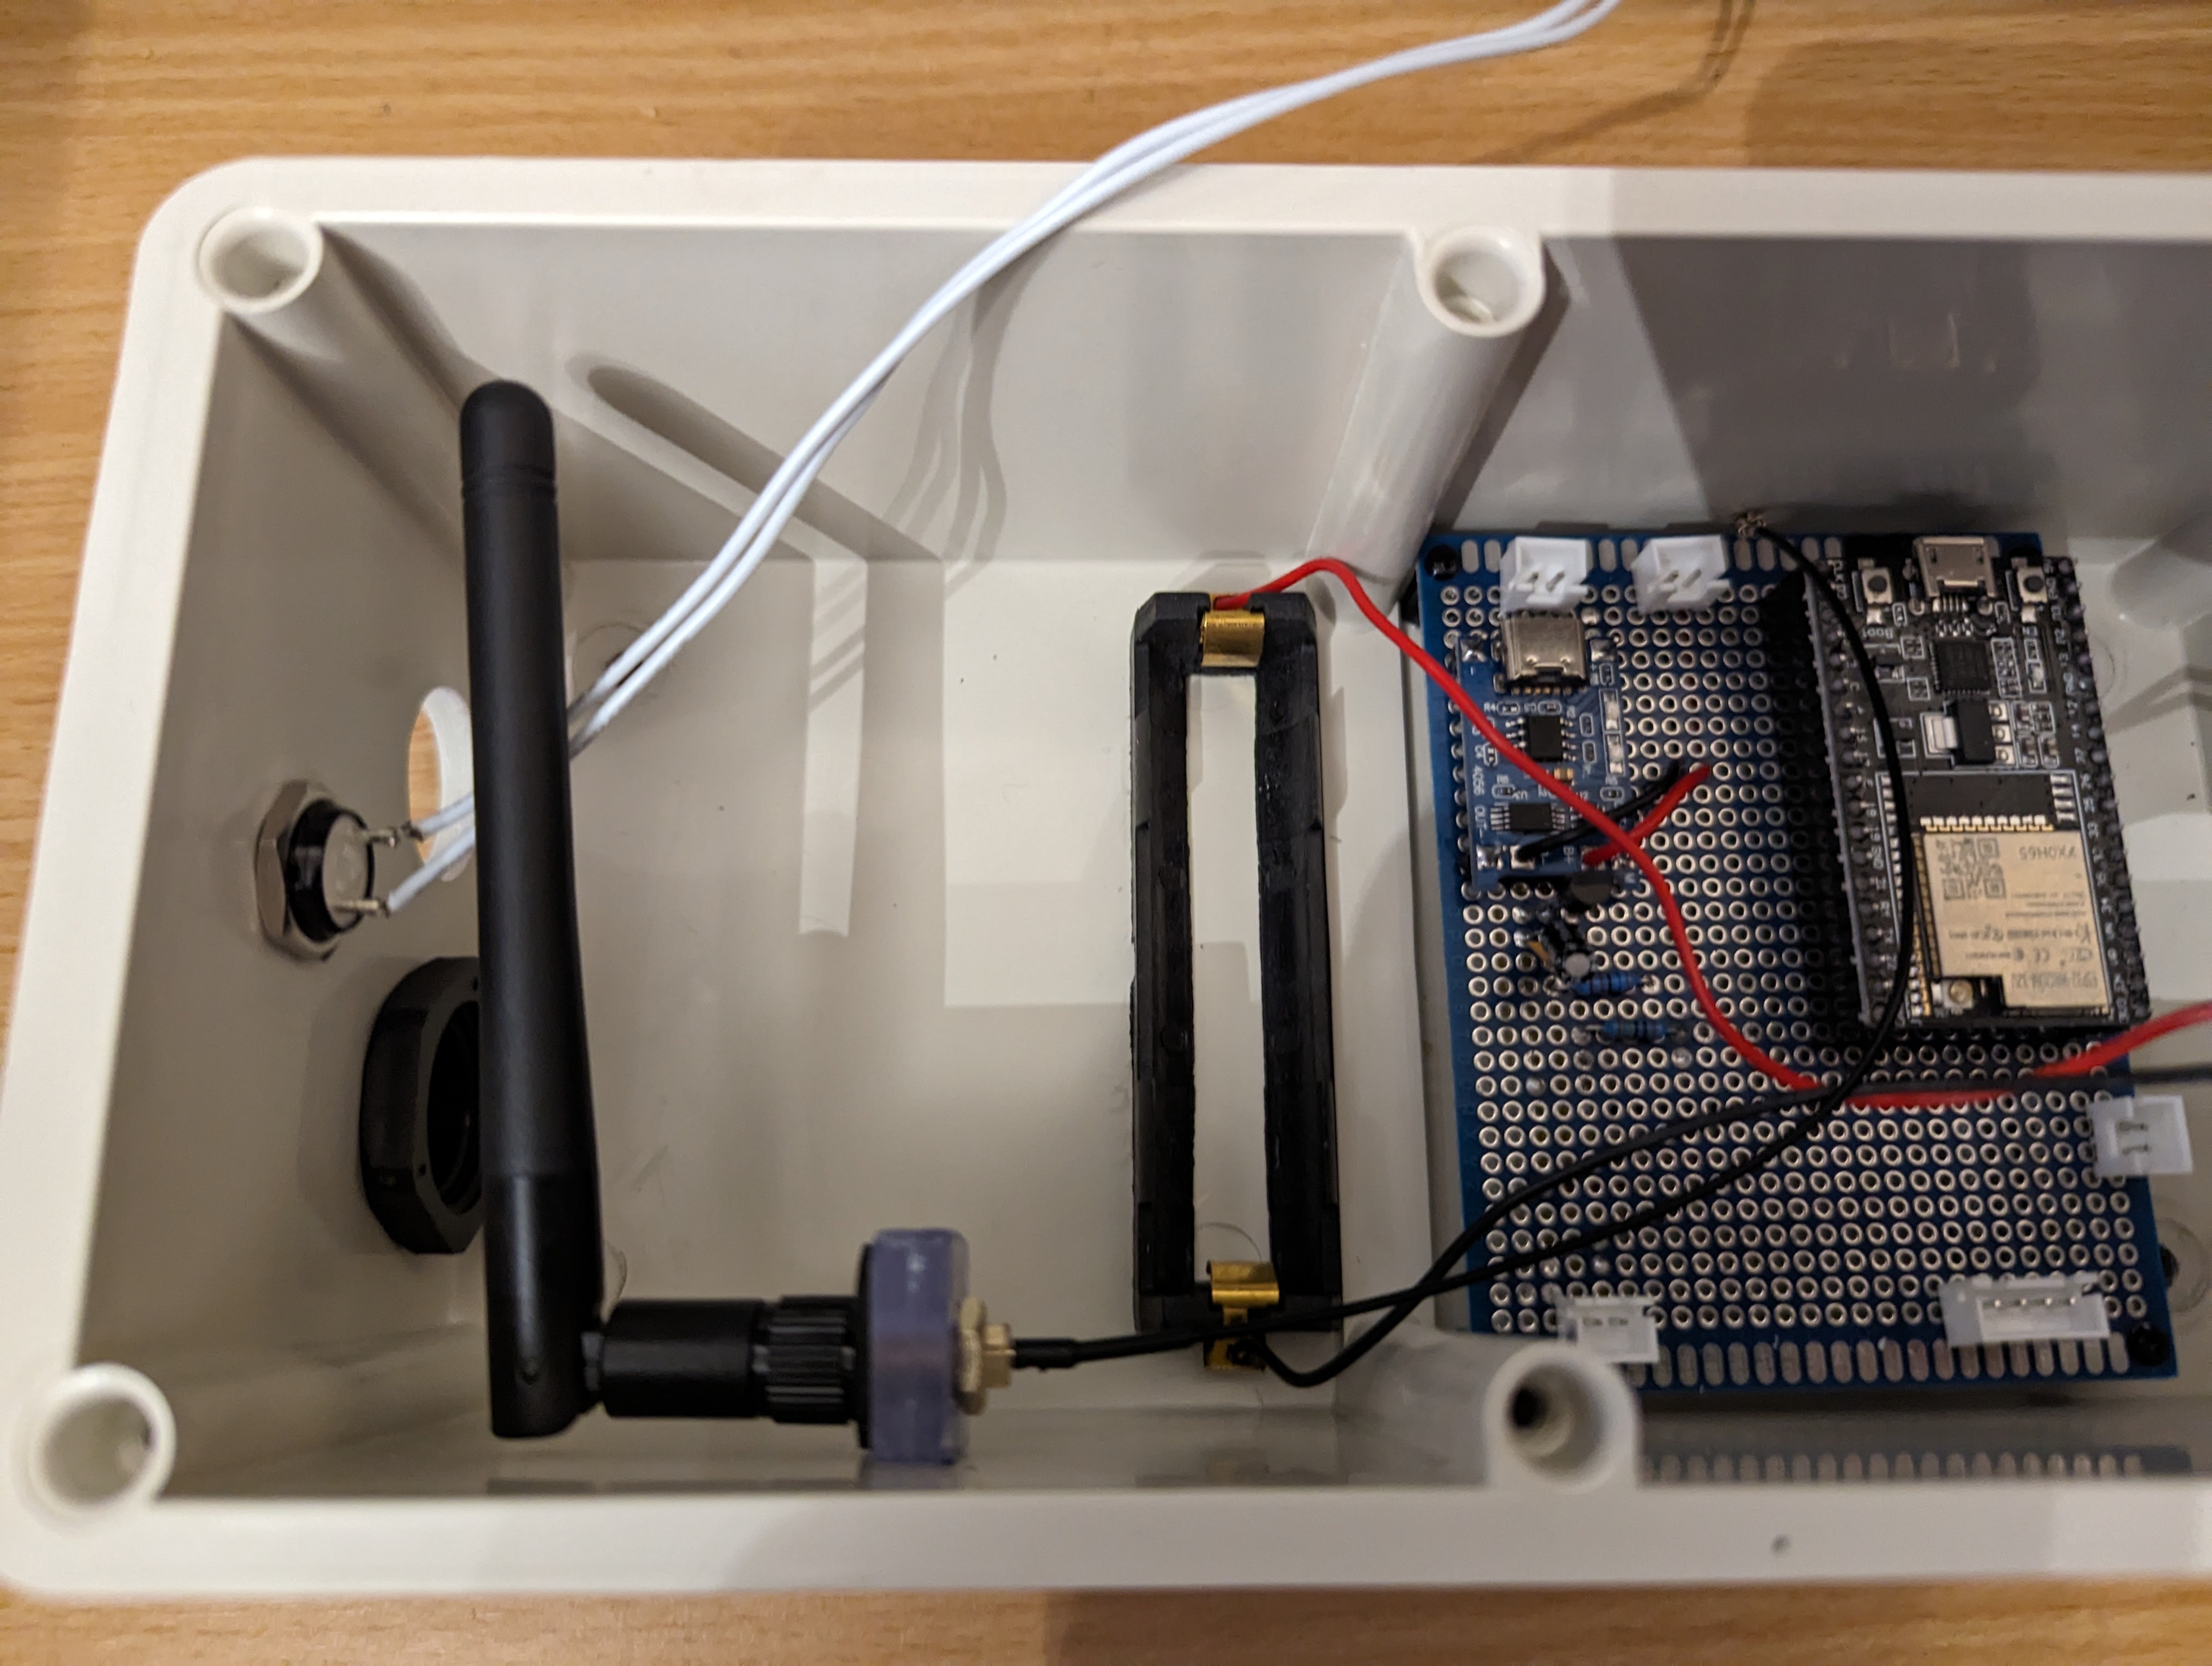
Wiring up the prototype board was next. Again, see the article I linked above for how this works. I used pin headers to allow the ESP32 dev board to be slotted in and out, just in case I ever needed to take it out for replacement or reprogramming. Also the JSTs on the prototype board are for connecting the battery (top left), connecting the solar panels (bottom left), providing power to the sensors (bottom right) and clock and data lines for the sensors (top right). Since the sensors are both using the same I2C bus address and cannot be configured otherwise, I had to run two clock and data lines, but if I’d found sensors that could have different addresses I could have just used one of each. I didn’t take a photo of the board at this stage, but I later added another header to connect a button to reset the ESP32 from the outside.
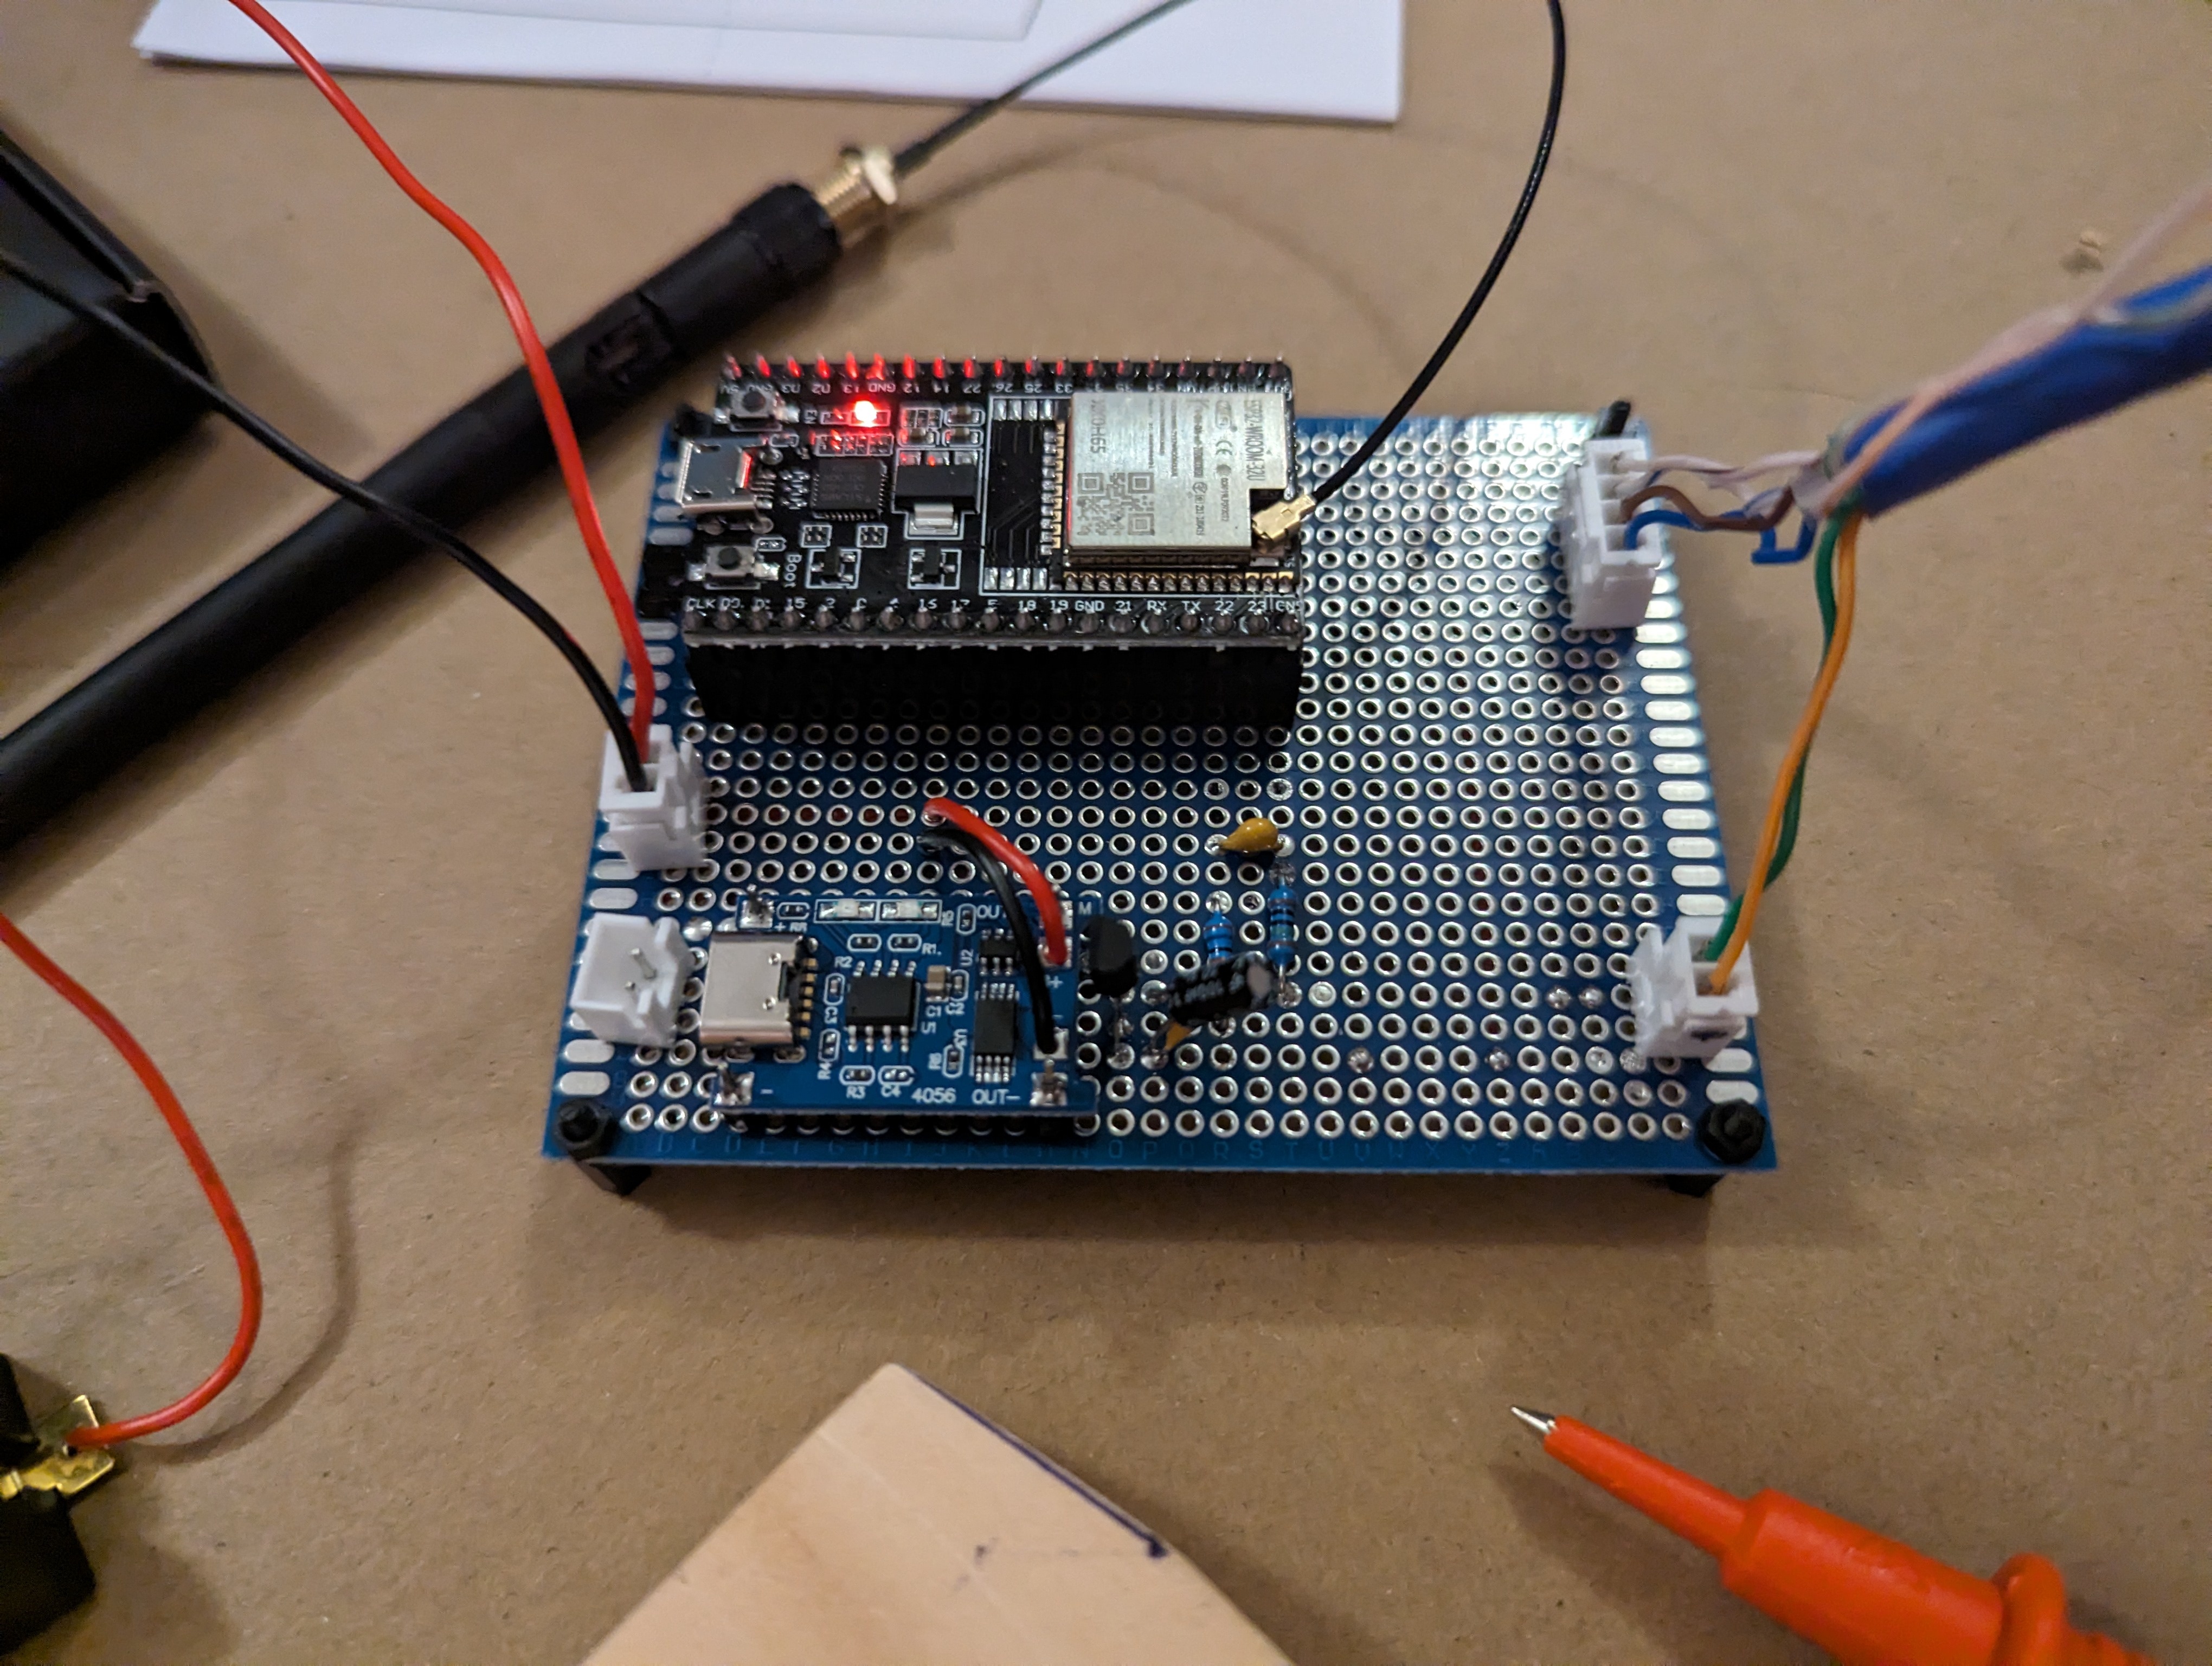
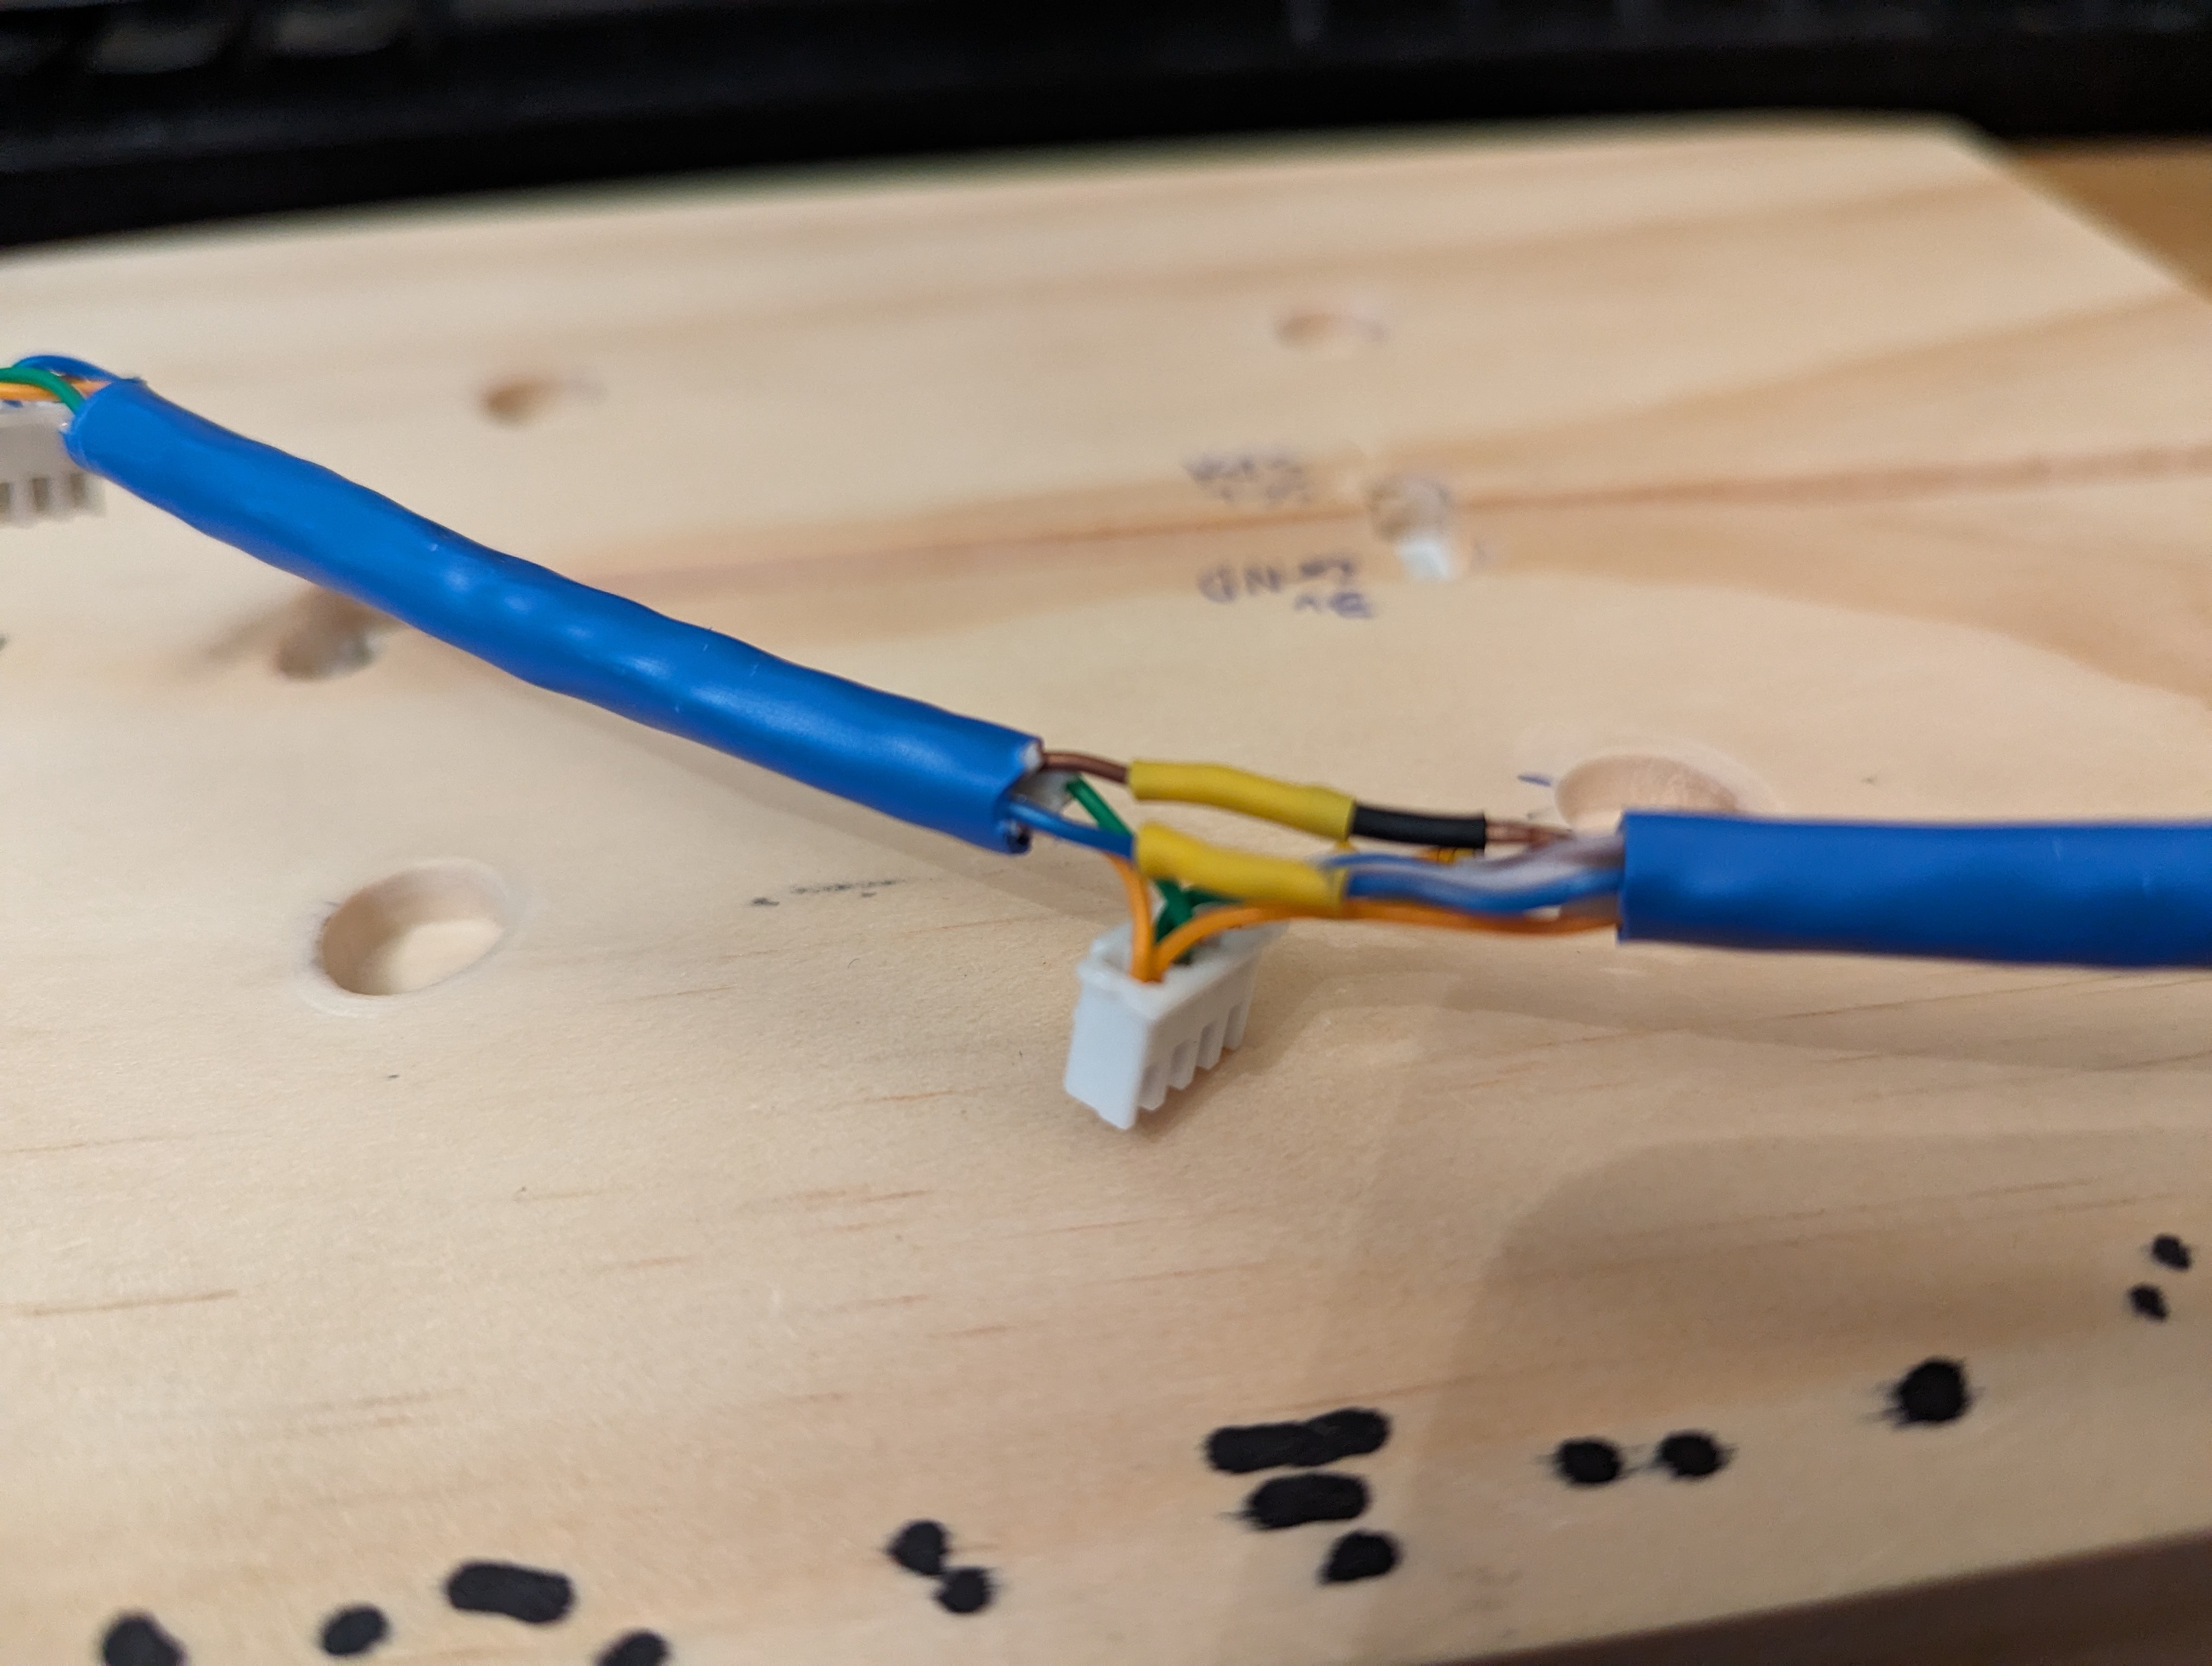
I also made the data and power cable for the sensor board.
The solar panel housing and ‘sensor plate’ were both painted and treated with polyurethane spray to protect them from rain and humidity.
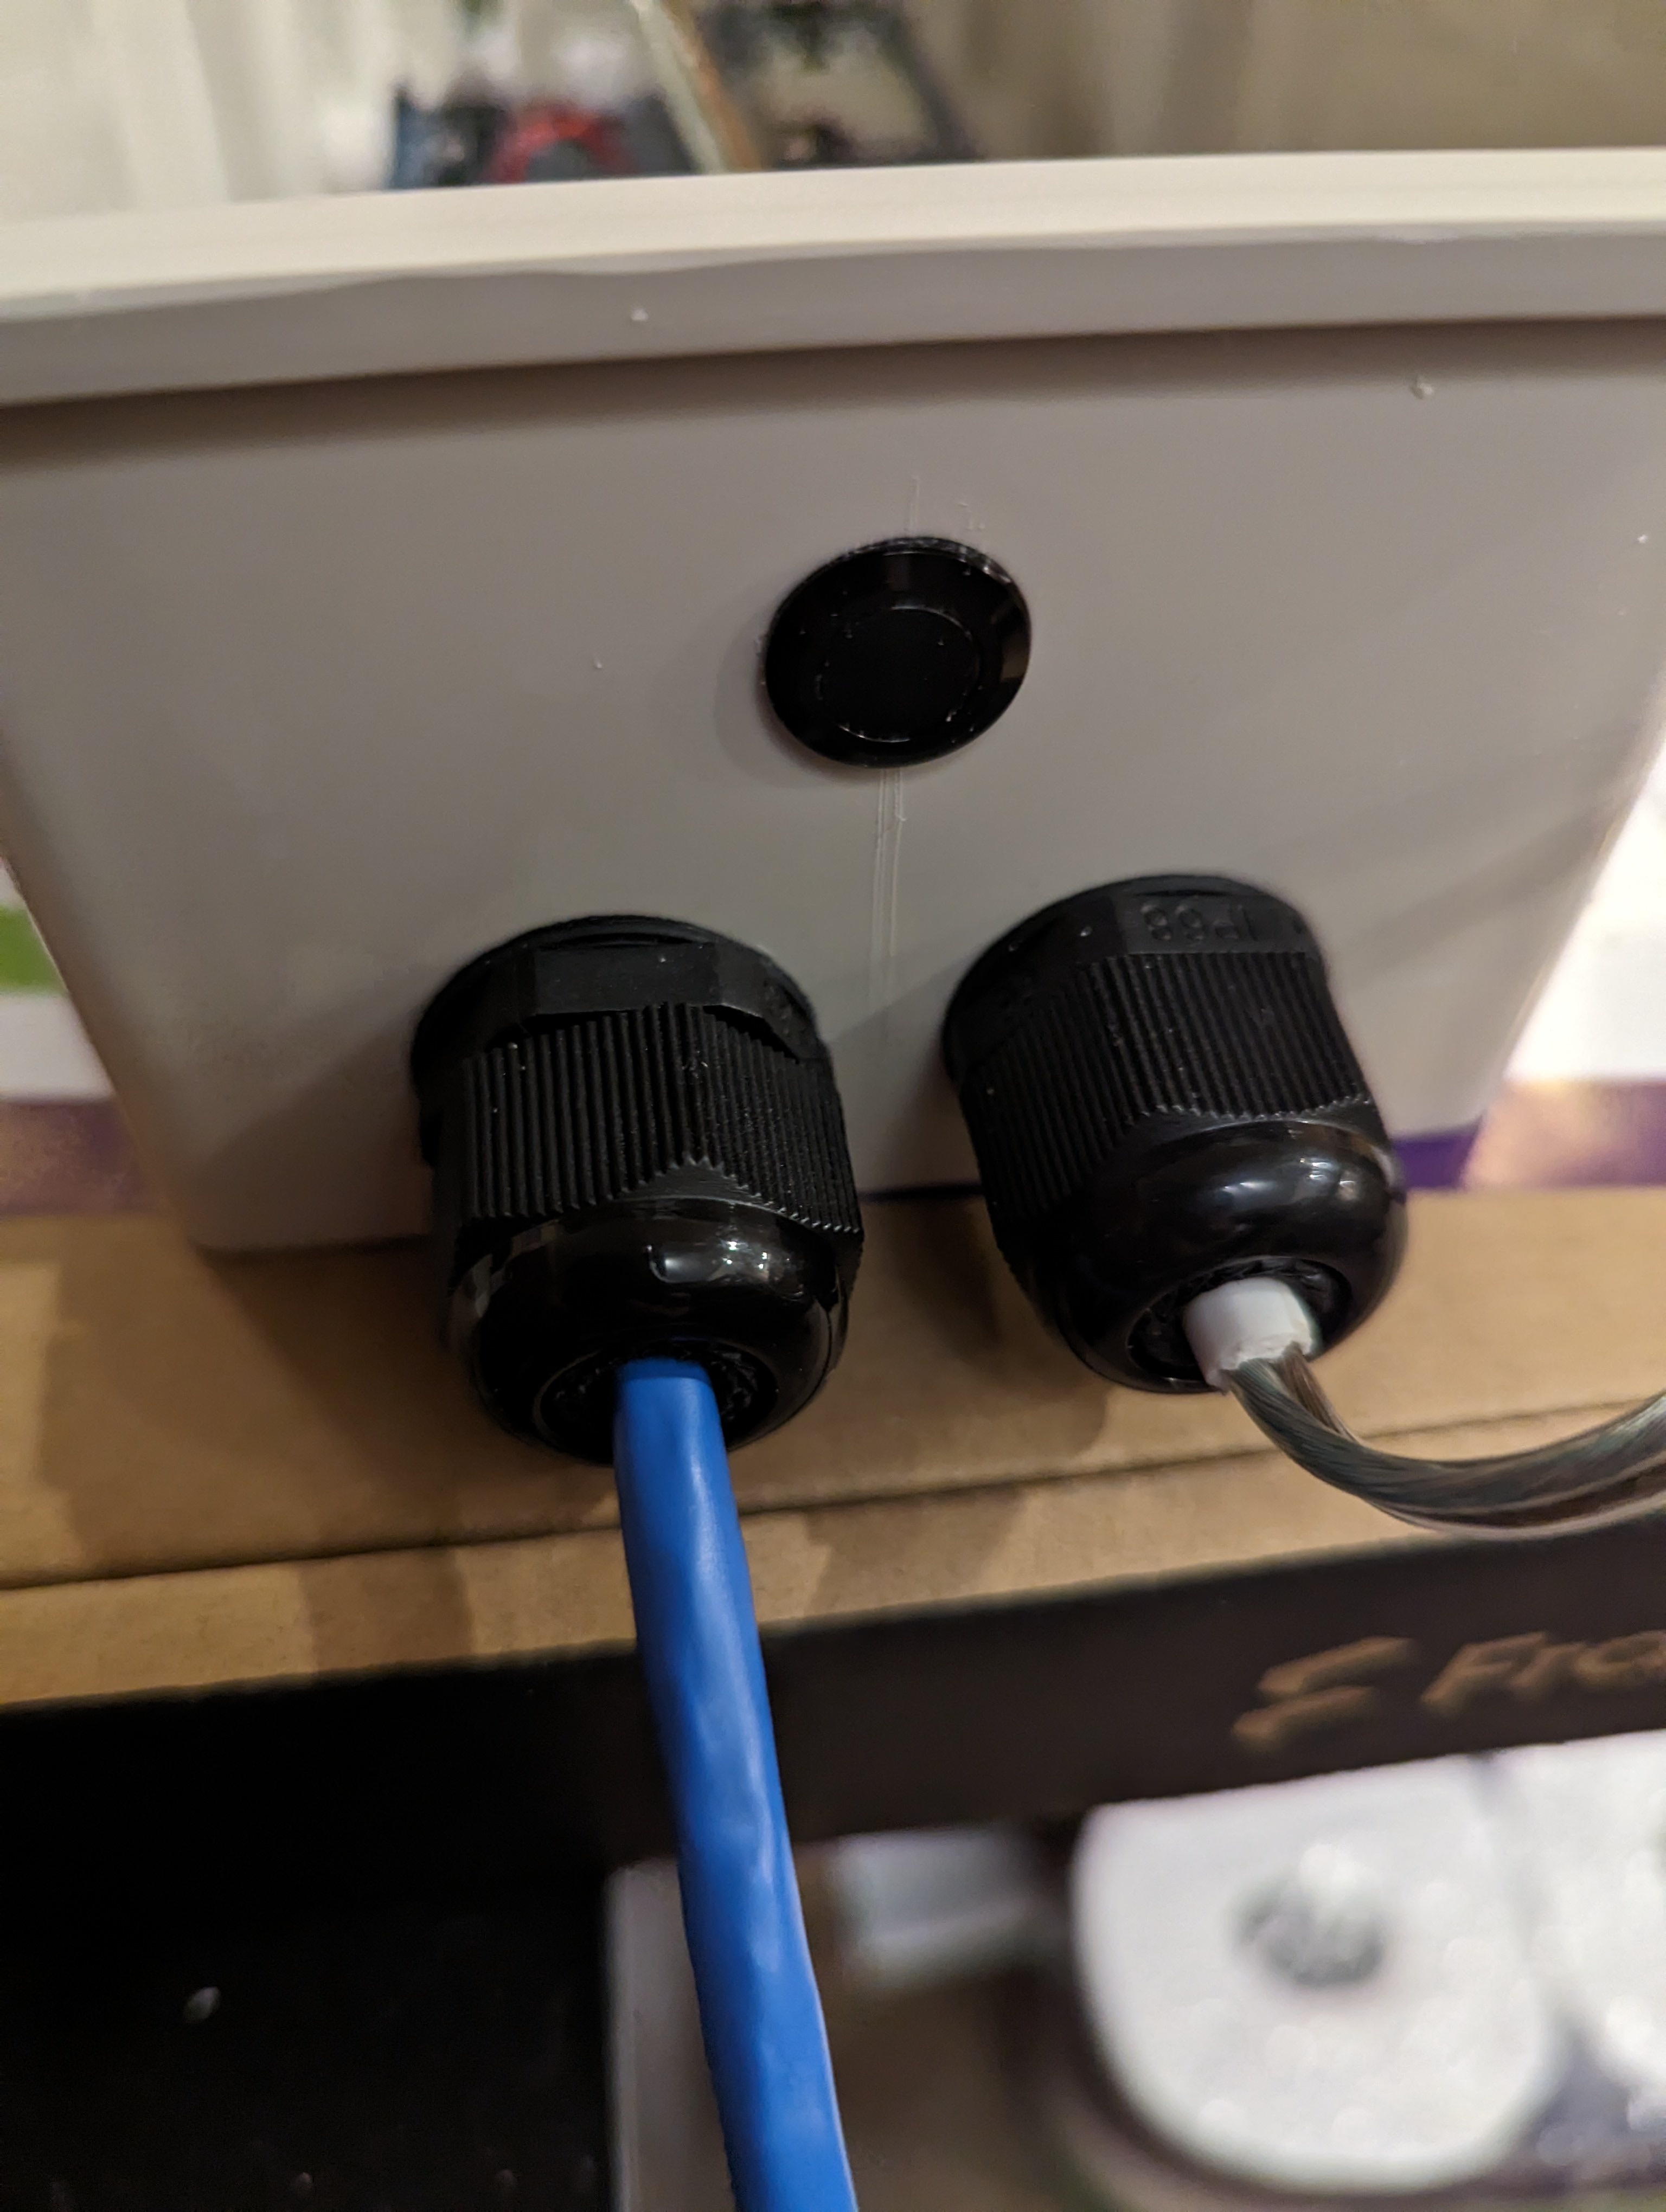
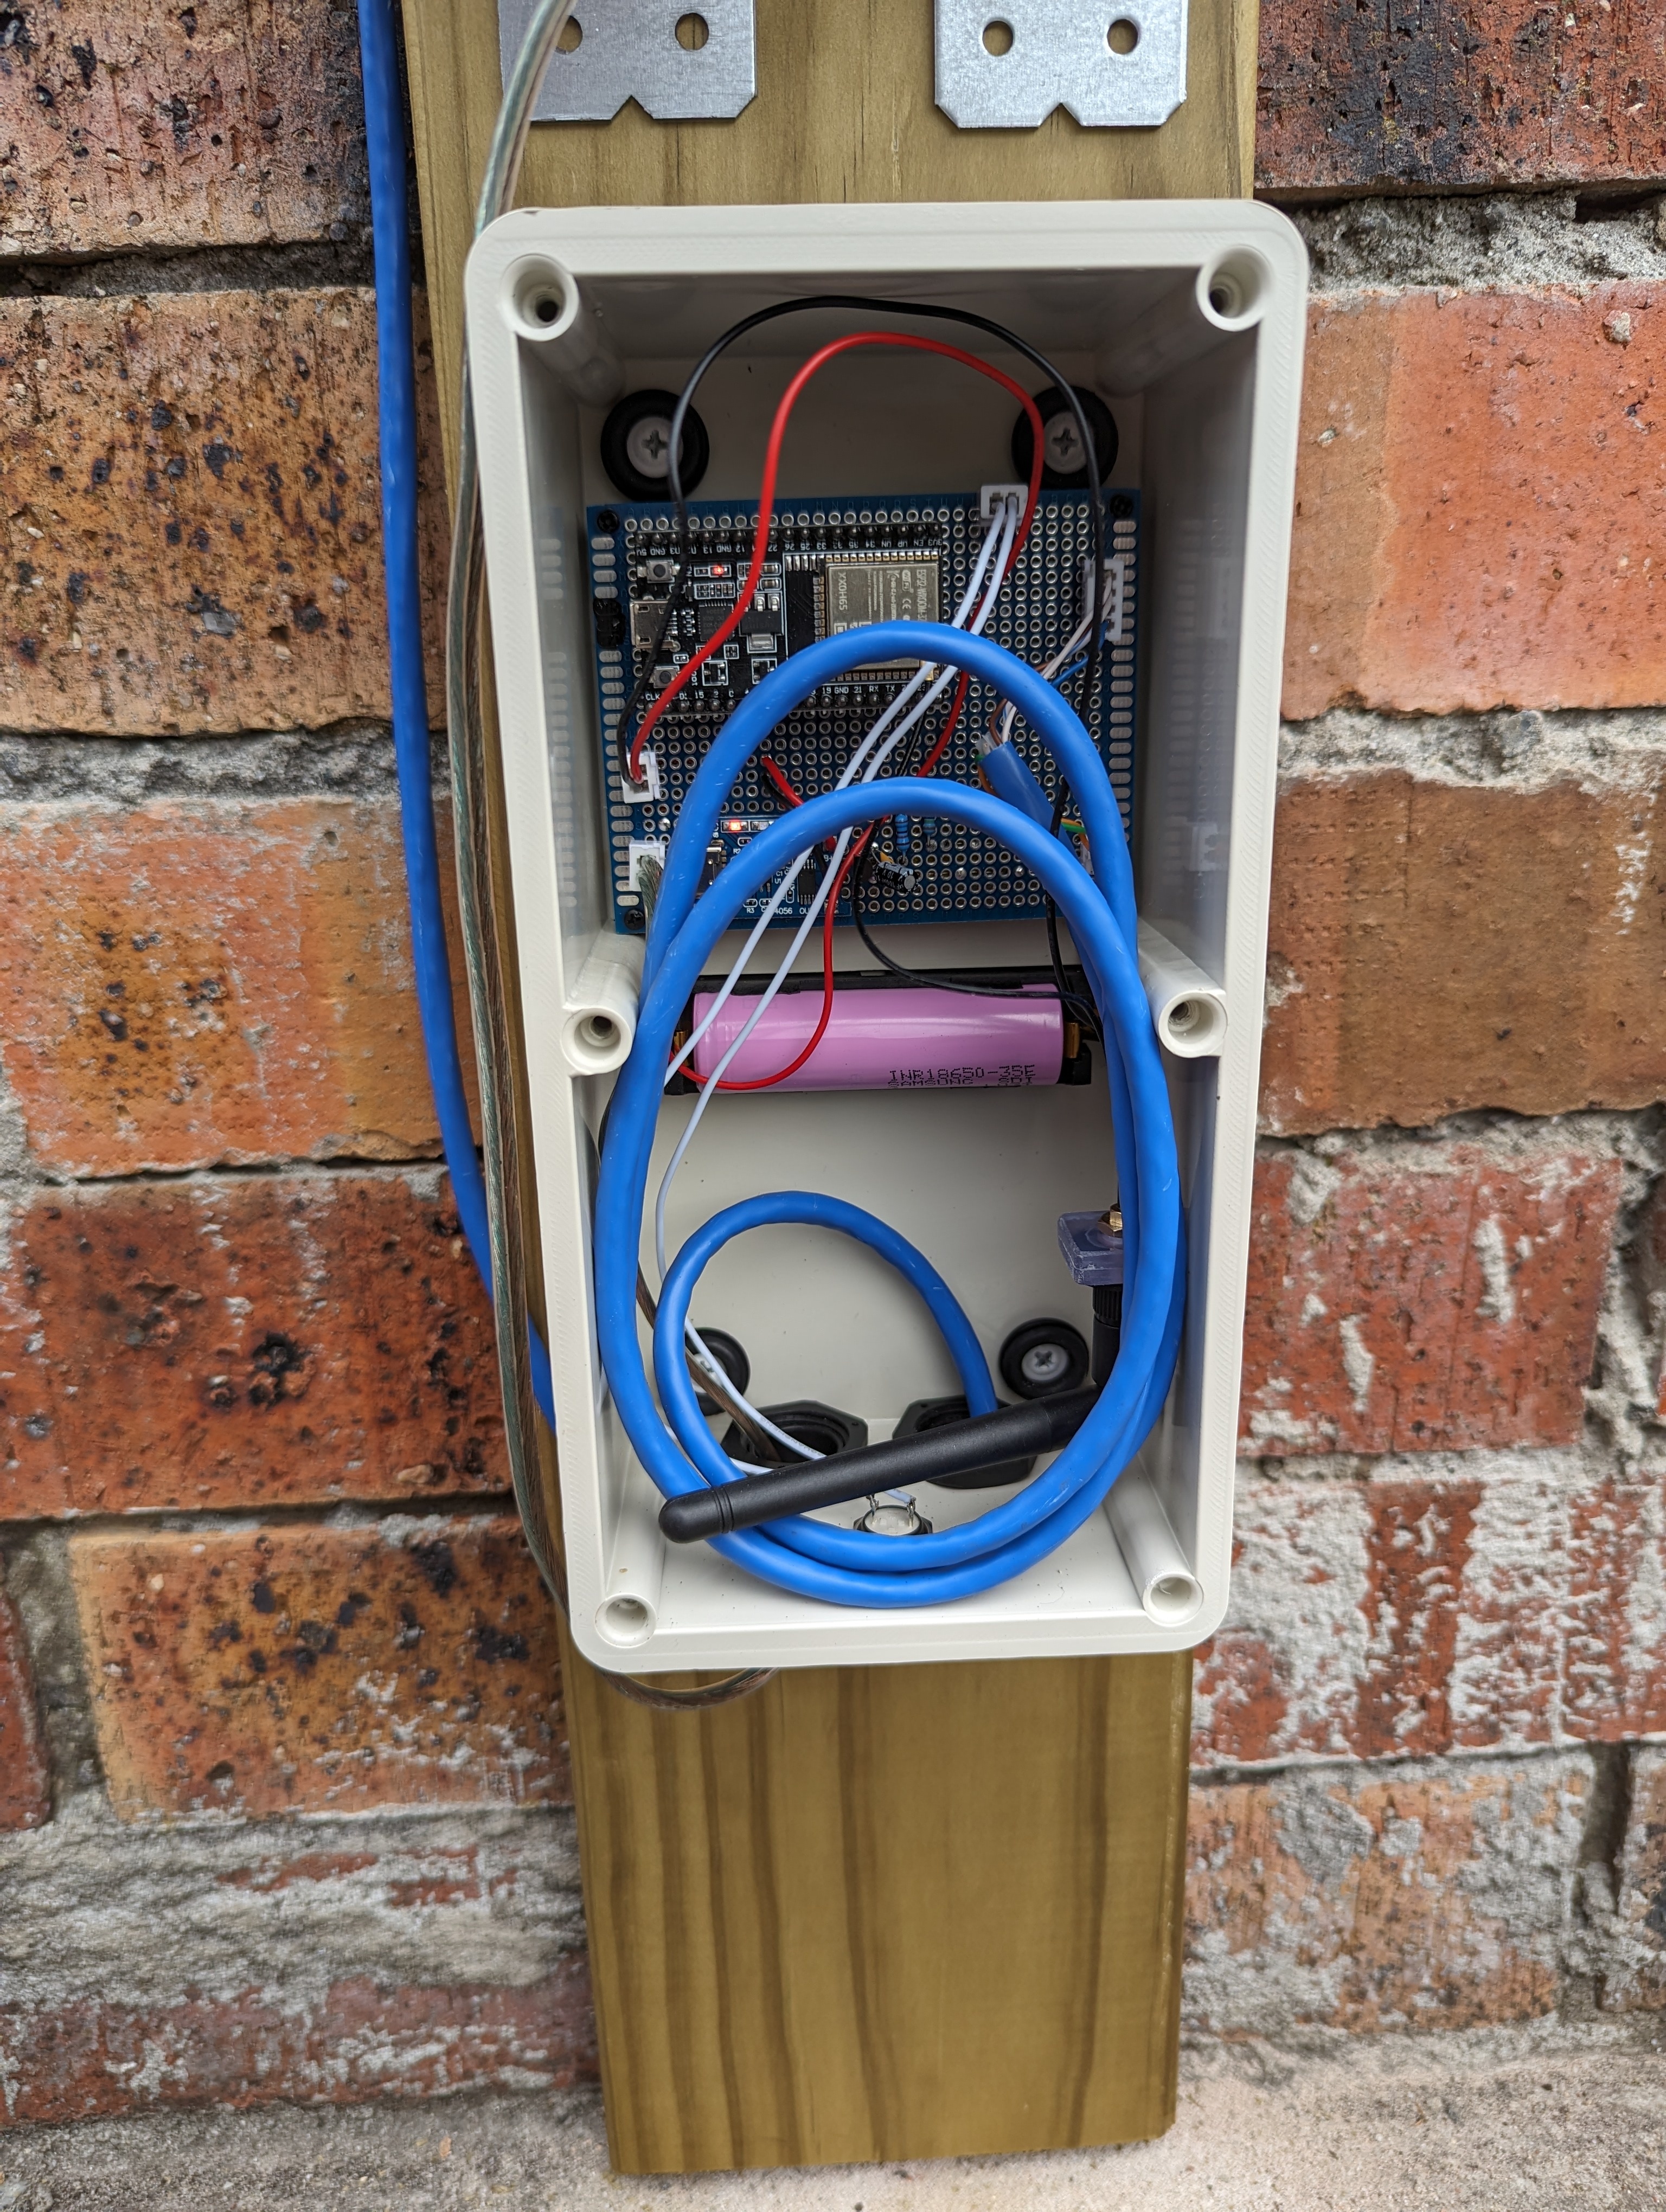
I drilled holes in the weatherproof box to fix the cable glands and the weatherproof button. In the case of the solar panel wire, I had opted to buy speaker wire since I figured it would be easier to run in the channel between the two solar panels, being flat. But that also made it not really fit the cable glands that great. I ended up stripping some of the outer sheath off some 2 wire power cable I had, and wrapping that around the part of the speaker wire that gets clamped in the glands, just to make a reasonable seal. These all were on the side I decided I would mount at the bottom, so water wouldn’t be able to easily fall into the box.
Final test fit. I later used epoxy glue to glue down the nylon headers and the battery holder inside the box.
The mailbox itself also needed a hole in the bottom for the sensor cable to come out. After drilling a hole and filing it into a square shape, I cut some rubber grommet strip to size and fitted it around the hole, with some marine silicone adhesive to protect the sharp metal edges from water and to hold the grommet strip in place.
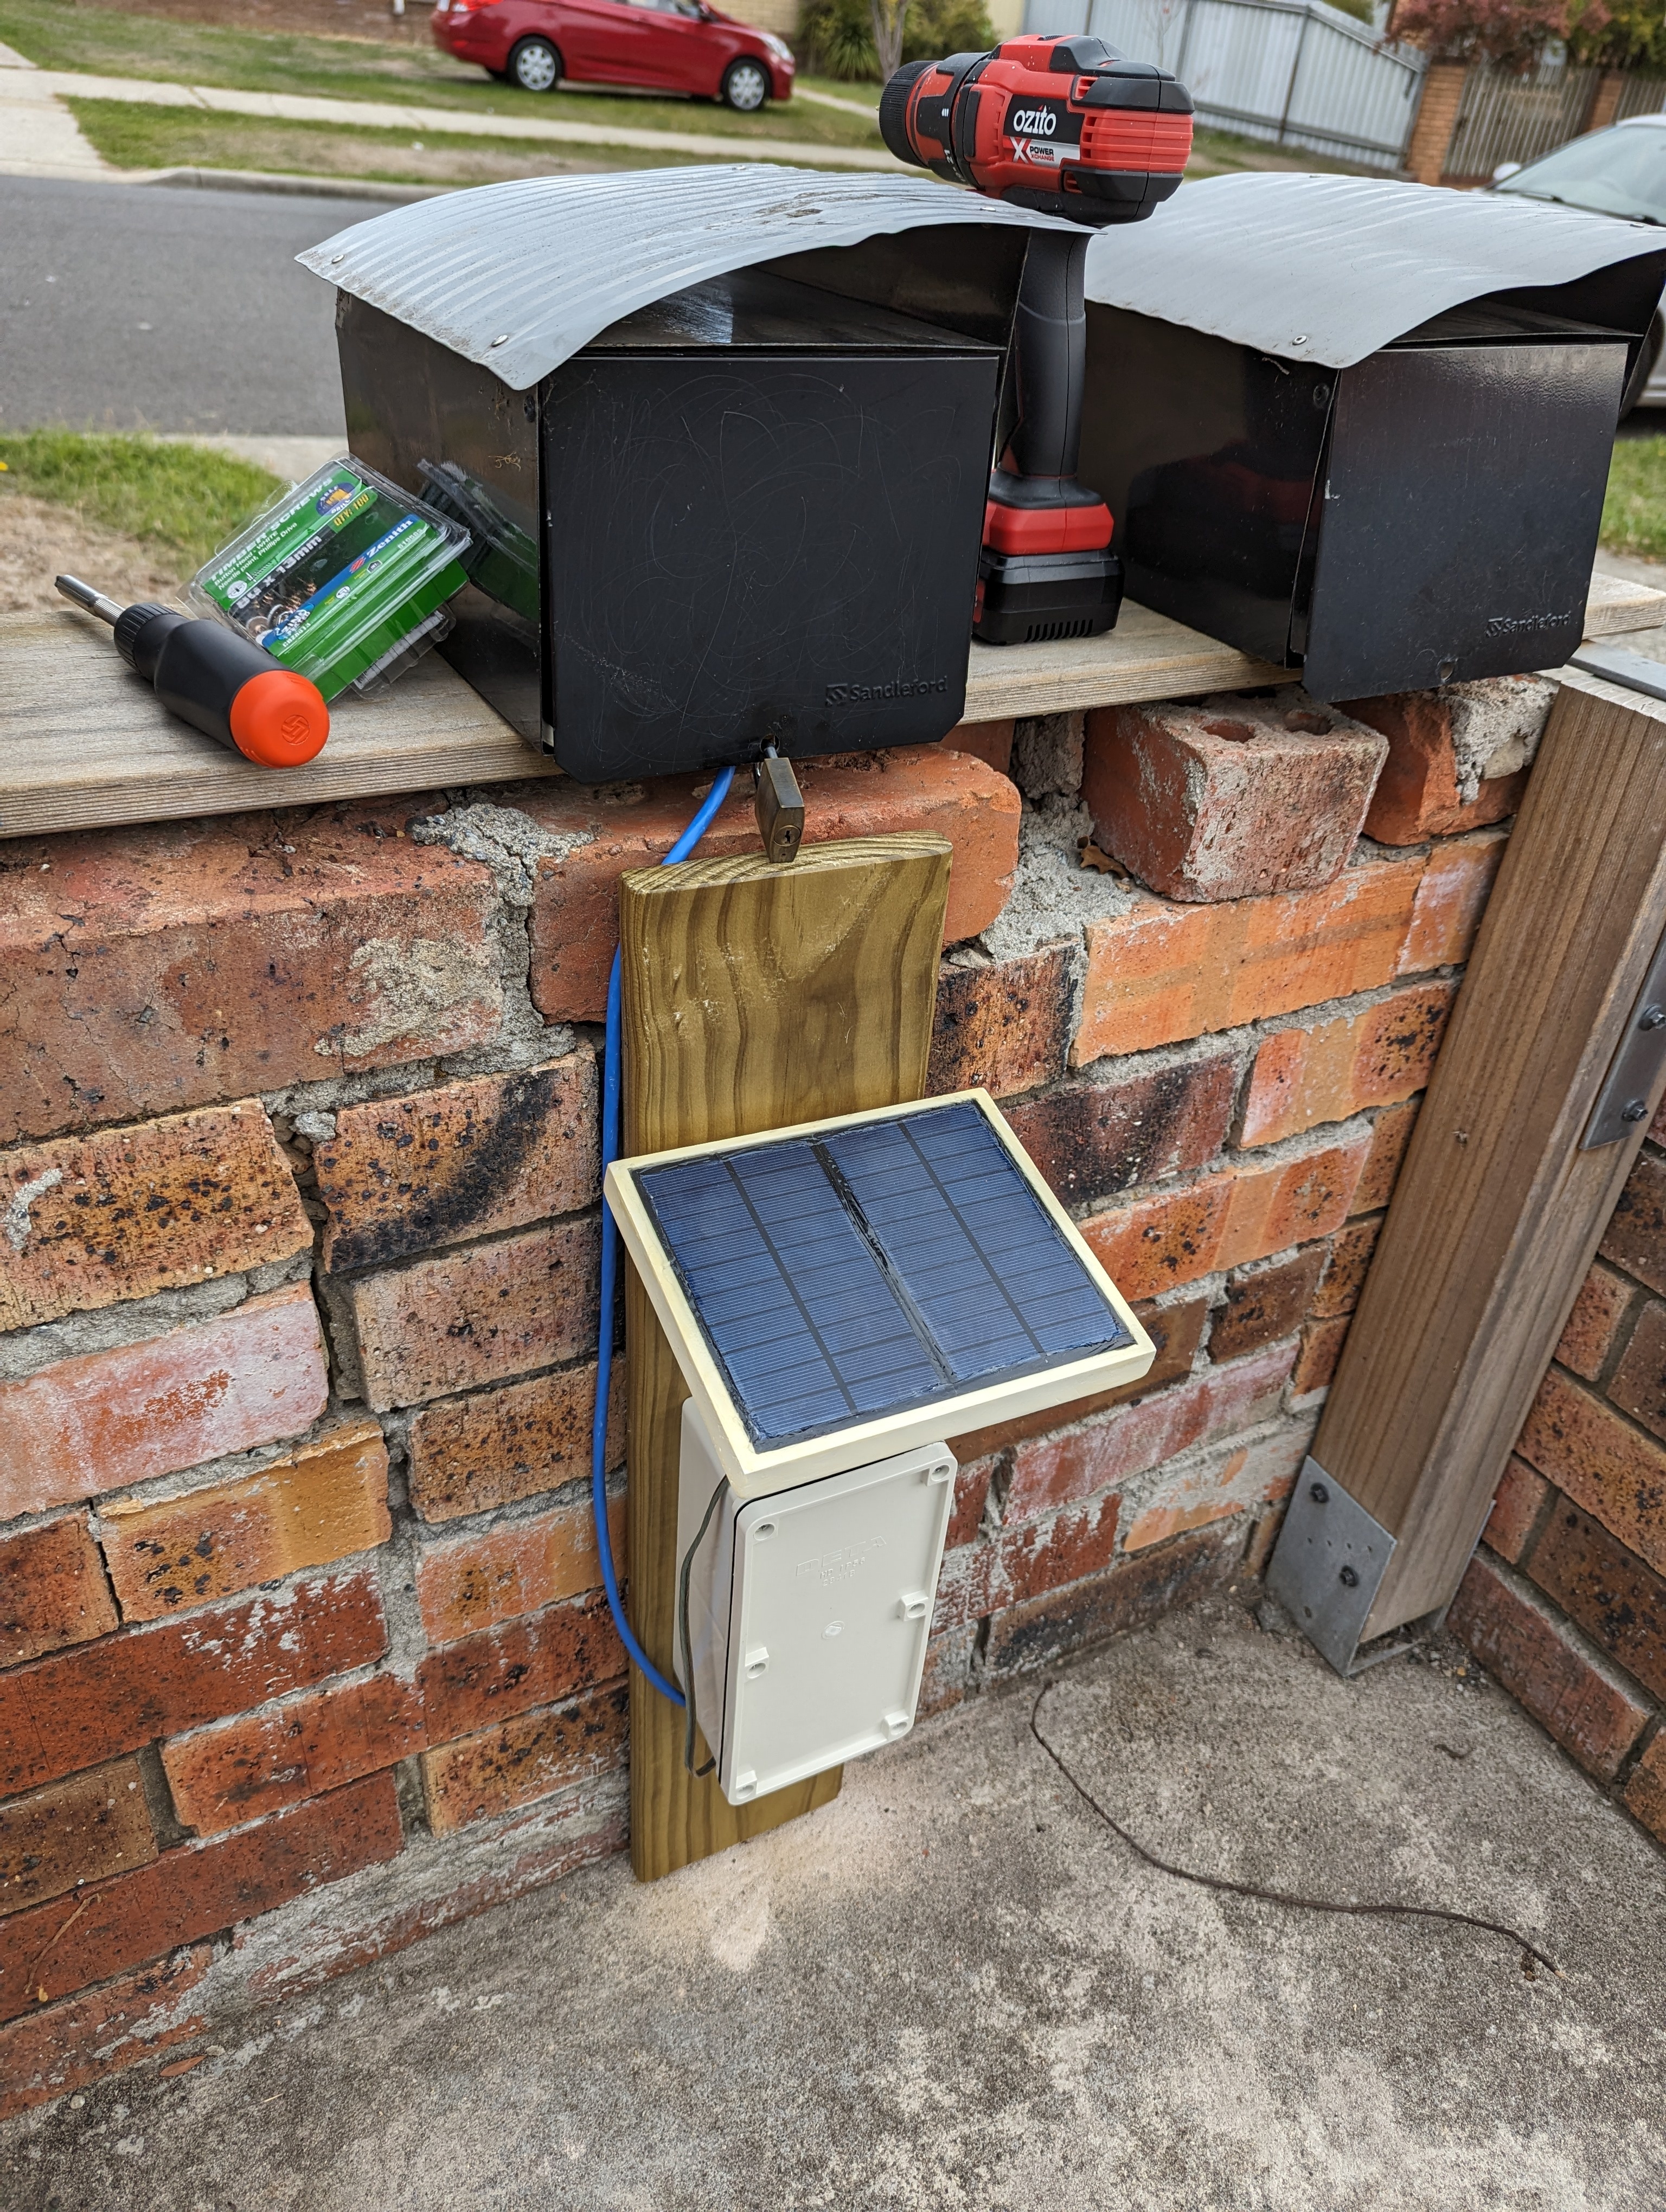
I’d drilled some holes in the brick wall my mailbox sits upon for masonry anchors, and this piece of treated pine got the last of my polyurethane spray, just in case.
Using a two pieces of the leftover perspex glued together, I made an internal mount for the antenna, figuring it would be best to not have the thing either floating around freely inside the box or sticking out the side where people could potentially break it off.

Finally, after weeks of off and on work, it was ready to install.
It cracks me up how thorough this post is with pages and pages of instructions, links, and pictures. But nowhere in the post does it say what a smart mailbox is or does.
Hah, fair. It tells me when I have mail.
…I just put a Zigbee contact sensor on my mailbox lid and called it a day…
Nice idea. Mine has a slot tho, so I couldn’t just do that. Never seen anyone with a mailbox the mailman has to open in Australia.
Such a cool project, thanks for documenting it and posting here
I’m glad people seem to appreciate it.
Using HA I can get the status on my dashboard, but it also sends me notifications via the app and Discord.
I was actually planning on building a smart mailbox but then I found out USPS had a thing called Informed Delivery so they will take pictures if I have any incoming mail and have pictures of them before they are delivered.
That`s a nice service. Do you get no mail from other couriers? Or just no important mail?
In the US only USPS can use your mailbox, other packages just get left on your doorstep generally.
I remember seeing someone combine the two and had Home Assistant pull the photograph from USPS and attaches it to the notification when the mailbox sensor is triggered.
Huh, that’d be nice…
Doesn’t prevent Amazon from occasionally sticking smaller packages in our mailbox…
If I do get mail from Ebay or something or whatever I order, chances are, they’ll ask for my email and that information will be sent to me anyways. So having the usps informed delivery will cover all my bases.
Nice :)
Damn! Thats so awesome! Have you posted it on the homeassistant forum as well?
I haven’t yet. I might have to do that. :)
I think that would be cool since the peeps there are very appreciative and nice ime.
Yeah I made an account, any ideas where a post like this belongs?
There would be quite a lot of possible places. Maybe hardware? I‘d check if and where you find similar works and post it there.
I went to post it under share your projects, but new users can’t post a lot of embeds or links, so I just posted a link to this post.
Okay cool! Did you explain why you only posted the link?
Yeah, of course. :)
Very cool, hope you don’t have fireworks pranksters around there
Thankfully not. The worst I’ve had was some previous neighbours scratching up the back of the mailbox, probably because I had replaced the shitty old one that came with the place with a nicer one that didn’t match the others. Now everyone has the same mailbox I have, I think because the owners of that unit wanted them to look the same so they could sell it easier.
Great project, I like that you went all in and installed the solar panels - there is a nonzero chance I would have tested it with only a battery first, therefore creating a suboptimal solution that would have stayed around far too long, endlessly bugging me in the process.
Just one remark: the mailbox is so nice, you should definitely route a channel in the treated pine to hide / protect the blue cable better, that’d make it perfect.
Yeah, that thought did occur to me. Drill a hole in the mounting wood below the box, and a channel up the back to hide more of the cable. I might do that some time later, but I’ve already put everything away… :P
Amazing project, well done HeavyBell!
Thank you!
I’m sure there’s stuff I missed out. Like how I got some round rubber grommets to push the wood screws through when mounting the box to the wooden plank. And how the panels were sealed into the housing with silicone. Ah well. :)
This is great. I tried putting a shock sensor in my metal mailbox which is attached to my building and couldn’t get the signal to reach. This is a whole other level of advanced work!
A shock sensor would be an interesting way to do it, too. :)
I just use informed delivery. It even can do something you couldn’t just DIY: it tells me what’s coming before it even arrives. Does it just tell you when you have mail?
That said: I just love things that are done simply because they can be done. Especially when they go hard like this. 😃
Yeah, all it does is tell me when something is obscuring one of the sensors. I figure anything that gets put in there which is small enough to fall in a way it covers neither isn’t going to be important enough to worry about.
I am vaguely aware AusPost has some kind of service that might inform me of regular mail delivery, but anyone can put stuff in my mailbox not just AusPost. Plus this was a fun project, yeah.
Awesome project! Love the photos and breakdown, very well presented and explained, thanks for sharing! 🙂
My only problem is our driveway is 700 feet long, uphill & through trees. I seriously doubt my WiFi reaches it…
Might be worth looking into LoRa for longer range, it’s got quite cheap to play with now.
Mm, that could be a problem for the battery even if it does connect. You could probably work around it if you really wanted to; solar powered repeater high up somewhere between the box and the house. But that’s getting into silly territory. :P
Next time you’re out there see what signal you get from your phone, maybe? Just hold it away from your car.
deleted by creator