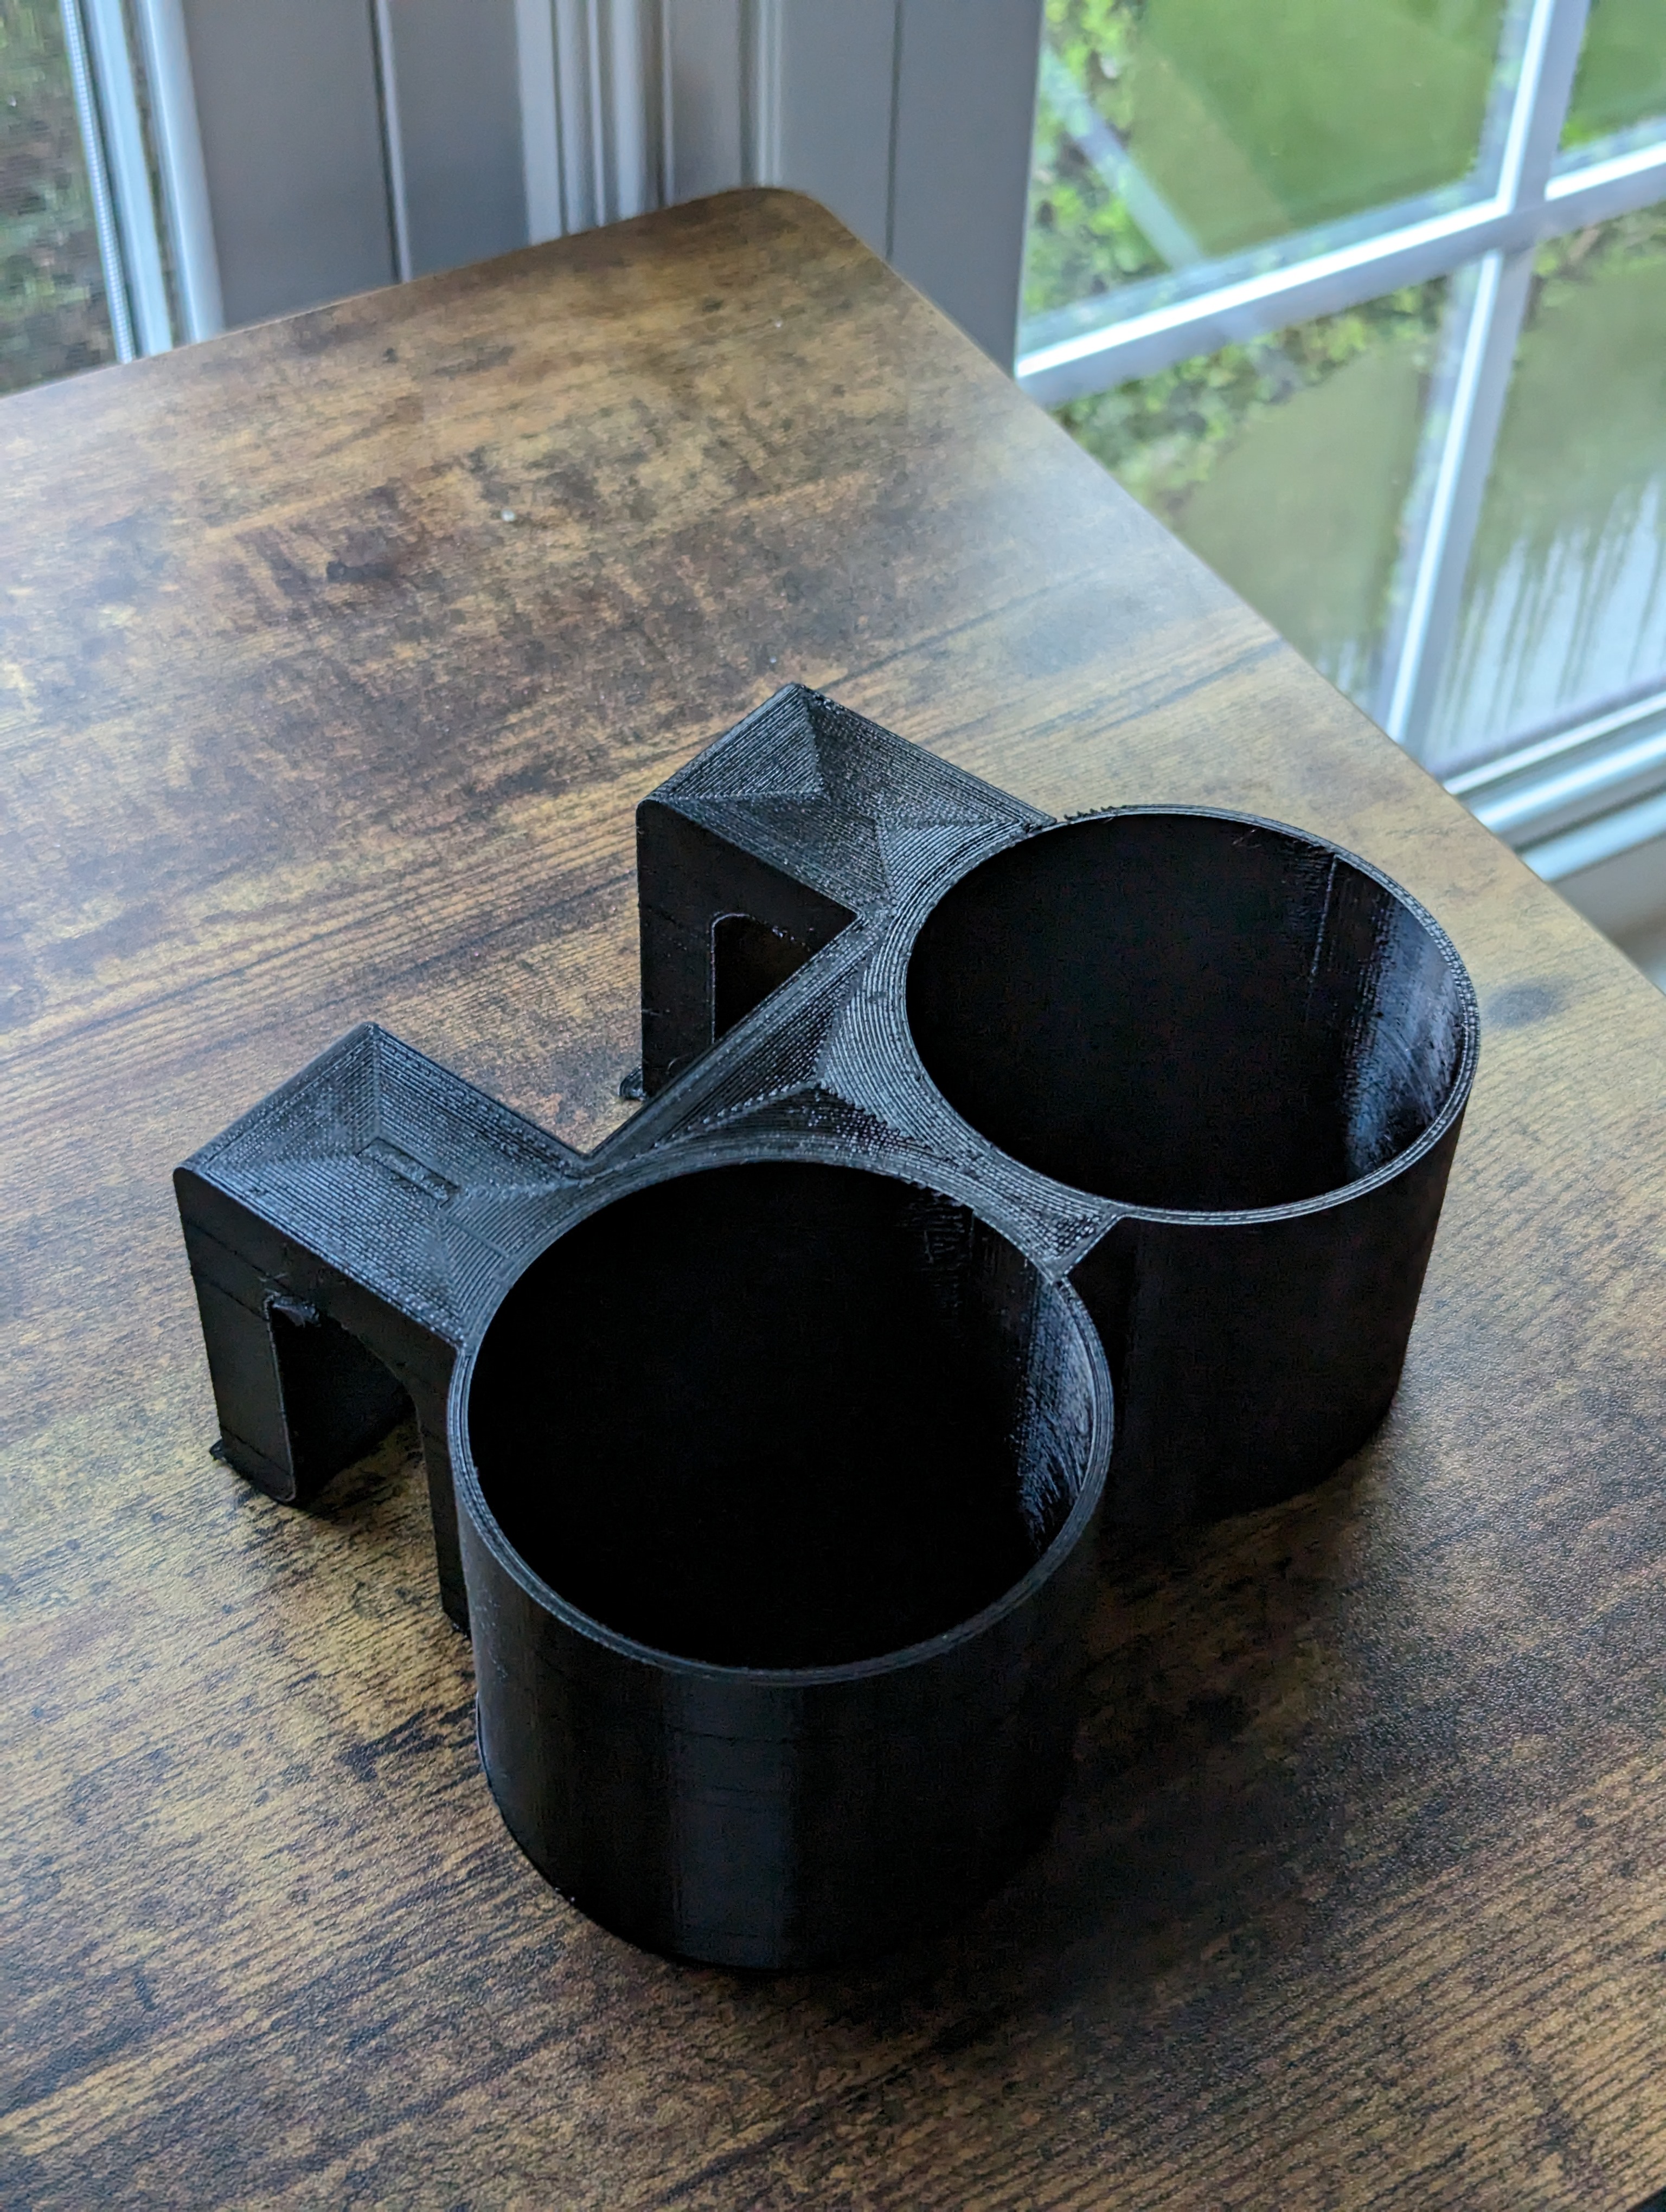
Best I can tell, my z-seam after a hop is under extruding? I tried looking at all3dp’s troubleshooting page, but couldn’t find this specific issue. Can someone fill me in on the name of this so I can best Google it? I’d also be happy to take pointers, but I do try to be self sufficient.
That’ll be your retraction settings that need to be tuned. The pressure inside the nozzle isn’t getting high enough when starting a new layer. Took me a couple minutes to see the issue since it’s black and shiny. I’ve used http://retractioncalibration.com/ before to help get my retractions tuned
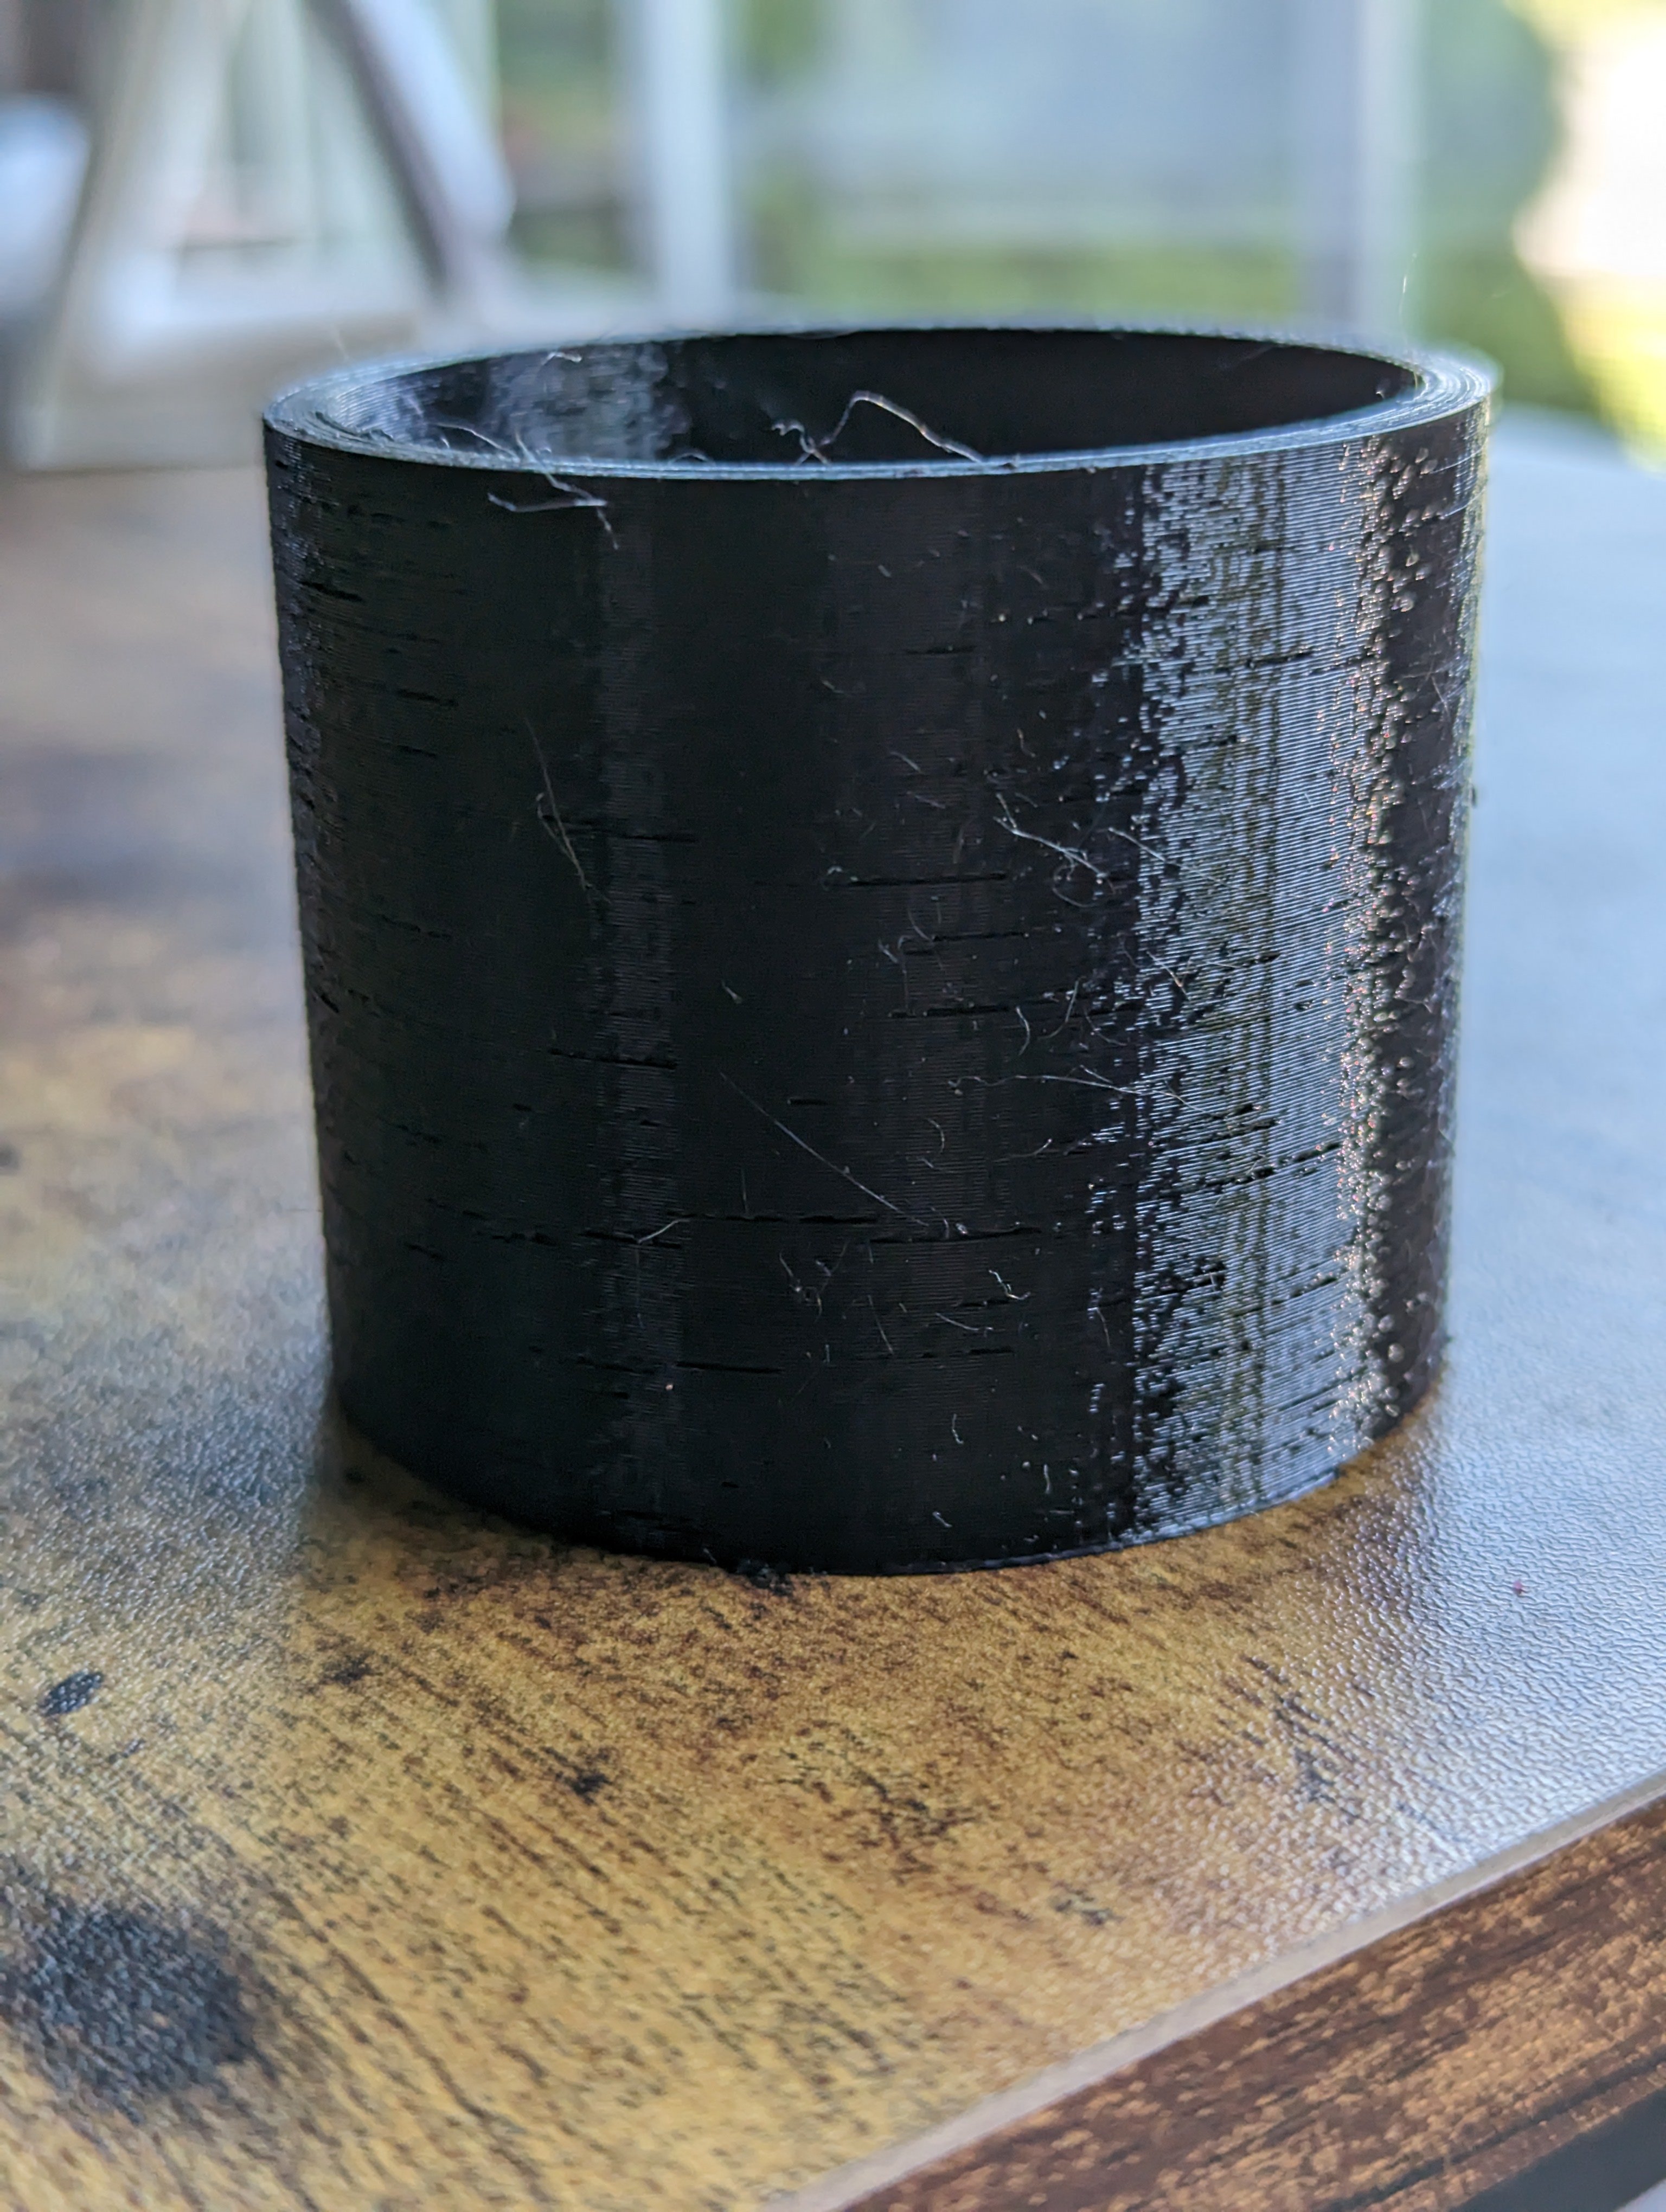
Here’s a pic of where it’s happening on the outside which is much more obvious. It lines up precisely with the z-seam in the slicer. I think you might be right on retraction. Thanks for the resource!

Hard to tell, but obviously your printer is struggling on layer change and/or retraction. Assuming its not play in your mechanism, Id fitst try printing just that part of the model without retraction and see is the problem gone. If it is, maybe you have too high retraction distance that can cause partial clogs. If the problem persist maybe you are overextruding a bit and then nozzle drags that corner out of the position. Tiny overextrusion can be a pain when printing “walls only” models. Its more guessing than anything, it would be useful to see your calibration models
Also more info about printer and settings. Are you using preassure advance or coasting? Temps, speed, retraction settings
I think you might be on to something with retraction. The open cubes didn’t show it with the solid corner. I’ll be able to print another test print tomorrow once the second copy of this print is done. I’ll make a smaller cup tomorrow.
One question, when I manually feed the PETG into the 0.8 nozzle, the filament feels… Gummy? Springy? Not at all like when I’ve typically fed PLA into 0.4mm. I wonder if the springyness is leading to weird retraction
PLA is much harder and more brittle. Also PETG loves moisture and printers hate wet PETG, just saying
You properly calibrated esteps? Also check your combing settings. I don’t think it’ll be that tbh, but there’s a chance it is
I’ve been meaning to do e-steps but haven’t got around to it. I did do a flow-rate adjustments which had me drop it to like 93%, which should compensate for any e-step issues.
I’ve not checked combing. Honestly never heard of it before this.
In that case, before you do anything else. Set flow rate to whatever is default (100% I assume), and calibrate your esteps. It takes like 10 mins. Just get some measuring device (calipers best, ruler works good enough) and one of those estep calculators
Whatcha making there? It looks like a shrews fiddle 😉
It’s a stroller cupholder for some dude on my town’s Facebook page. A 3d printing Etsy page wanted $35 for this, so I showed him how he can save money by spending $70 on filament, new nozzles, and a new hotblock (see my other post here). Overall I’d say the print came out well enough (🚢 🐿️) but I’m just curious on better settings for future prints.

In prusaslicer there’s a setting to stagger seam position. Might help narrow down what’s happening. Jave you check your model? When I’ve accidentally left gaps in my model it looked kinda like that
Yeah, if I do random seam, it comes out with small under extrusions at random spots in every layer. You can kinda see it in this test print I did, though it was hard to get a good pic.

How’s your humidity control?
Filament is brand new (open air for a few days), house humidity is like 60%, but there’s not much I can do about that.
I’ve had under extrusion, caused by too high speed or pressure advance settings look like this, does it show up if you slow down?
I can’t quite tell but it looks to me like it’s doing a turn-around there? Like instead of doing a complete circle for the inner wall it’s turning to do a continuous path for the rest of the print.
What slicer are you using? I only know cura and have never had this problem but I’d try doing less than 100% fill rate which seems to have an indirect effect to cause it to prefer cleaner paths for walls. I’m sure there are some other wall related settings to play with.
I’m using cura. There’s actually one seam on the inner and one on the outer. Attaching a pic of one half of the outer seam. The other is on a corner that was kinda hard to get a pic of. I’m printing another copy of it now, so I’ll try to watch it while it hits that seam.

The layers do not seem to be fusing correctly. Have you tried increasing the temperature or slowing the movement?
The layers are really solidly together. In a test print I had the temp up higher and got a ton of stringing, so I don’t think it’s that. The issue happens only at the z-seam, and seemingly only in one direction from it.


